Tag Bulk Edit
Update all your tags to include the tag name in the metadata
To effectively monitor your tags and ensure they include necessary metadata, follow these comprehensive steps to configure your client-side Tag Manager container.
Step-by-Step Implementation Guide
Step 1: Access the Tag Monitor Configuration Page
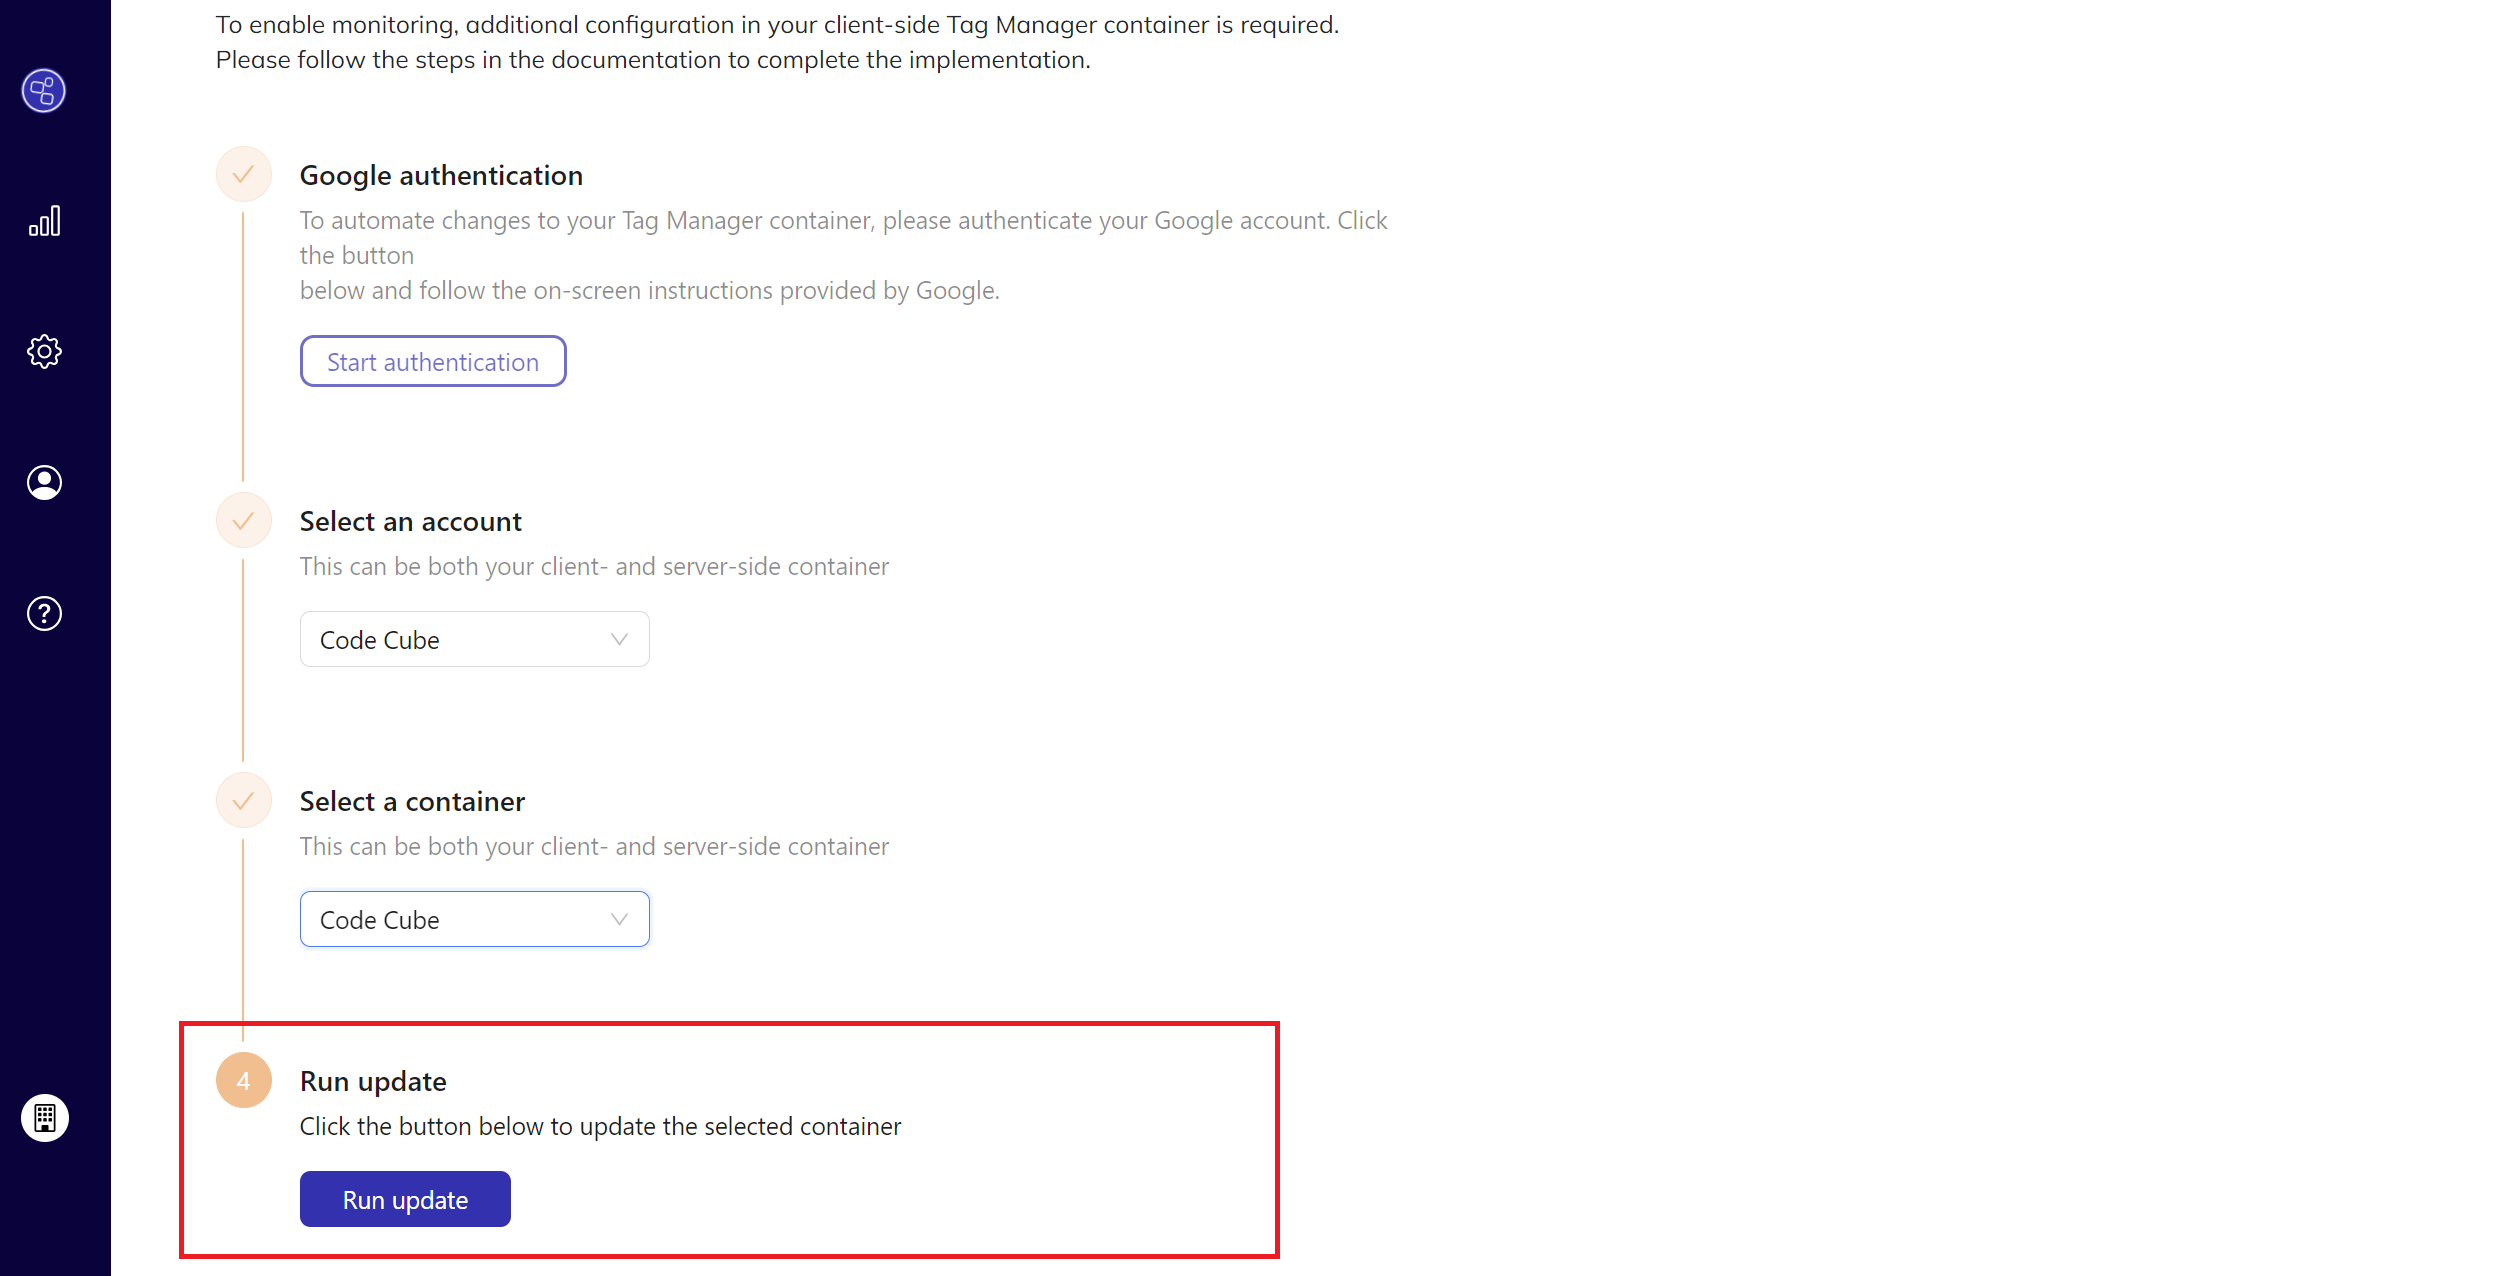
Begin by navigating to the Tag Monitor configuration page on the Code Cube portal. This is the starting point for setting up your tag monitoring and editing configuration.
Step 2: Select the Error Monitoring Tab
Once on the configuration page, you will see different tabs for various monitoring options. Click on either the "Client-side" or "Server-side error monitoring" tab, depending on your needs.
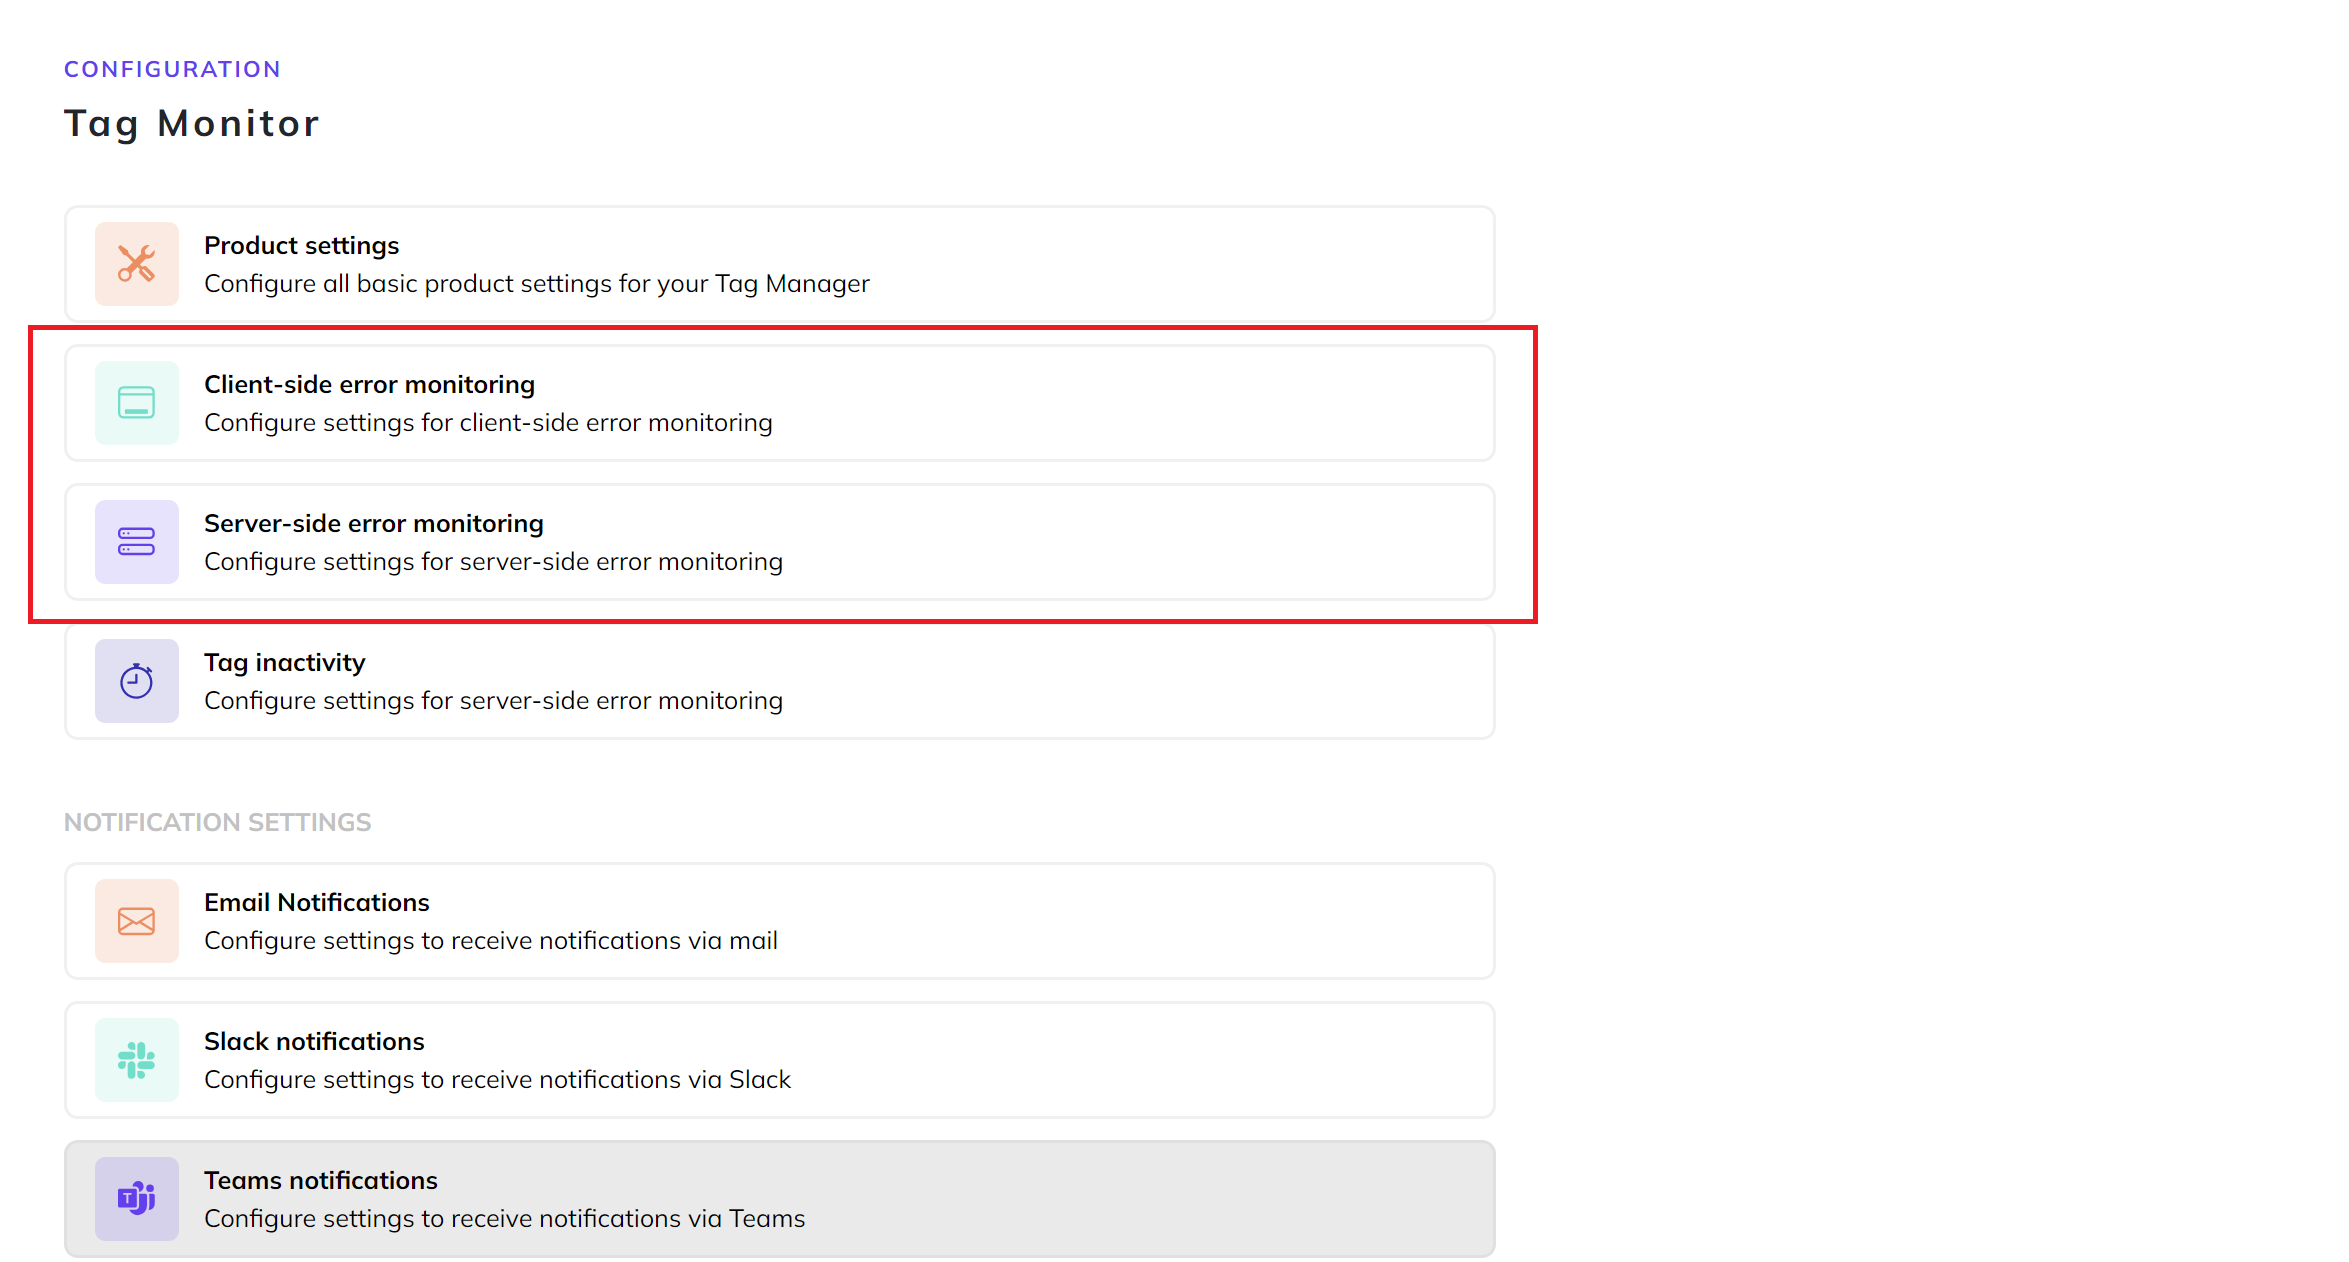
Step 3: Locate the Bulk Editing Tag Names Section
Scroll down to find the section labeled "Bulk editing tag names." This section is crucial for updating your tags. Click the "Start bulk editing" button to initiate the process.

Step 4: Authenticate with Google Tag Manager
If this is your first time using the Code Cube app to access your Google Tag Manager account, you will need to authenticate. Click the "Start authentication" button. This will open a Google authentication window where you must authorize the app.
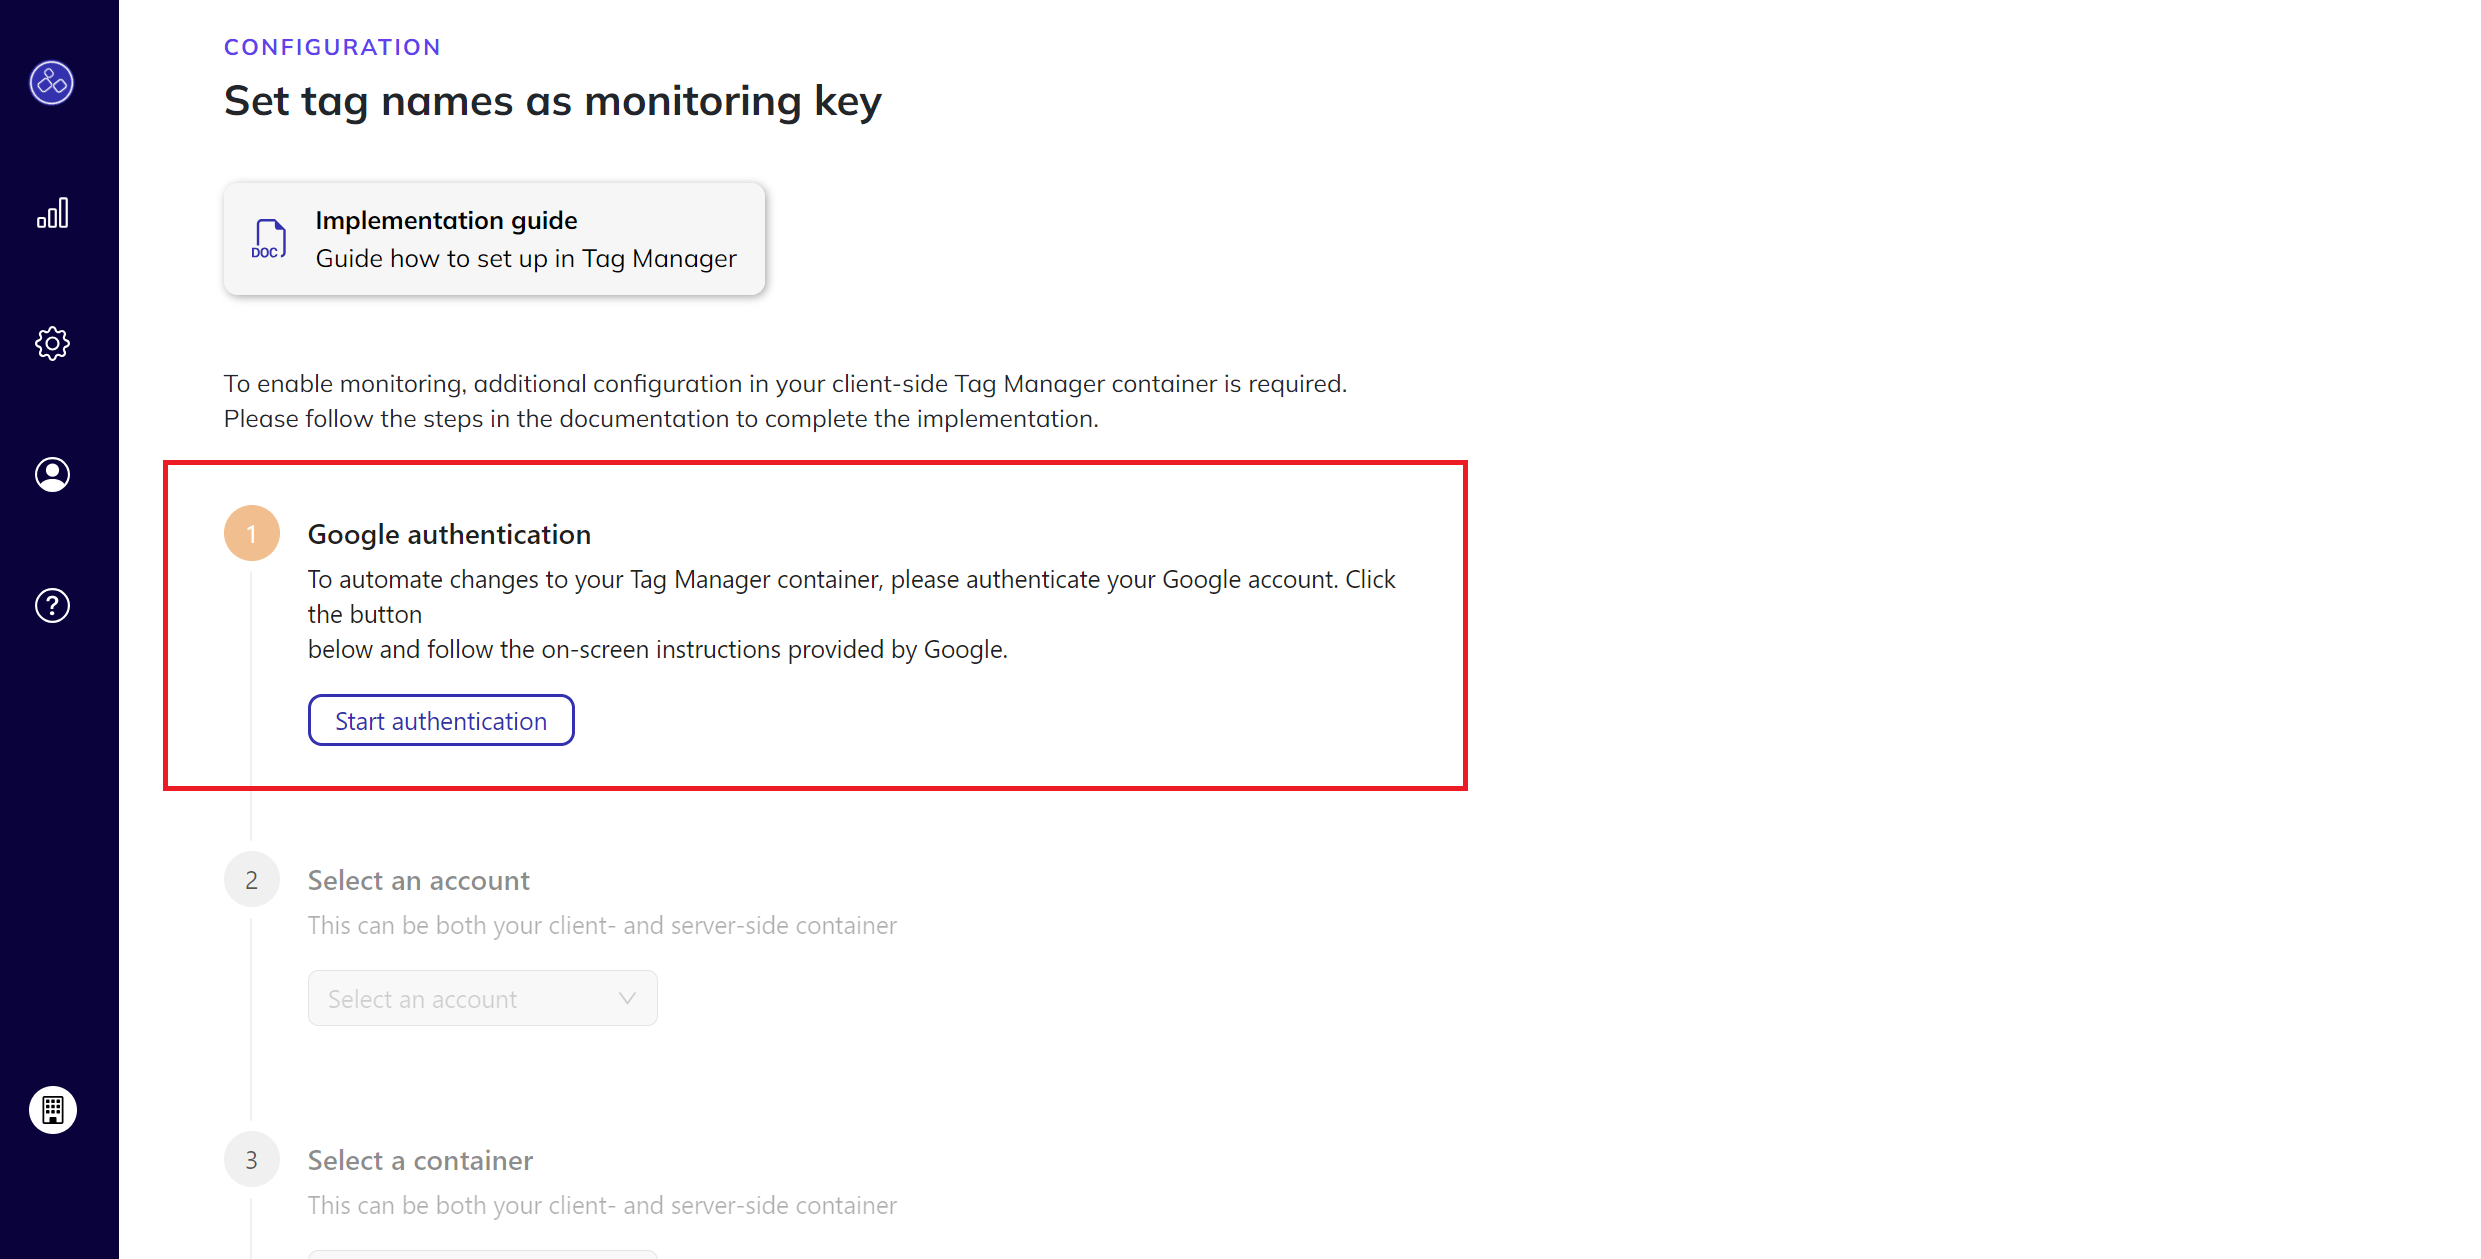
Step 5: Select Your Google Tag Manager Account
After authenticating, a list of your Google Tag Manager accounts will appear. Select the account that contains the container you want to update.
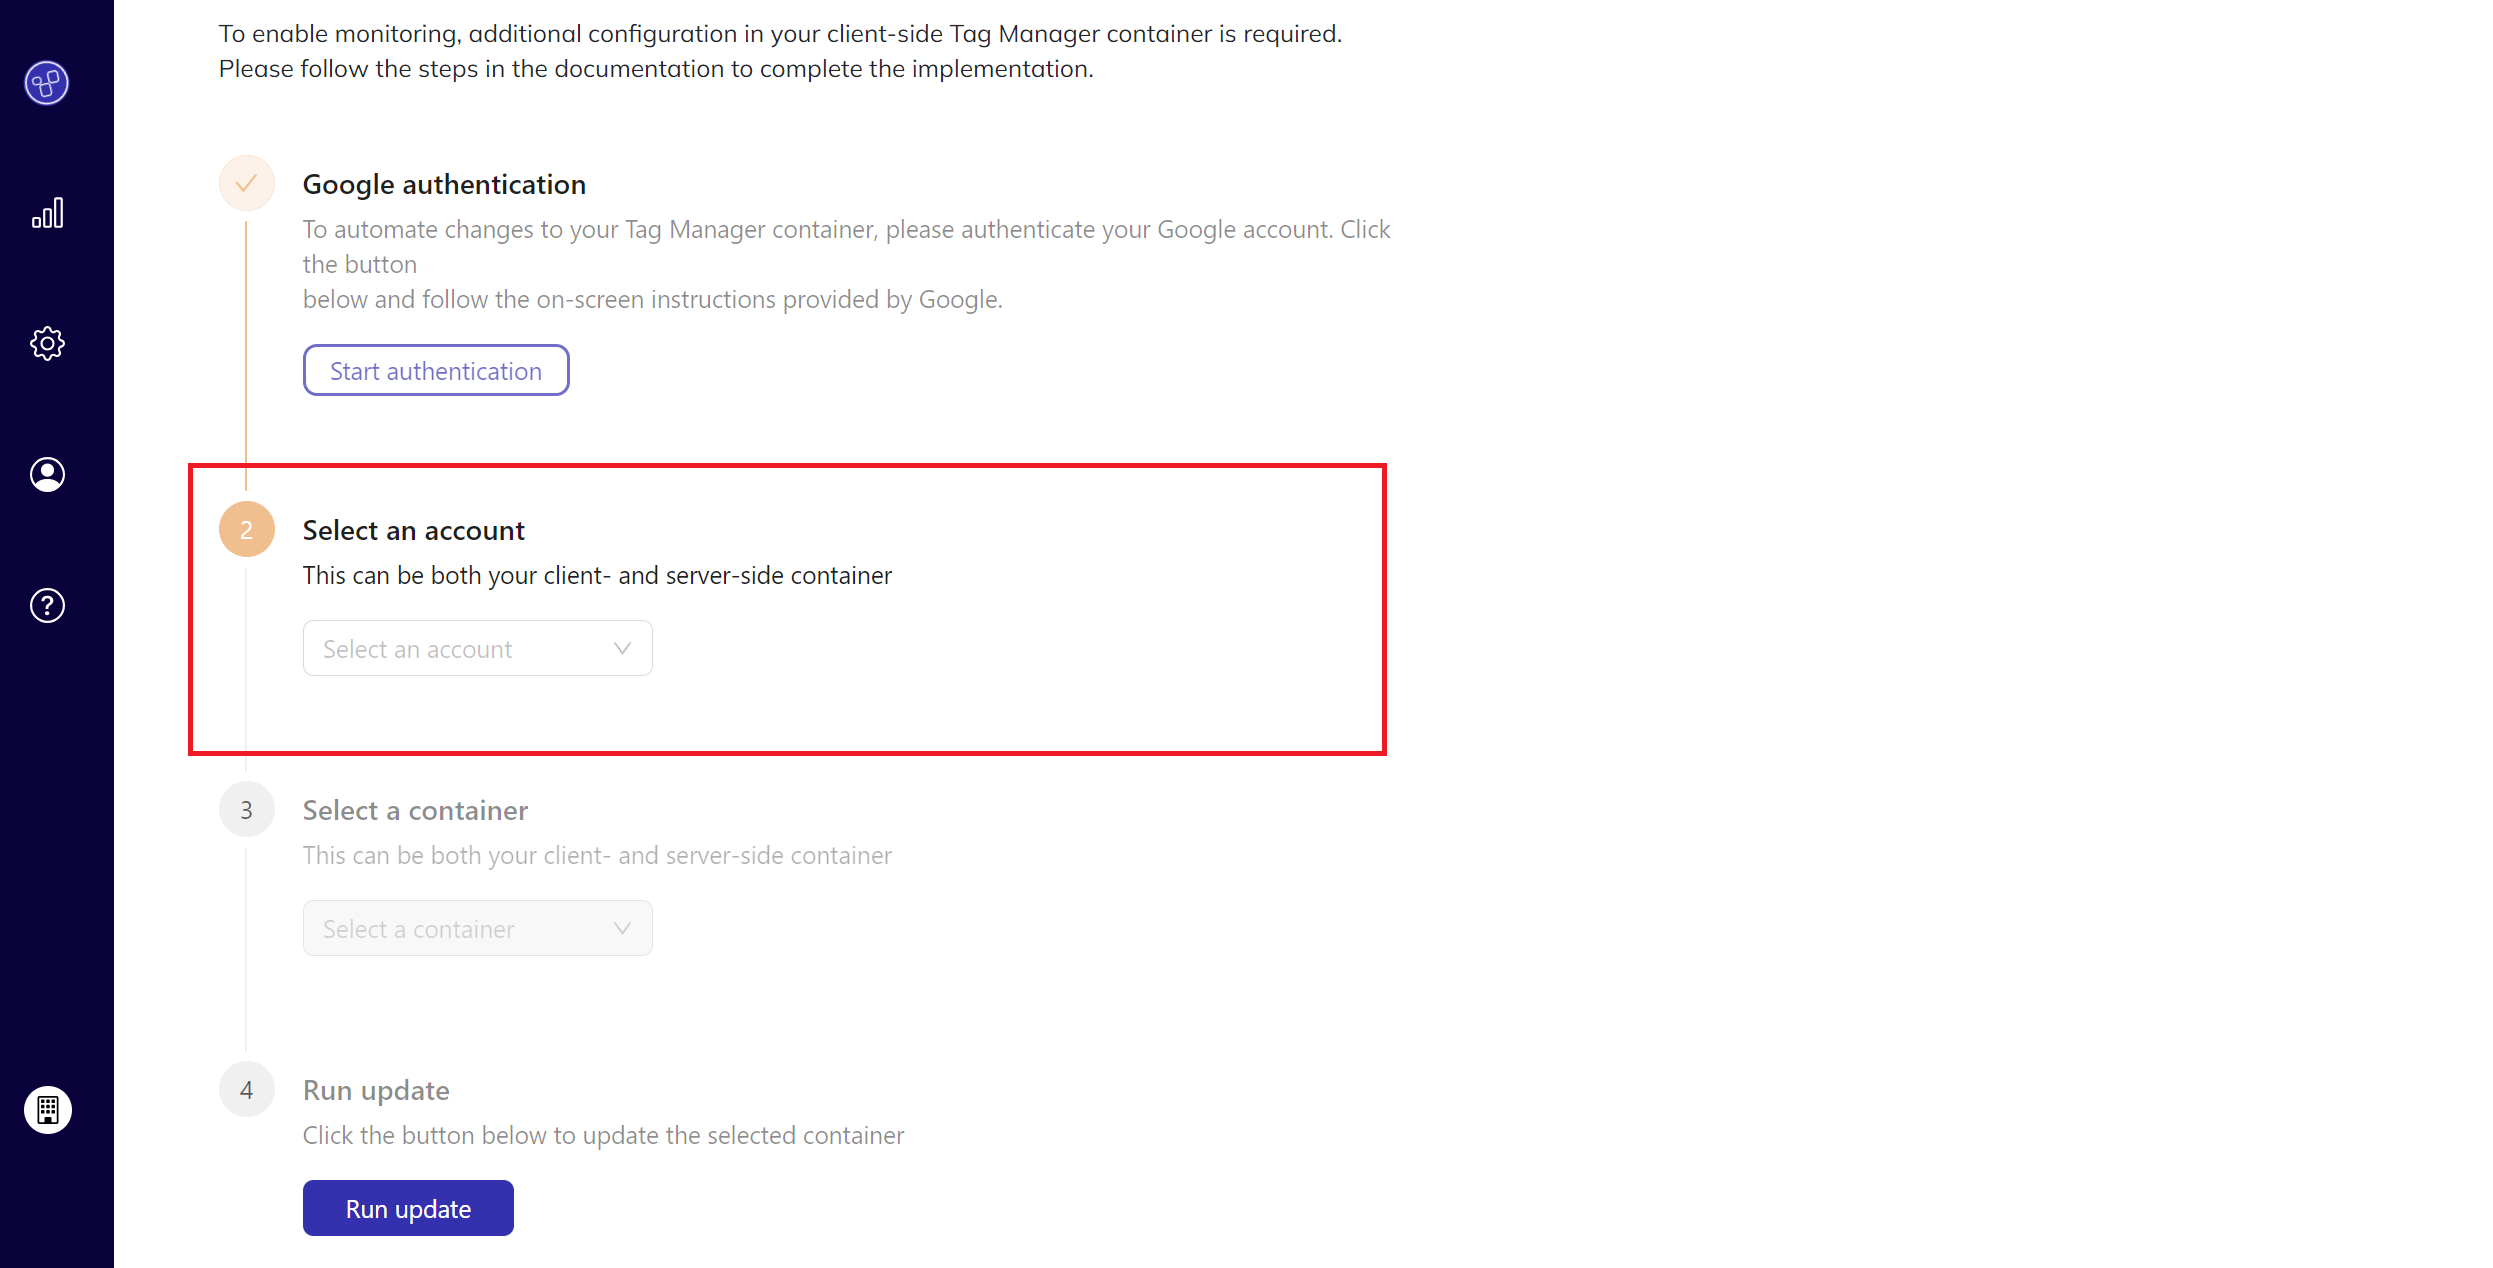
Step 6: Choose the Container to Update
Next, choose the specific container from the list of containers within your selected account. Ensure you select the correct container as this is where the updates will be applied.
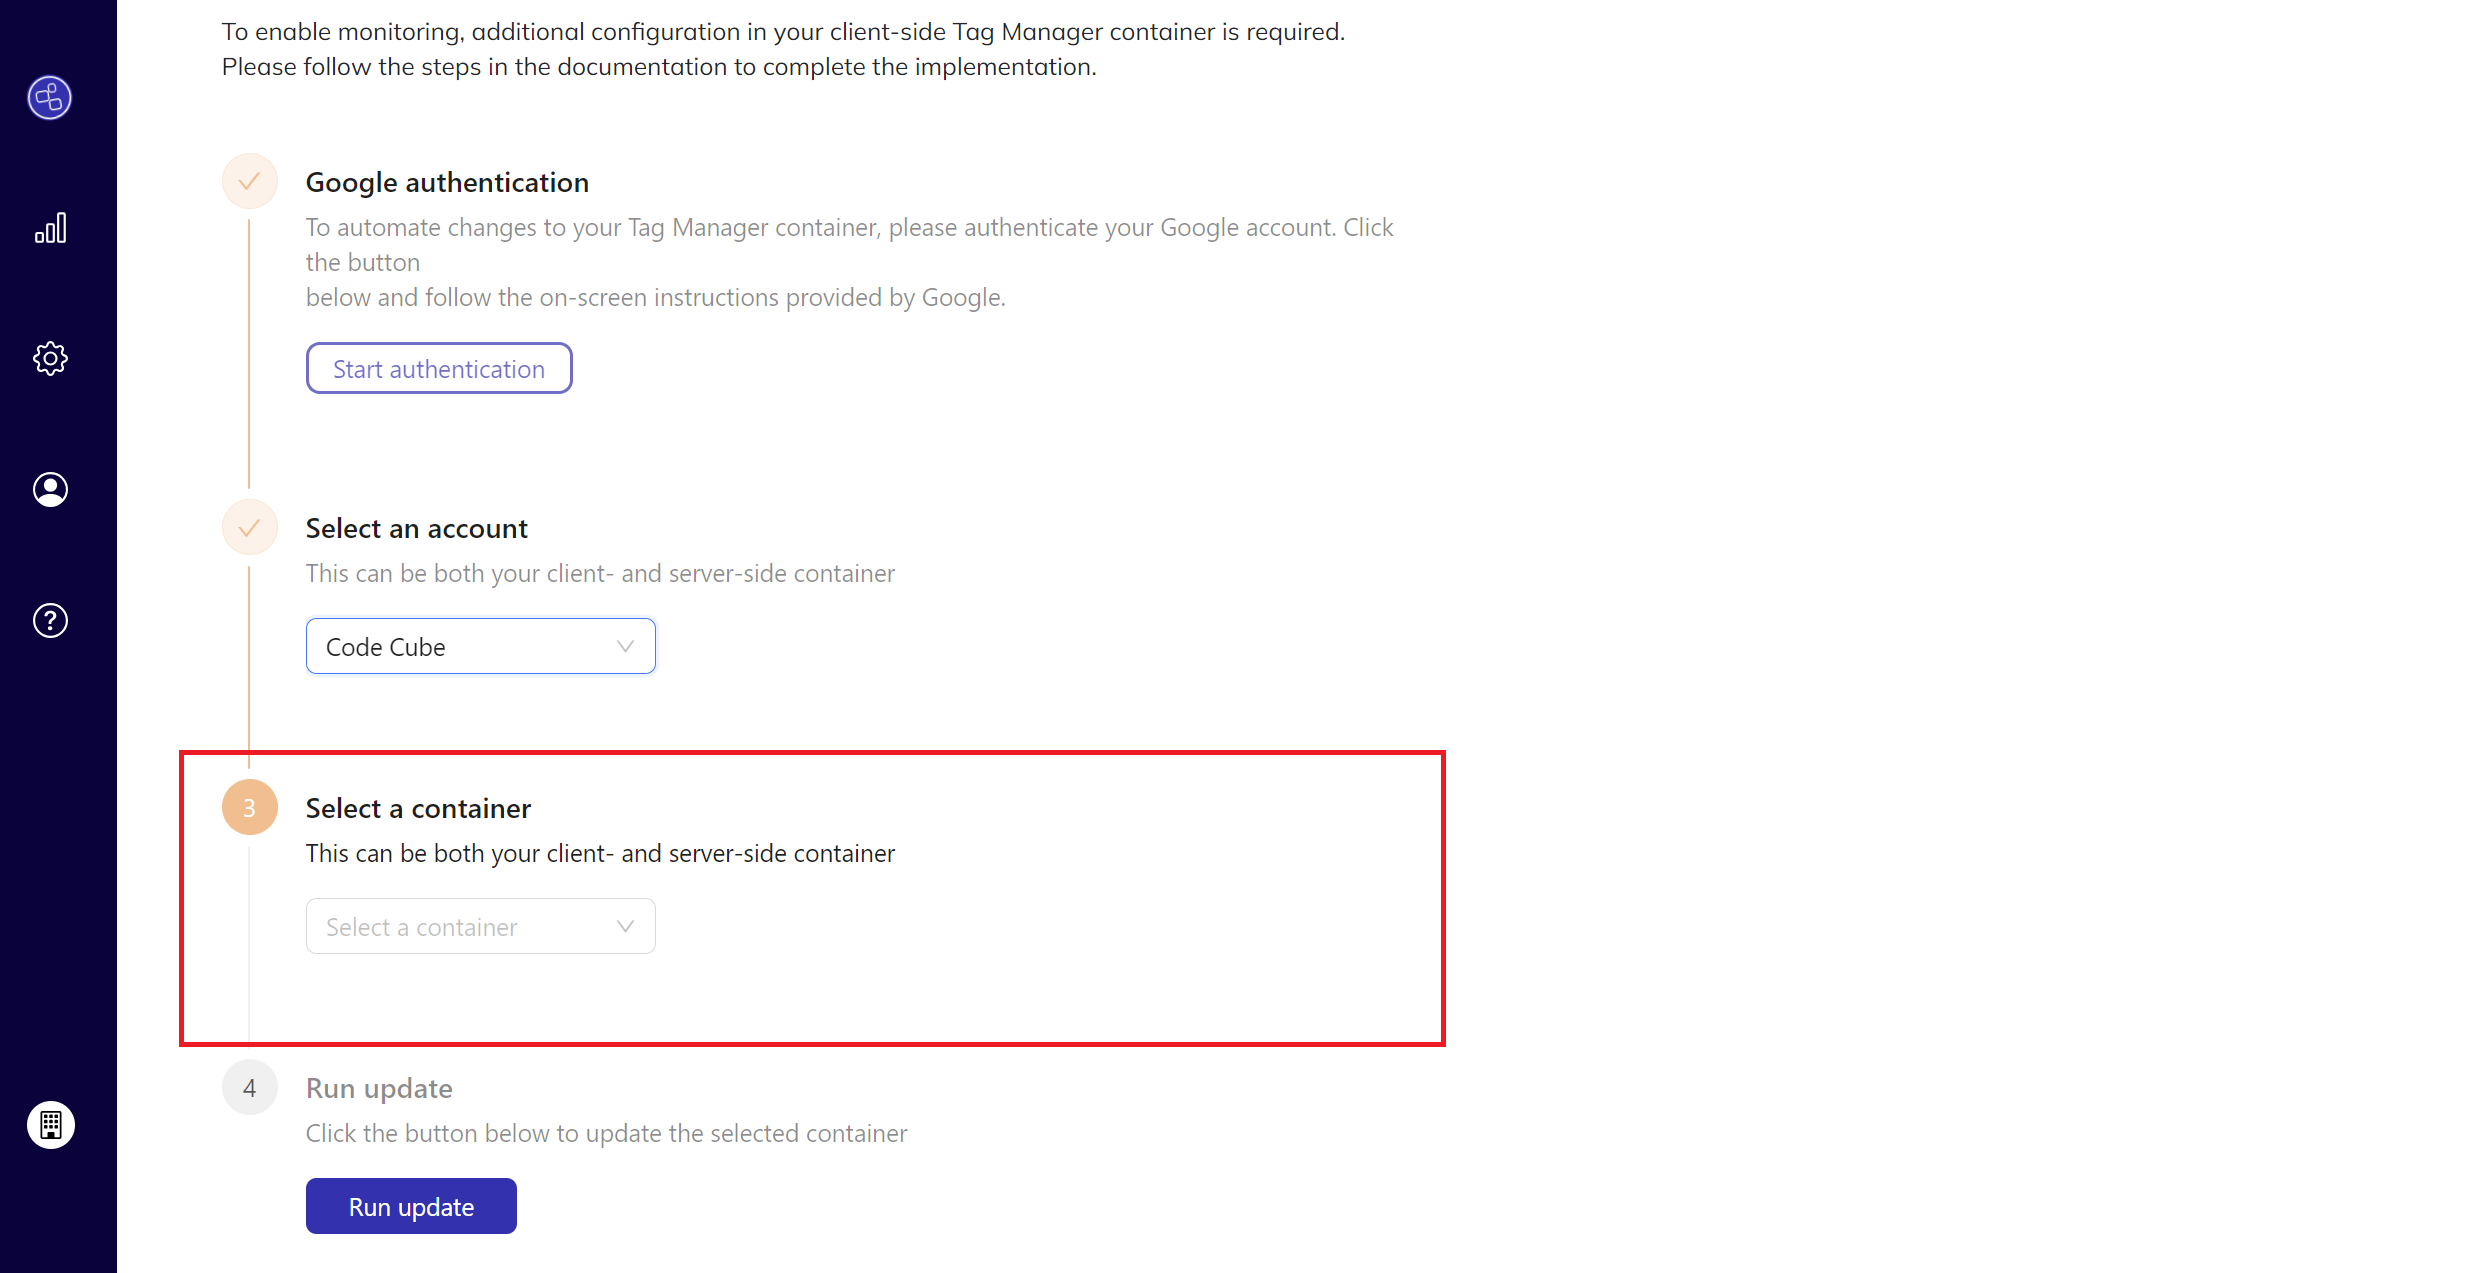
Step 7: Run the Update
With the container selected, click the "Run update" button. This will initiate the bulk editing process where your tags will be updated to include the tag names in their metadata.
Step 8: Publish the Changes
After the update process completes, a confirmation message will appear at the bottom of the page. To finalize the changes, navigate to the container in your Google Tag Manager account. Locate the newly generated workspace named "Code Cube" and publish the changes.

Conclusion
Congratulations! You have successfully updated all your tags to include the tag name in the metadata within your container. This update ensures better monitoring and management of your tags in Google Tag Manager. If you encounter any issues or need further assistance,please contact support at support@code-cube.io.