Server-side error logging
Feature description
❕This feature is only available with the Tag Monitor's premium and enterprise licenses.
Logs play an essential role in monitoring your server-side tagging. They assist in troubleshooting request issues, identifying missing data, and understanding how a vendor processed a request.
Logs are available for all tags that support the "logging to console" option in the server-side GTM container. However, it's important to note that you can not retrieve log data for Google Analytics and Google Ads tags, as these default templates do not support the logging option.
The logging will be configured in the Google Cloud Project where your GTM server-side container operates in a Cloud Run instance. From this instance, you can connect the logs to the Code Cube environment. These logs will then be paired with other error information and integrated into dashboarding and notifications.
How it works
Our system works by setting up a log monitoring mechanism within your Google Cloud Project. It starts by configuring a router log that collects logs from your GTM server-side container, specifically targeting logs that meet certain criteria.
The filtering logic is applied to ensure only relevant logs are captured, with the filter being: logName=~"stdout" AND textPayload!~"https://www.googletagmanager.com/sgtm/a" AND textPayload!~"Listening".
Filter explanation: logName=~"stdout": Filter logs based on stdout. textPayload!~"https://www.googletagmanager.com/sgtm/a": Exclude GTM analytics pings. textPayload!~"Listening": Excludes instance initializations.
Once the relevant logs are collected, they are sent to a dataset in our Google Cloud Project. This dataset serves as a repository for the logs, which can then be used to create insights, create dashboards, and track various metrics.
Resources Created in your GCP project
- Logging Sink
- A logging sink named codecube-serverside-logs routing logs to BigQuery dataset in our GCP project.
How to Enable server-side error logging
To enable the feature you need to take the steps below:
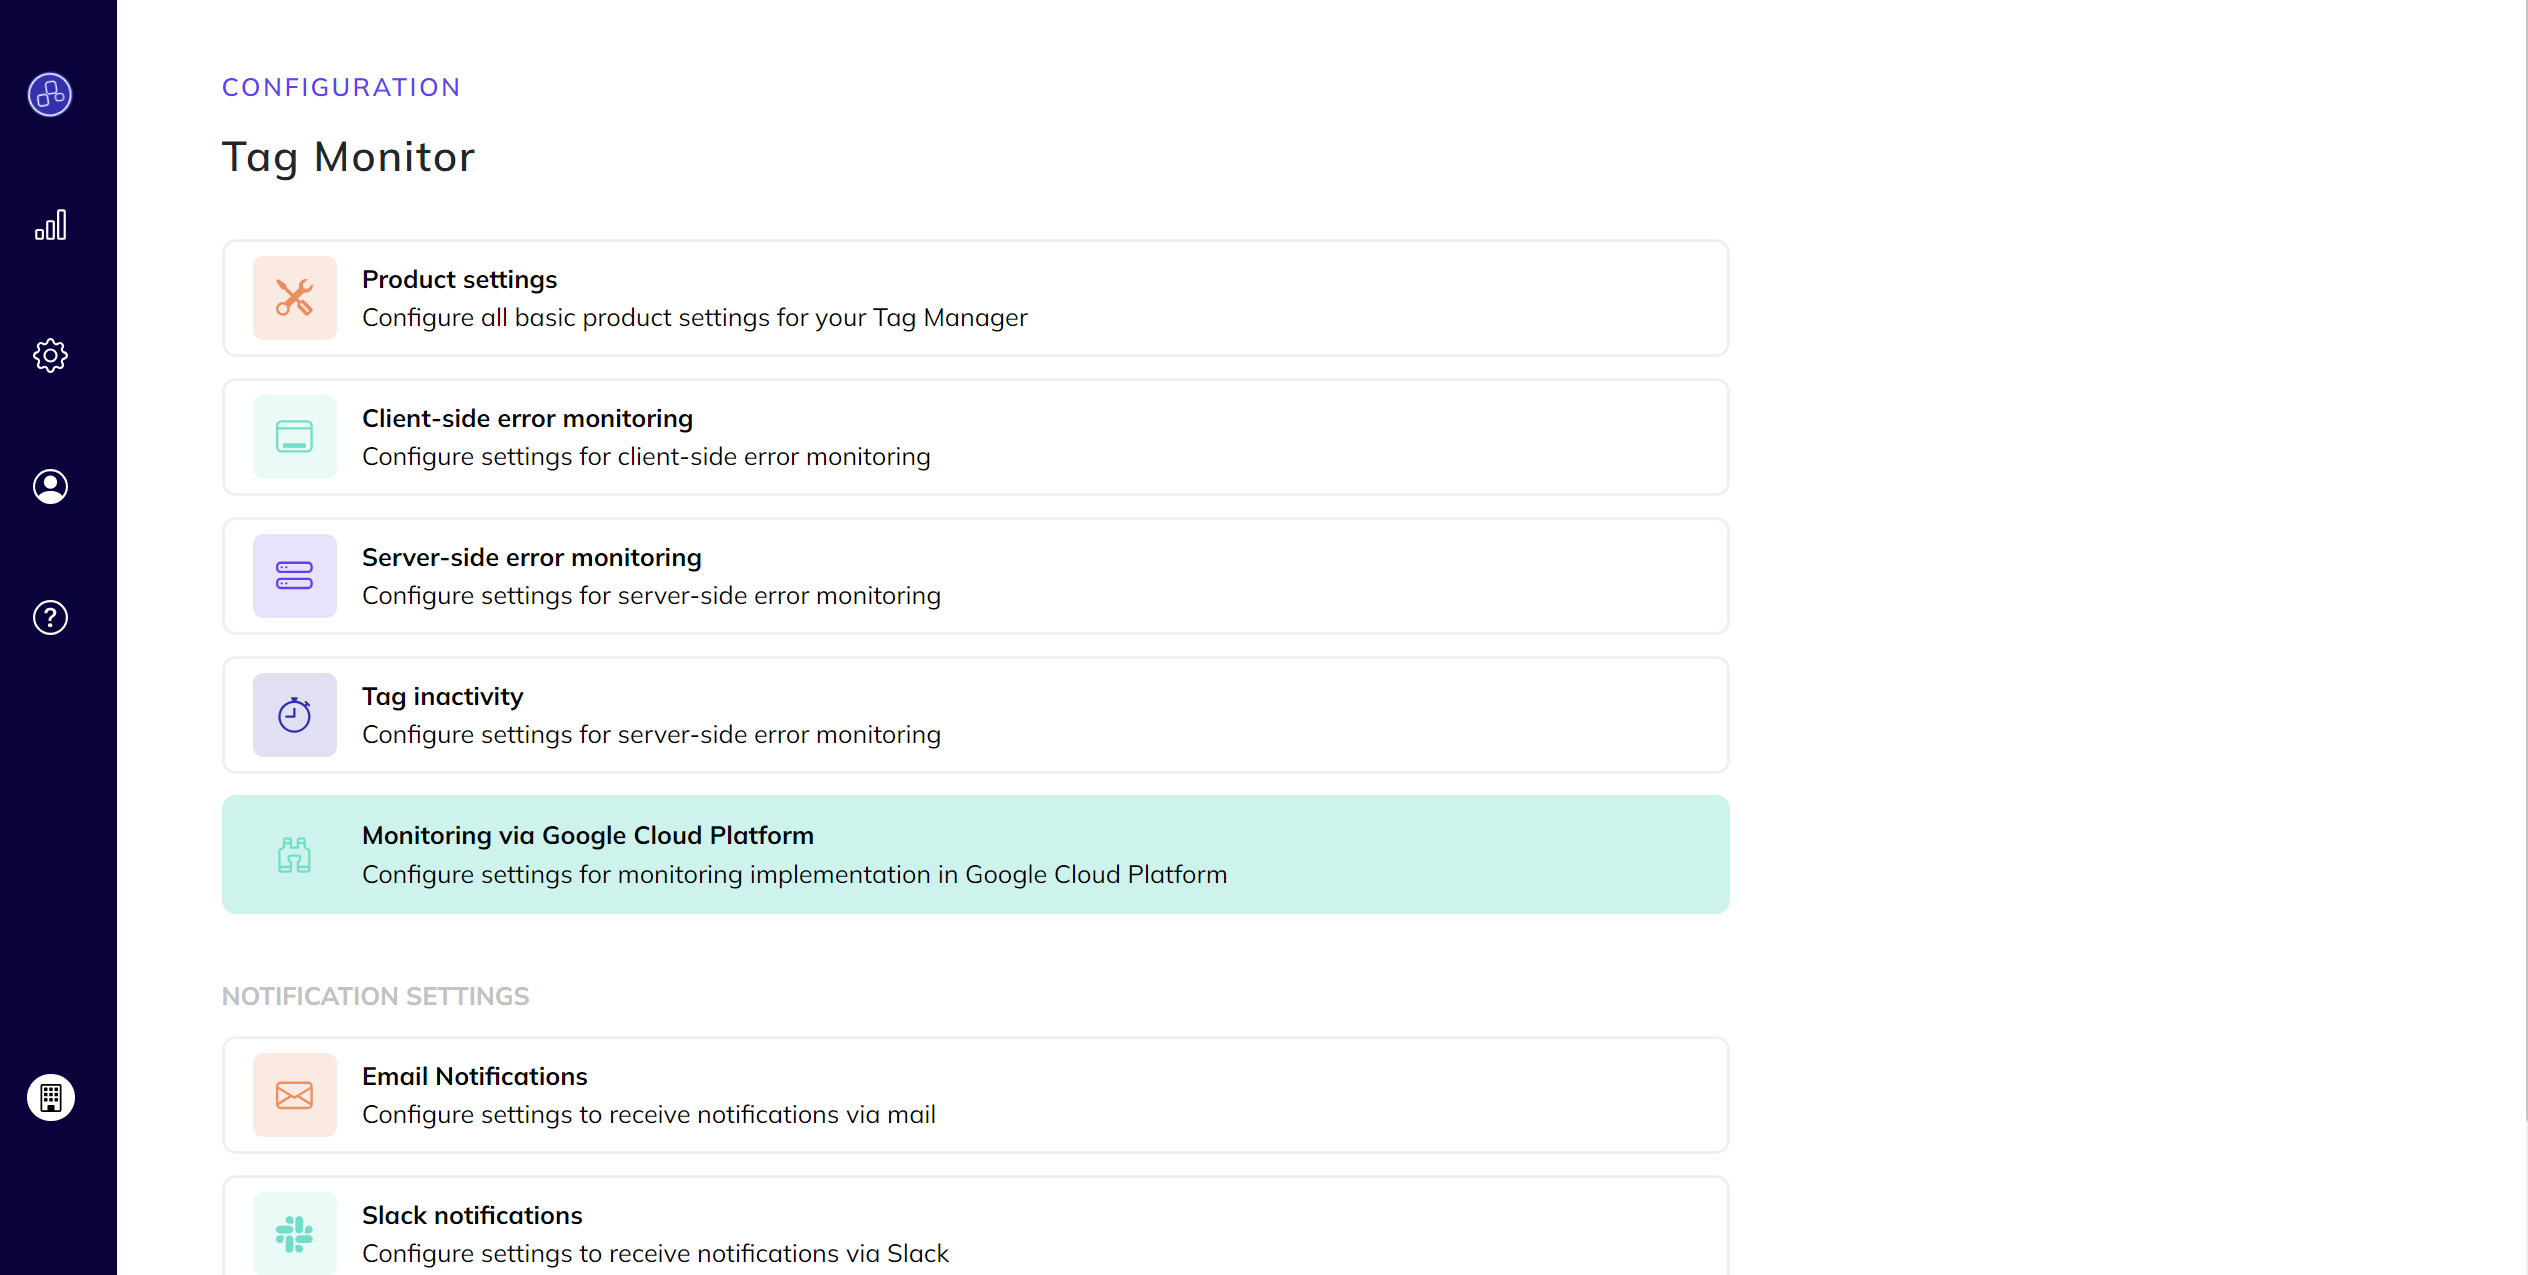
- Navigate to the Configuration Page:
- Go to the Tag Monitor Configuration Page on our portal.
- Access the Monitoring Tab:
- Click on the
Monitoring via Google Cloud Platformtab.
- Click on the
- Enable server-side error logging:
- Turn on the toggle for server-side error logging.
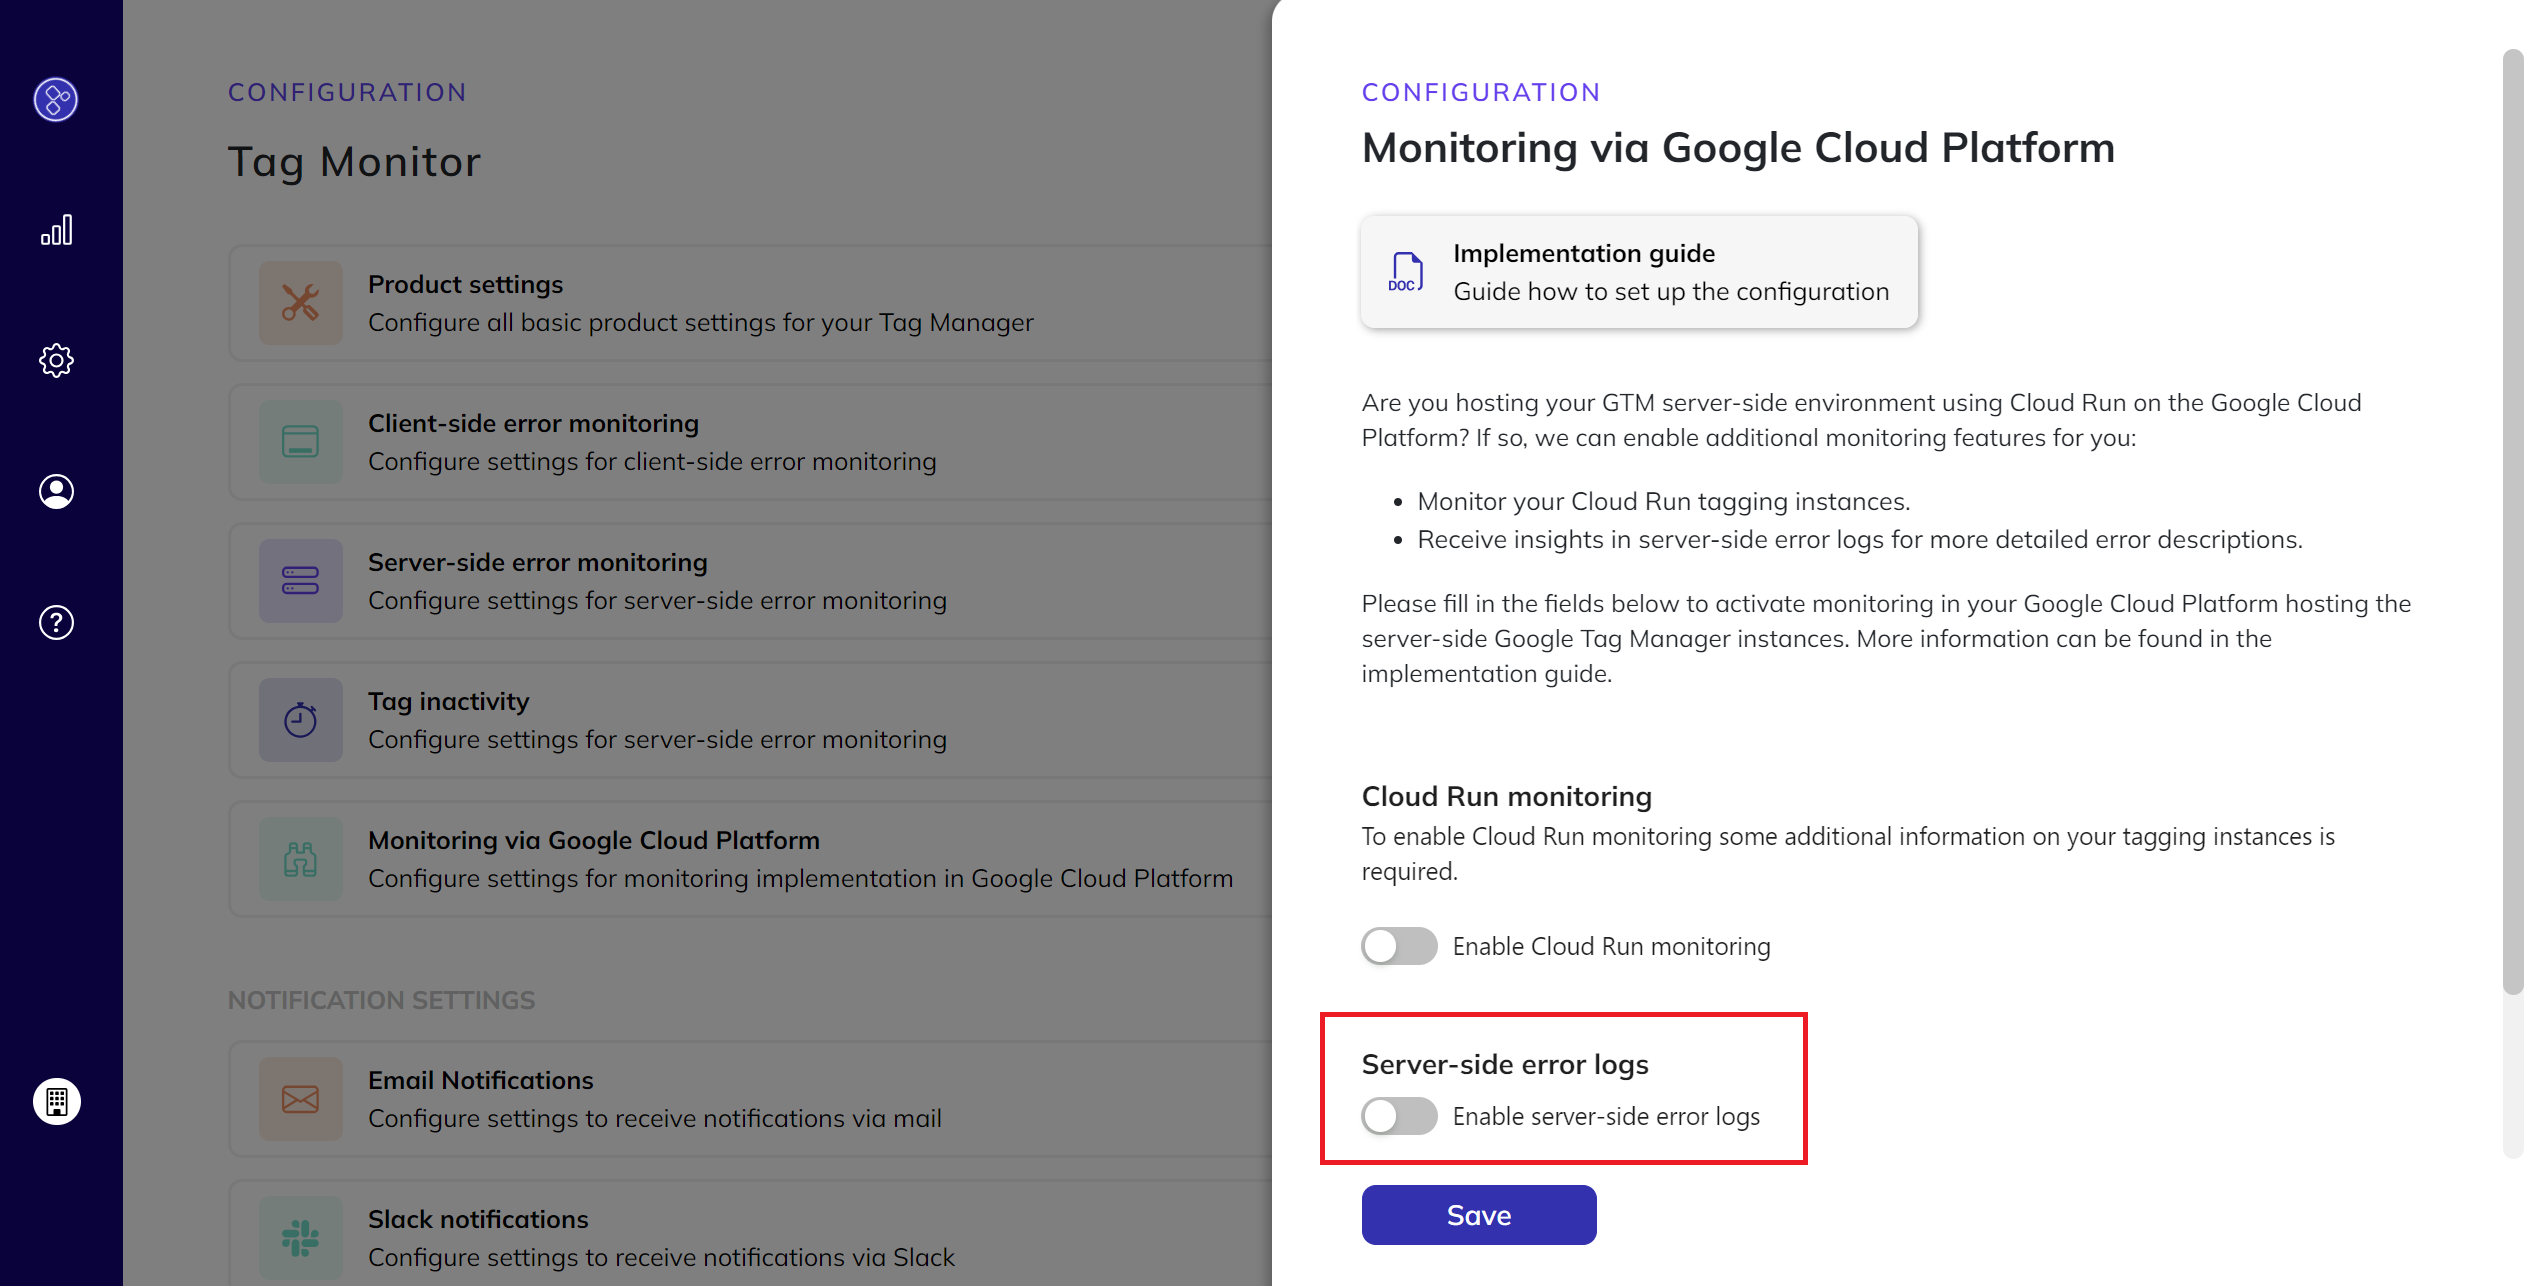
- Turn on the toggle for server-side error logging.
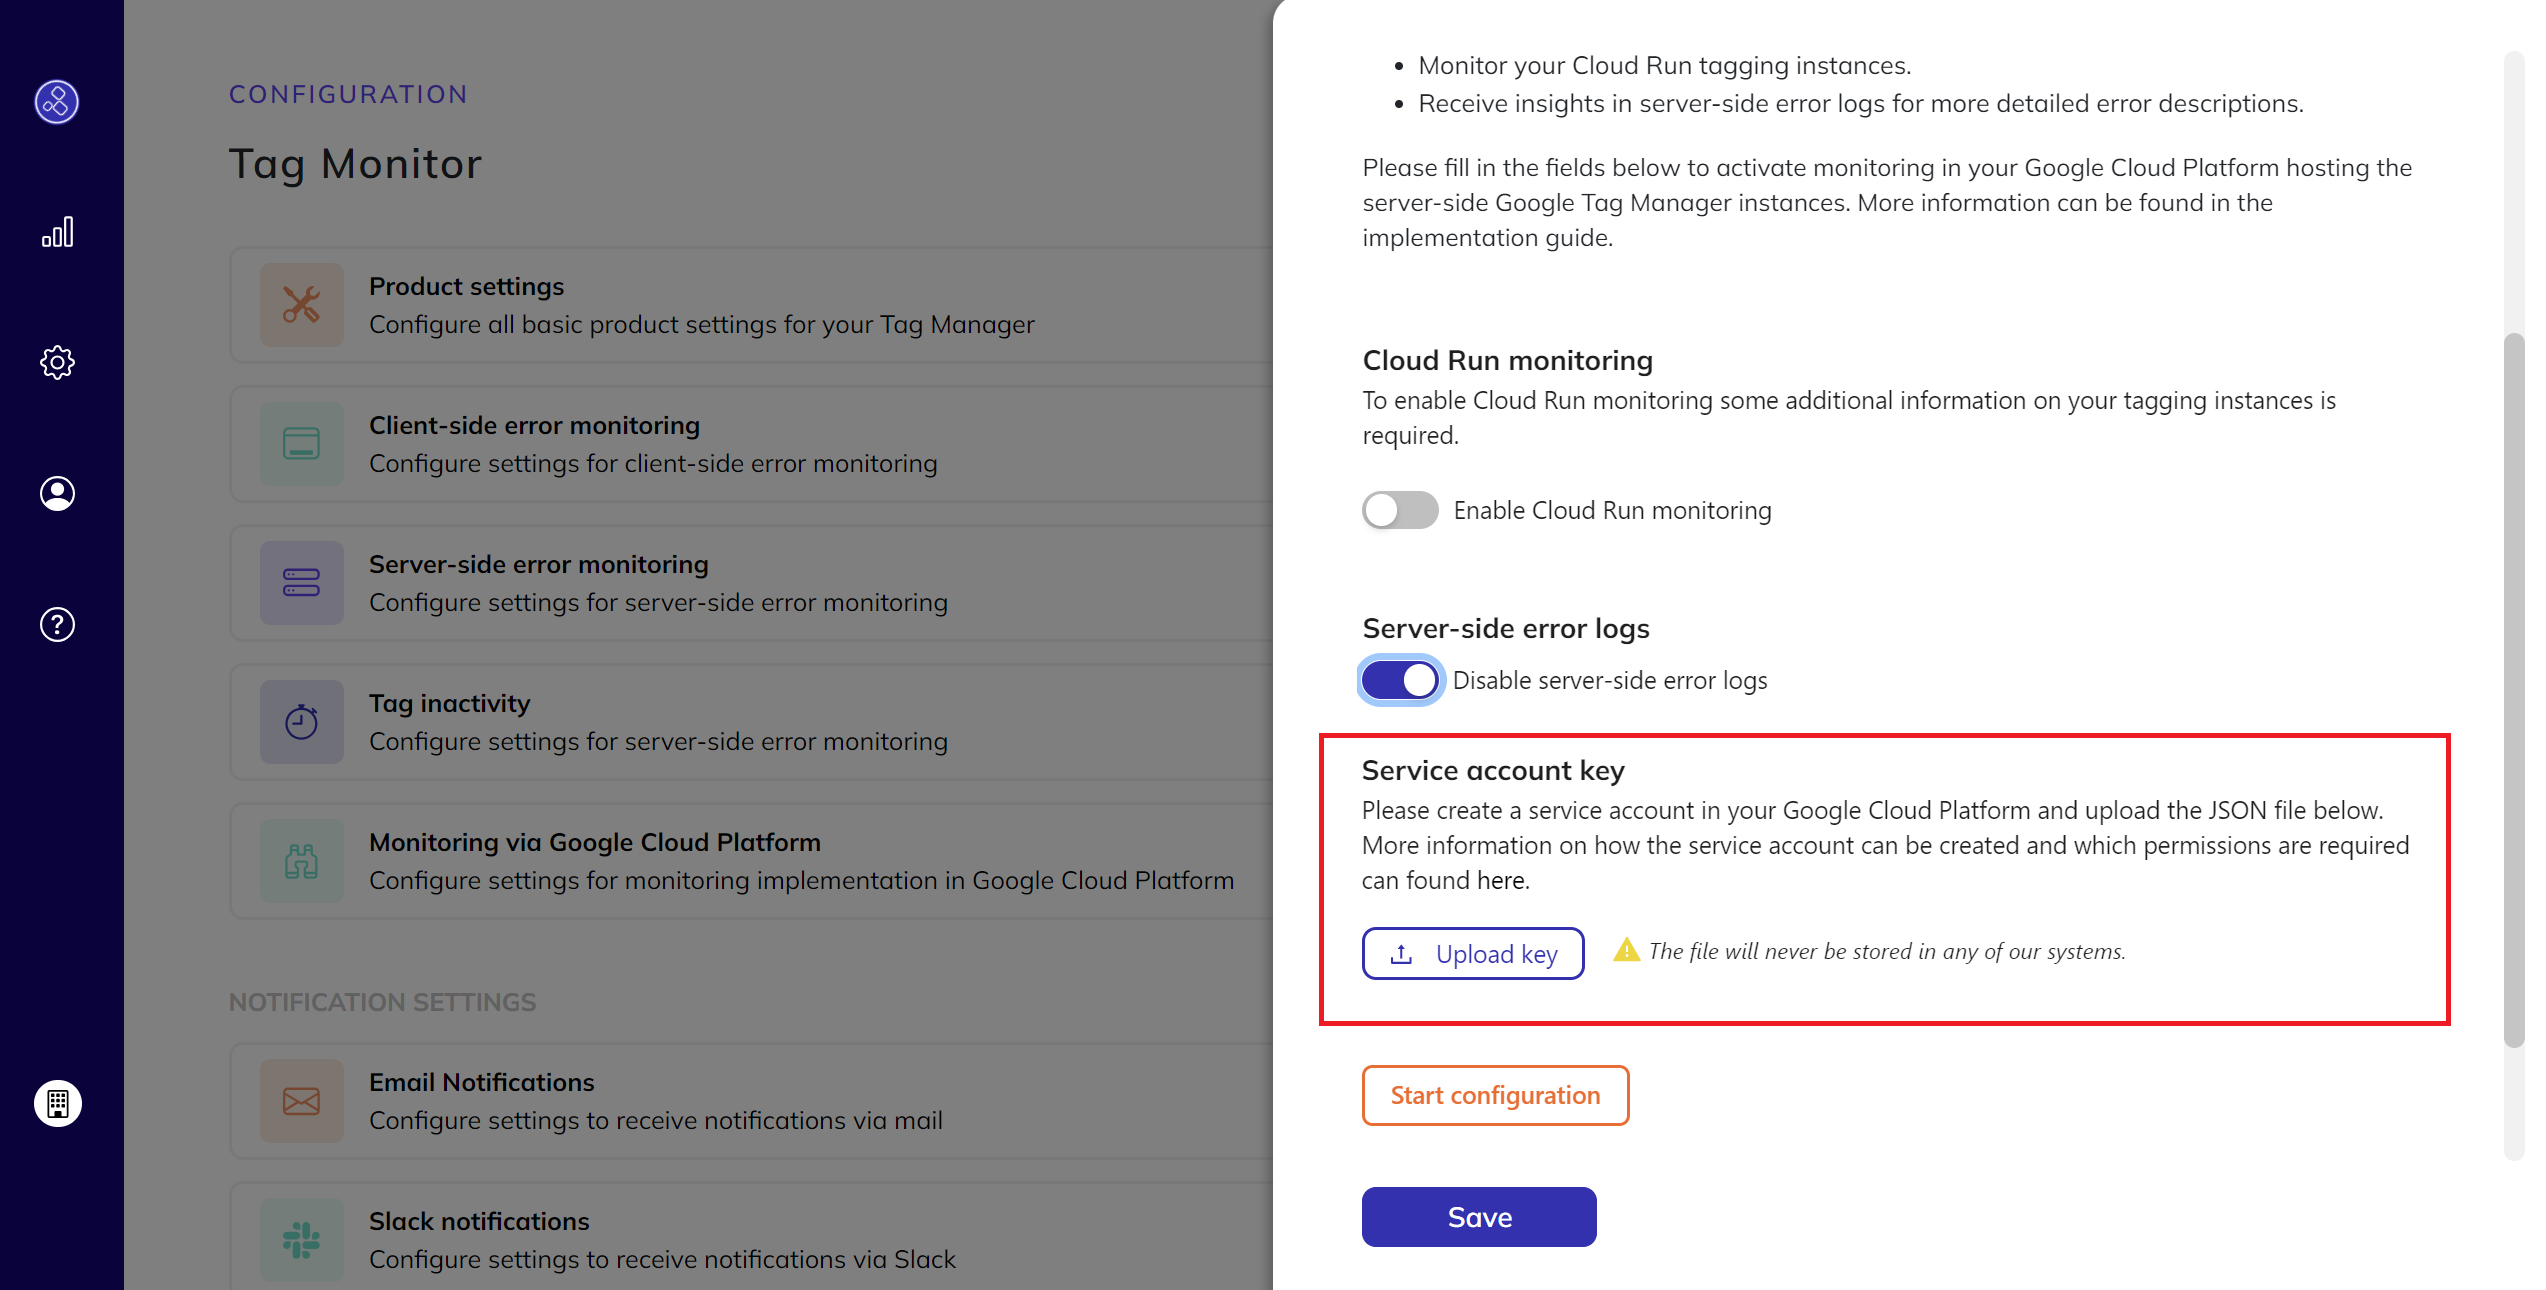
- Upload Service Account Key:
- Upload your service account key.
How to create the service account key? - Note: This service account key will not be stored in any of our systems for privacy and security purposes. Find more about
the security Measures and Implementation safeguards here.
- Upload your service account key.
-
Start Configuration:
- Click on
Start Configurationto initiate the process.
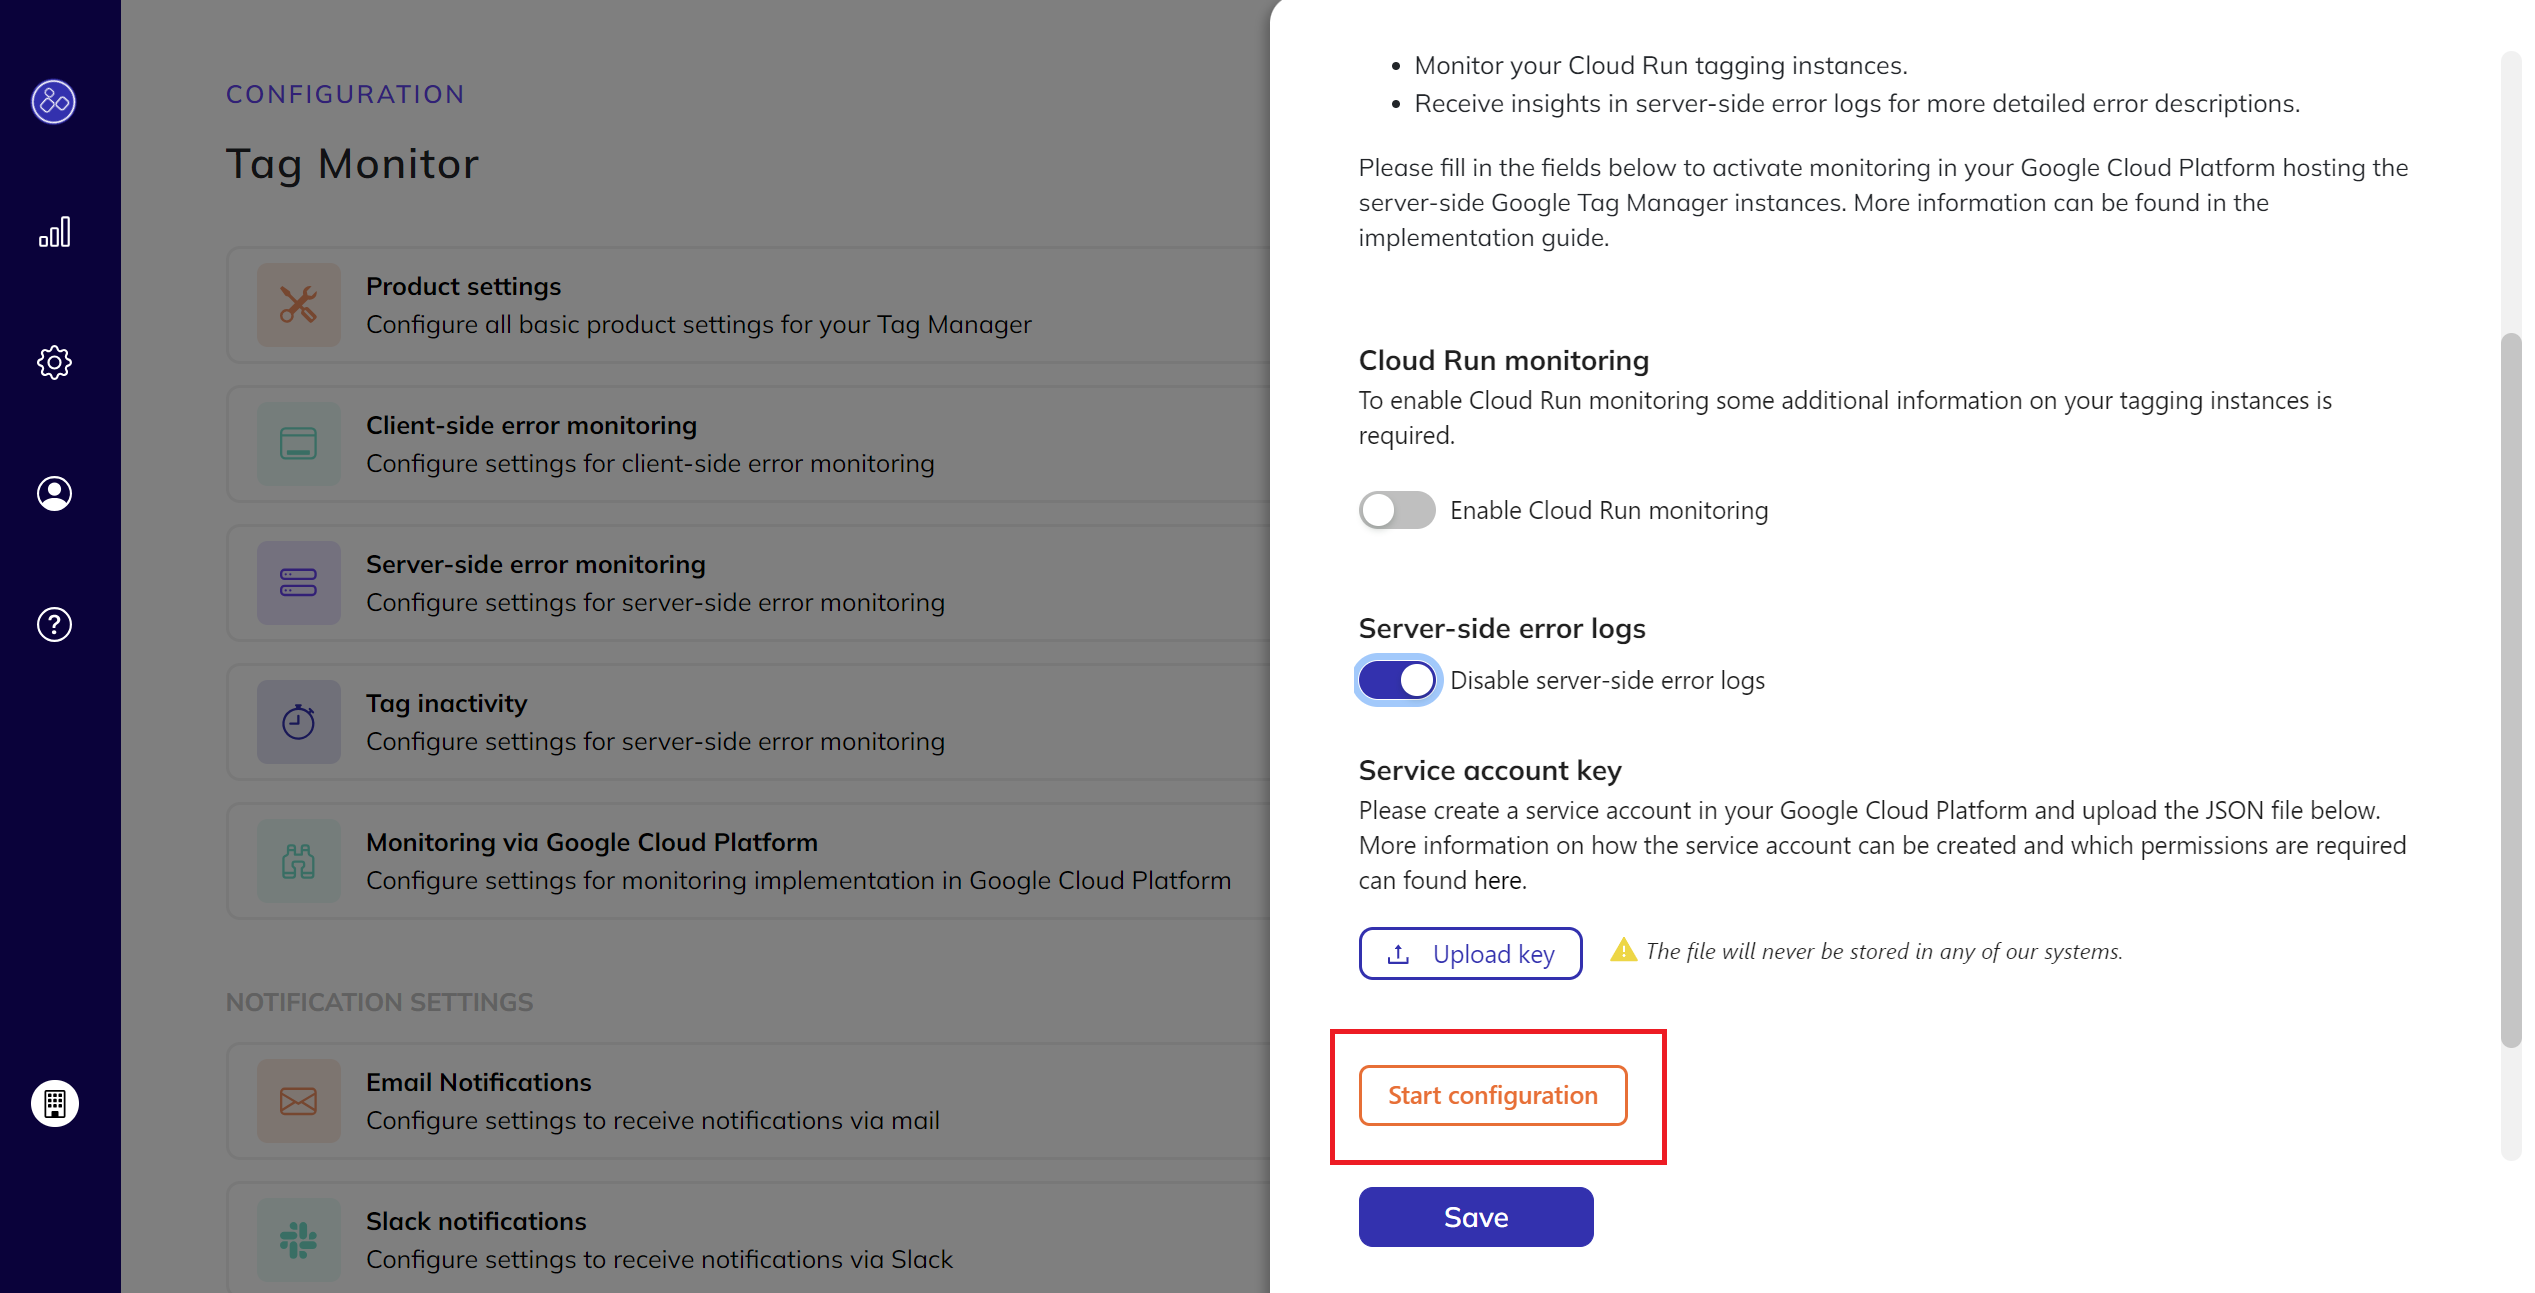
- Click on
-
Confirm the implementation:
- Once the following message appears on your screen, you can confirm that the implementation was successful.
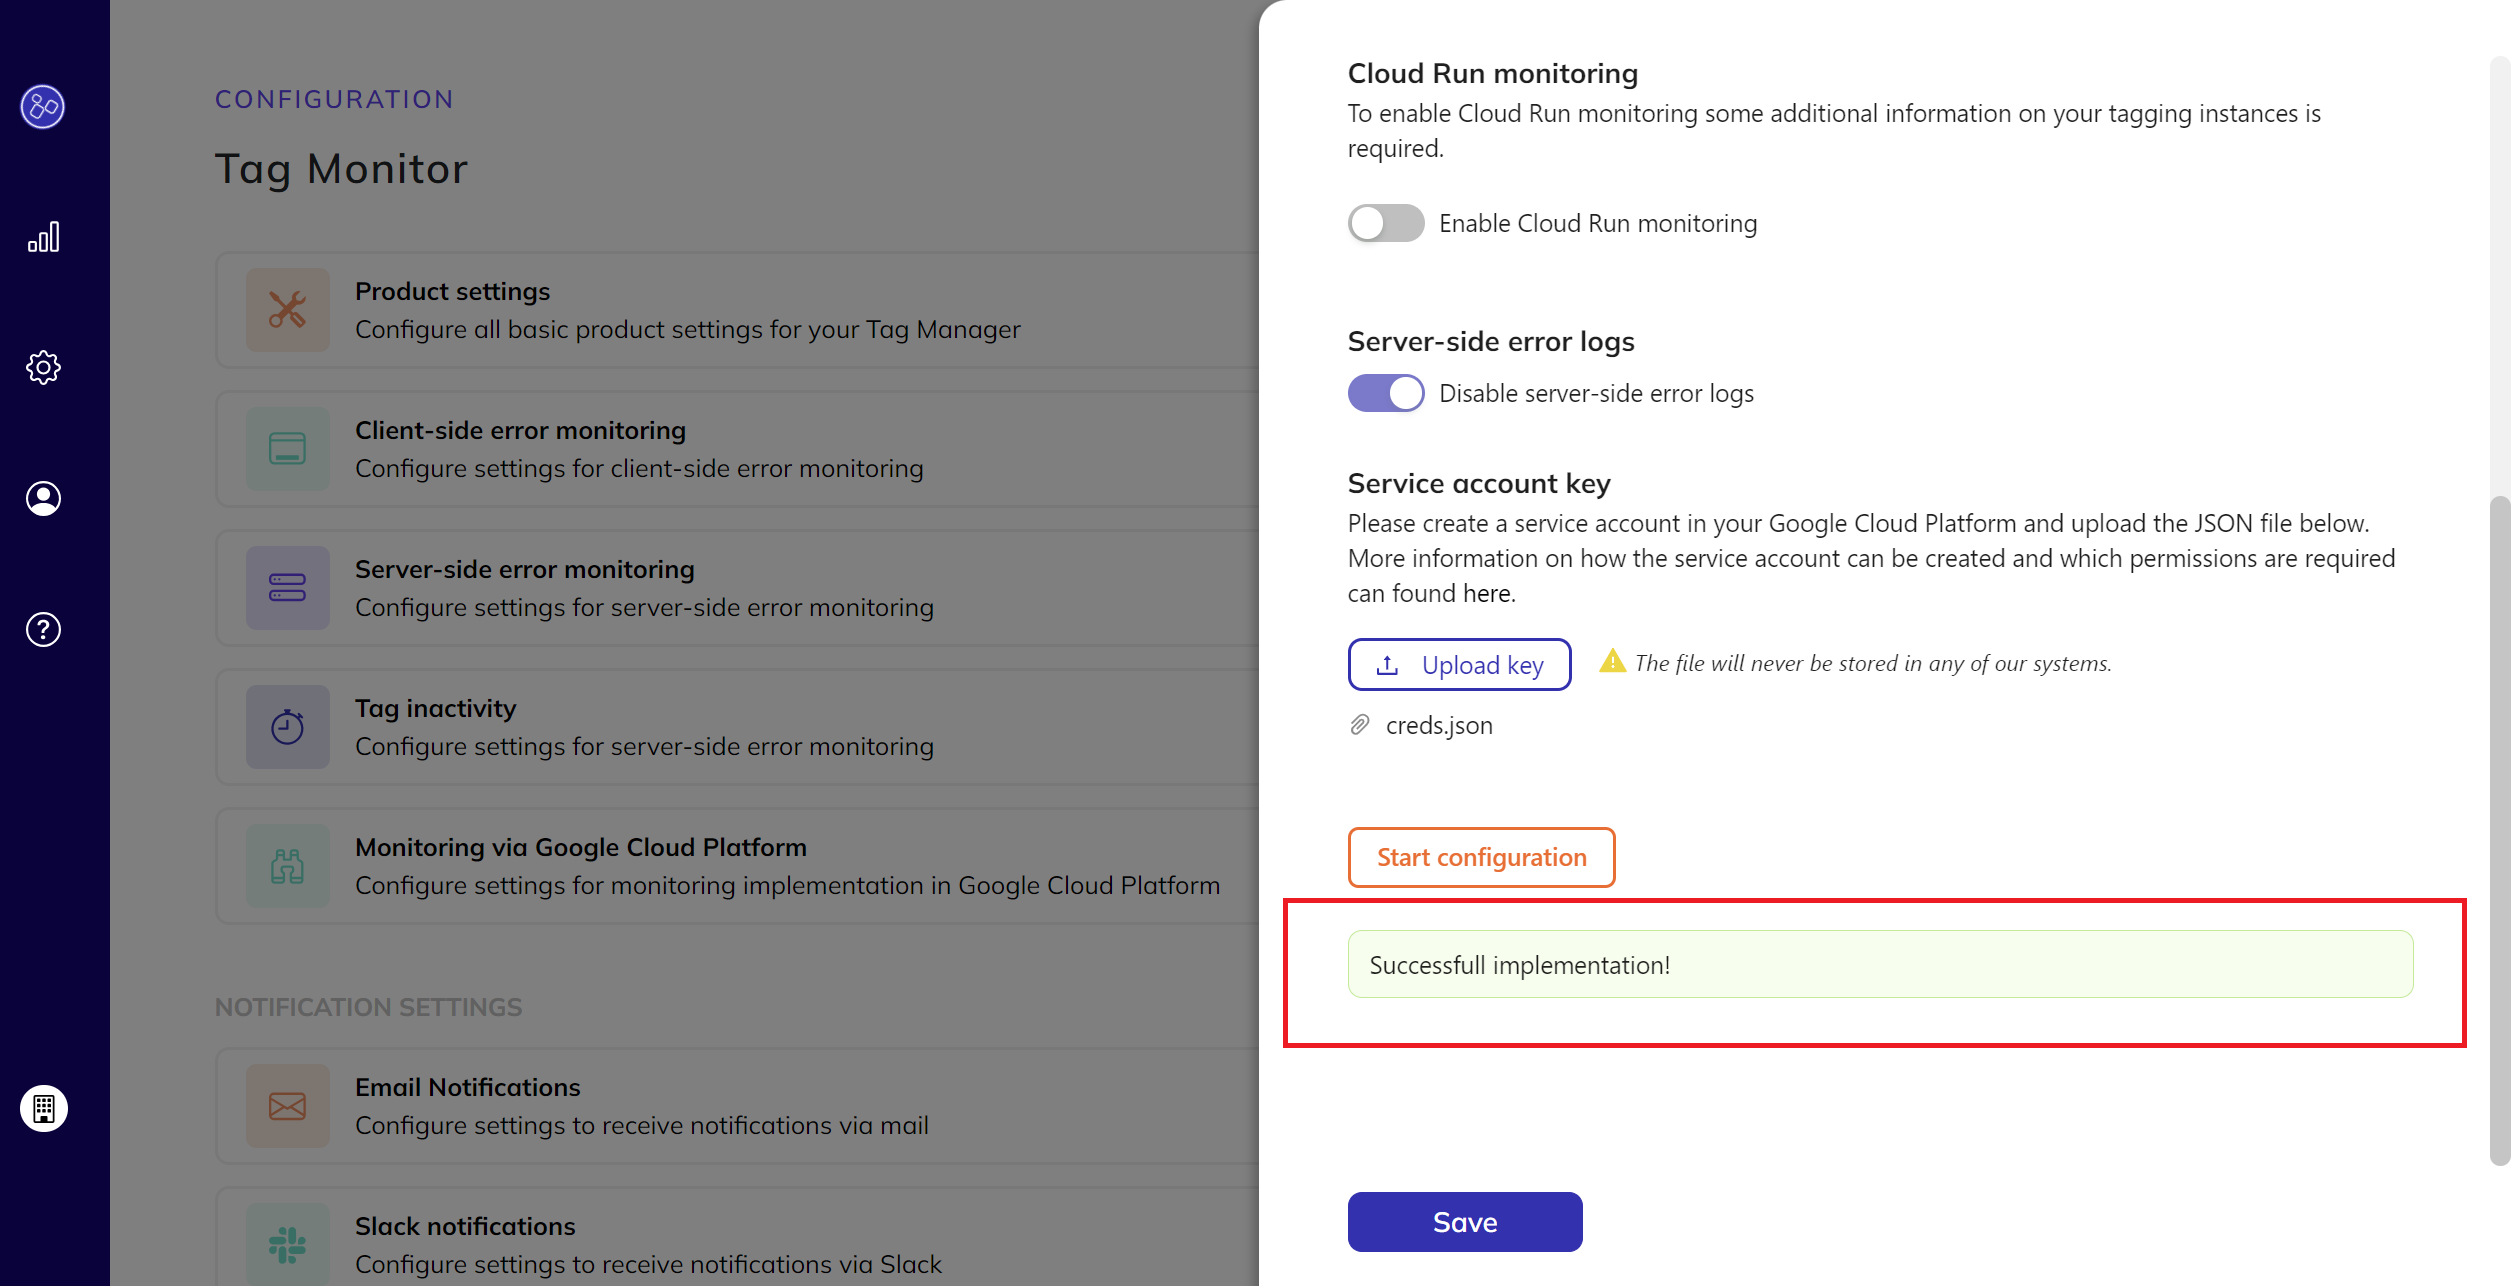
- Once the following message appears on your screen, you can confirm that the implementation was successful.
Creating a Service Account and Generating a Key
To enable the automation of monitoring and management processes, you need to create a Google Cloud Service Account with specific permissions. Follow these steps to create the service account, assign the necessary roles, and generate a service account key for upload to our portal.
Step 1: Create a Service Account
- Navigate to the Google Cloud Console
- Open the Google Cloud Console.
- Select Your Project:
- Ensure you have the correct project selected from the project selector dropdown at the top of the page.
- Go to the Service Accounts Page
- Navigate to
IAM & Admin>Service Accounts.
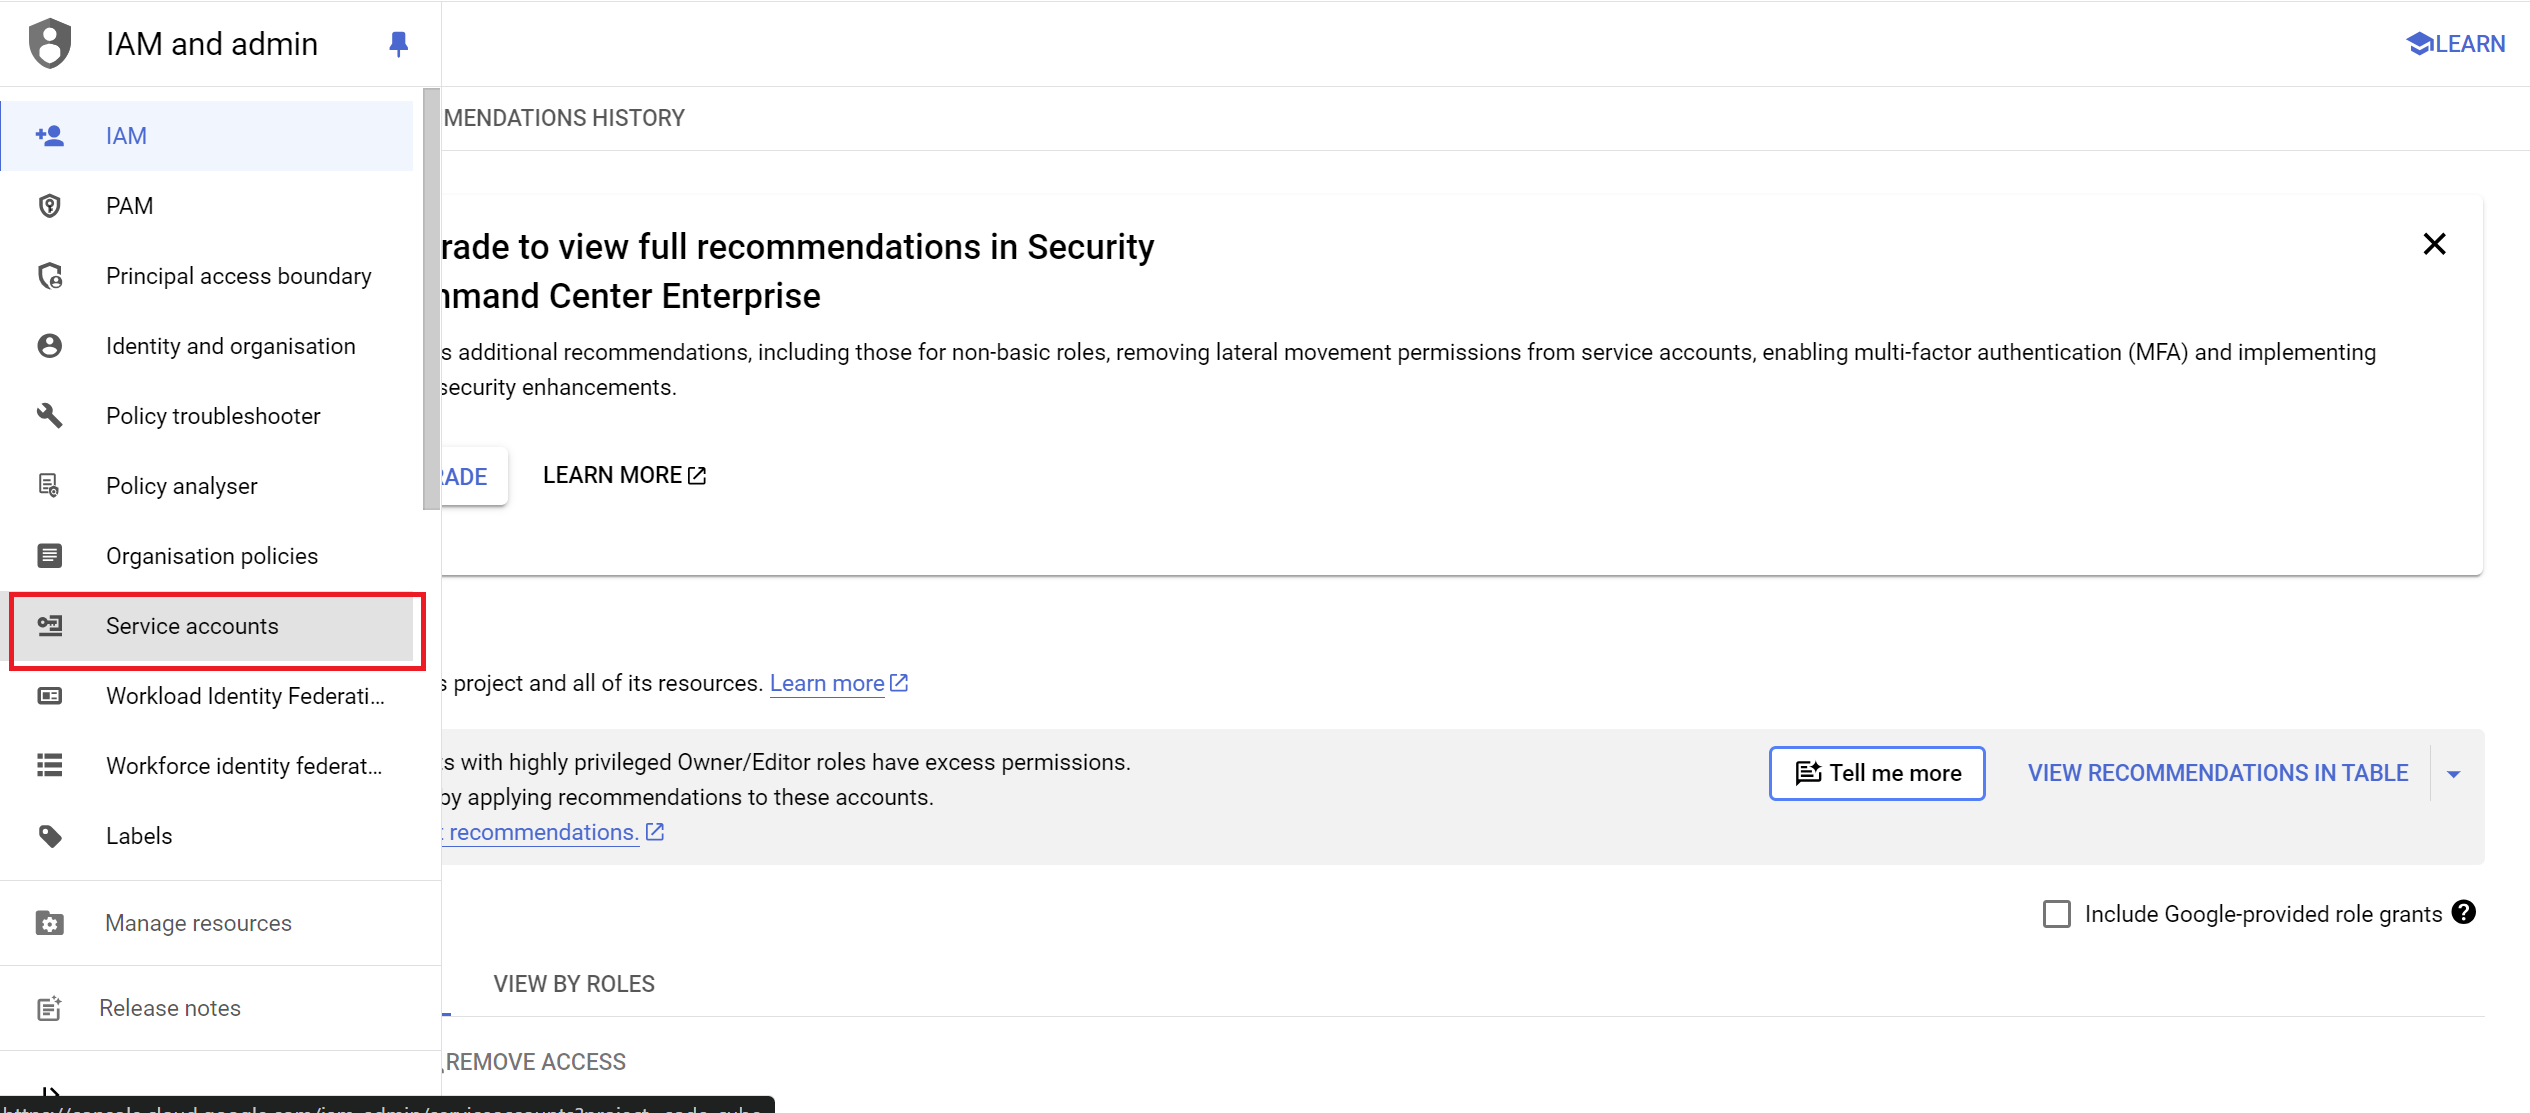
- Navigate to
- Create a New Service Account
- Click the
+ CREATE SERVICE ACCOUNTbutton.
- Enter a name, ID, and description for the service account.
- Click
CREATE AND CONTINUE. - Copy the service account email into your clipboard for the next step.
- Click the
Step 2: Assign Roles to the Service Account
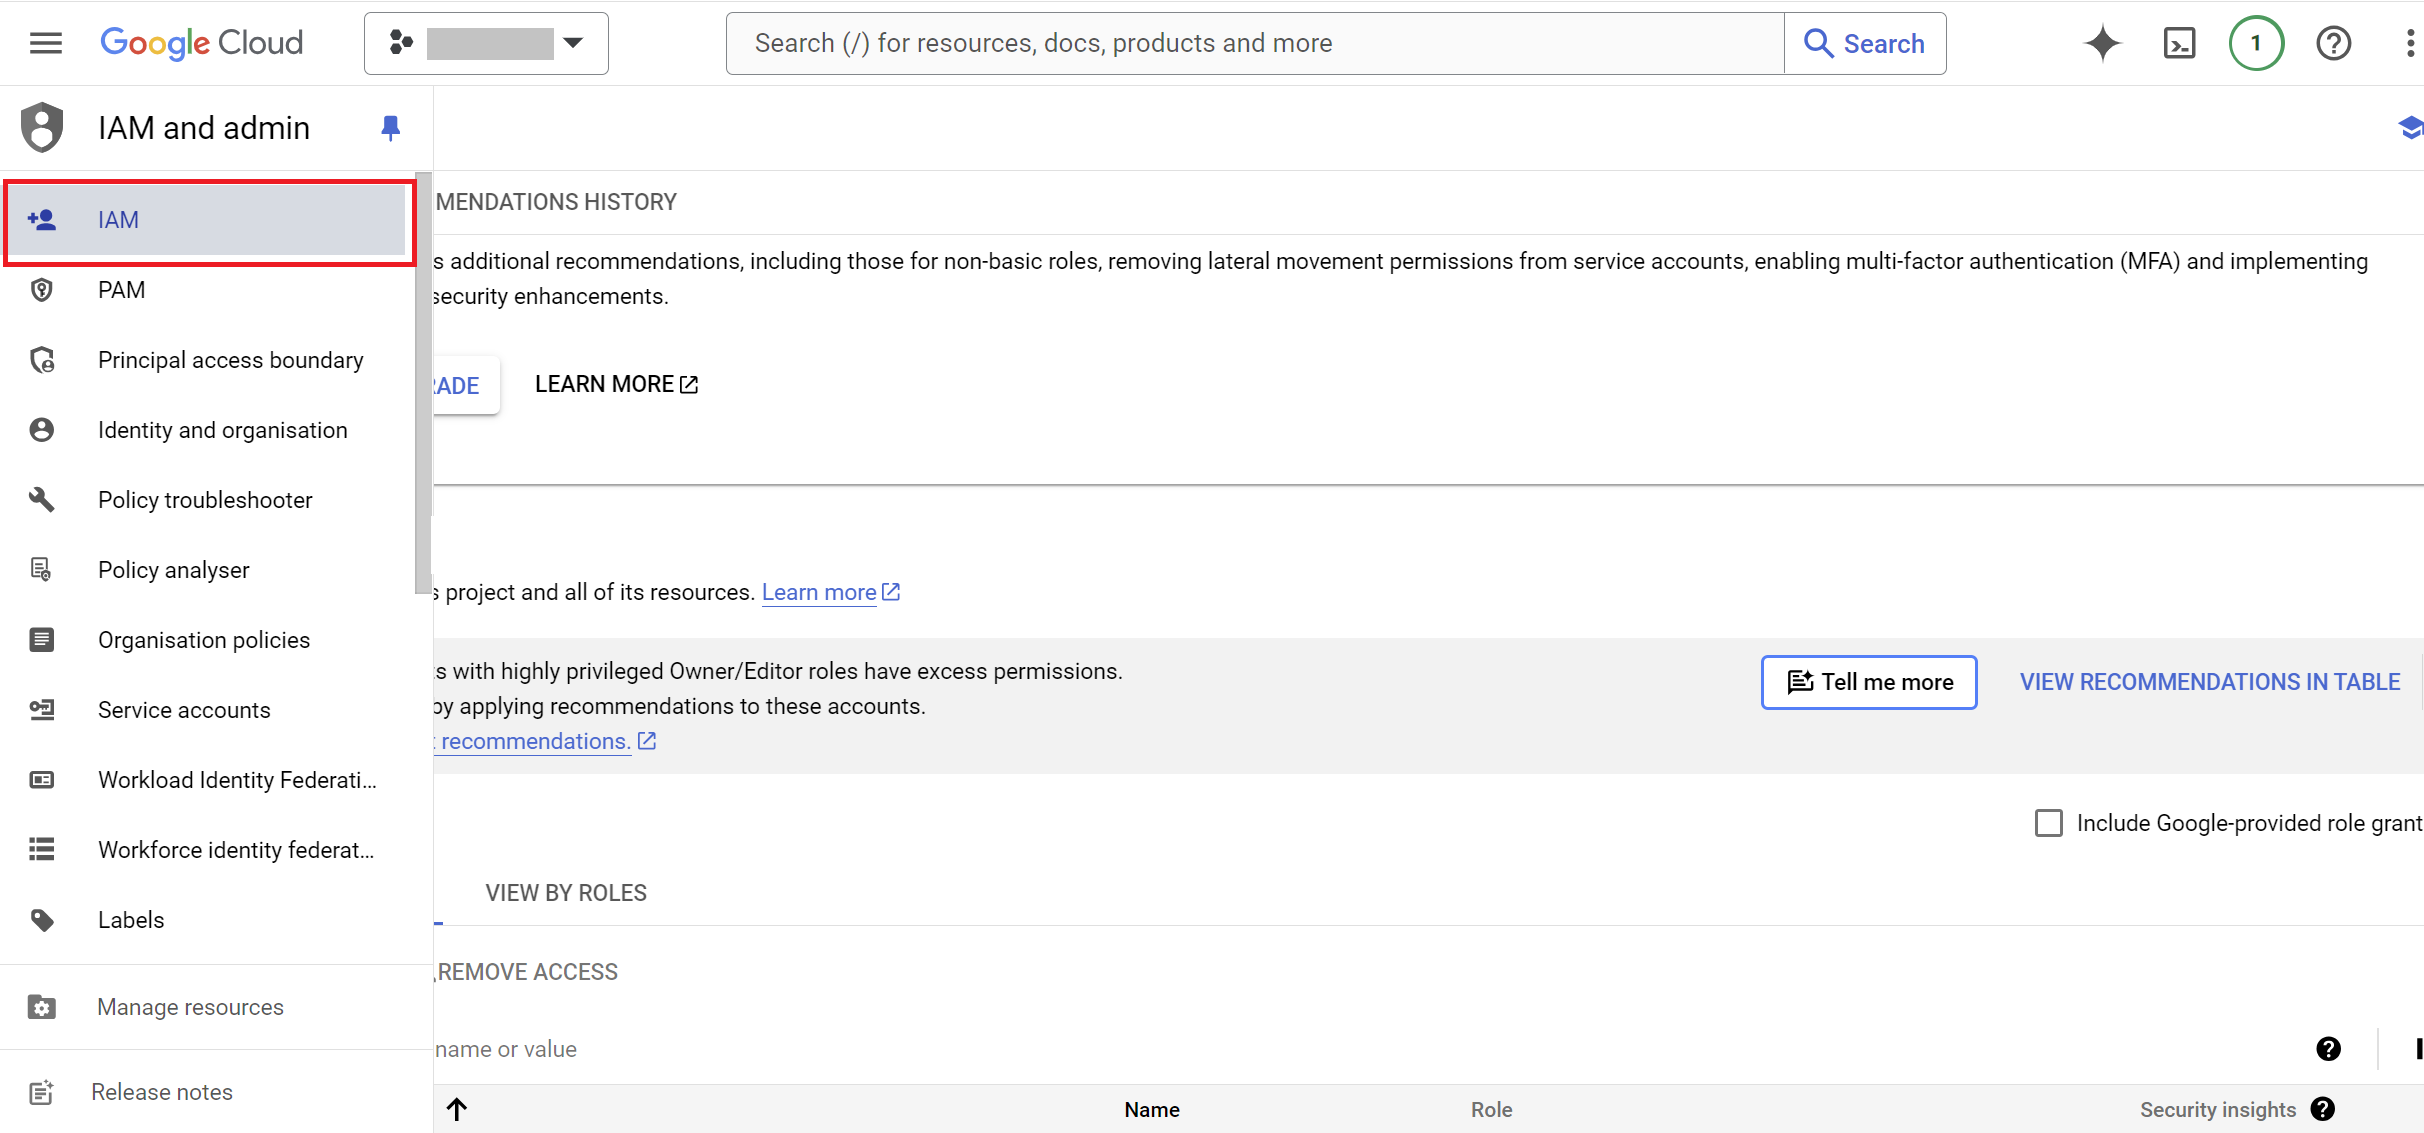
- Navigate to
IAM & Admin>IAM.
- Click on
GRANT ACCESSbutton.
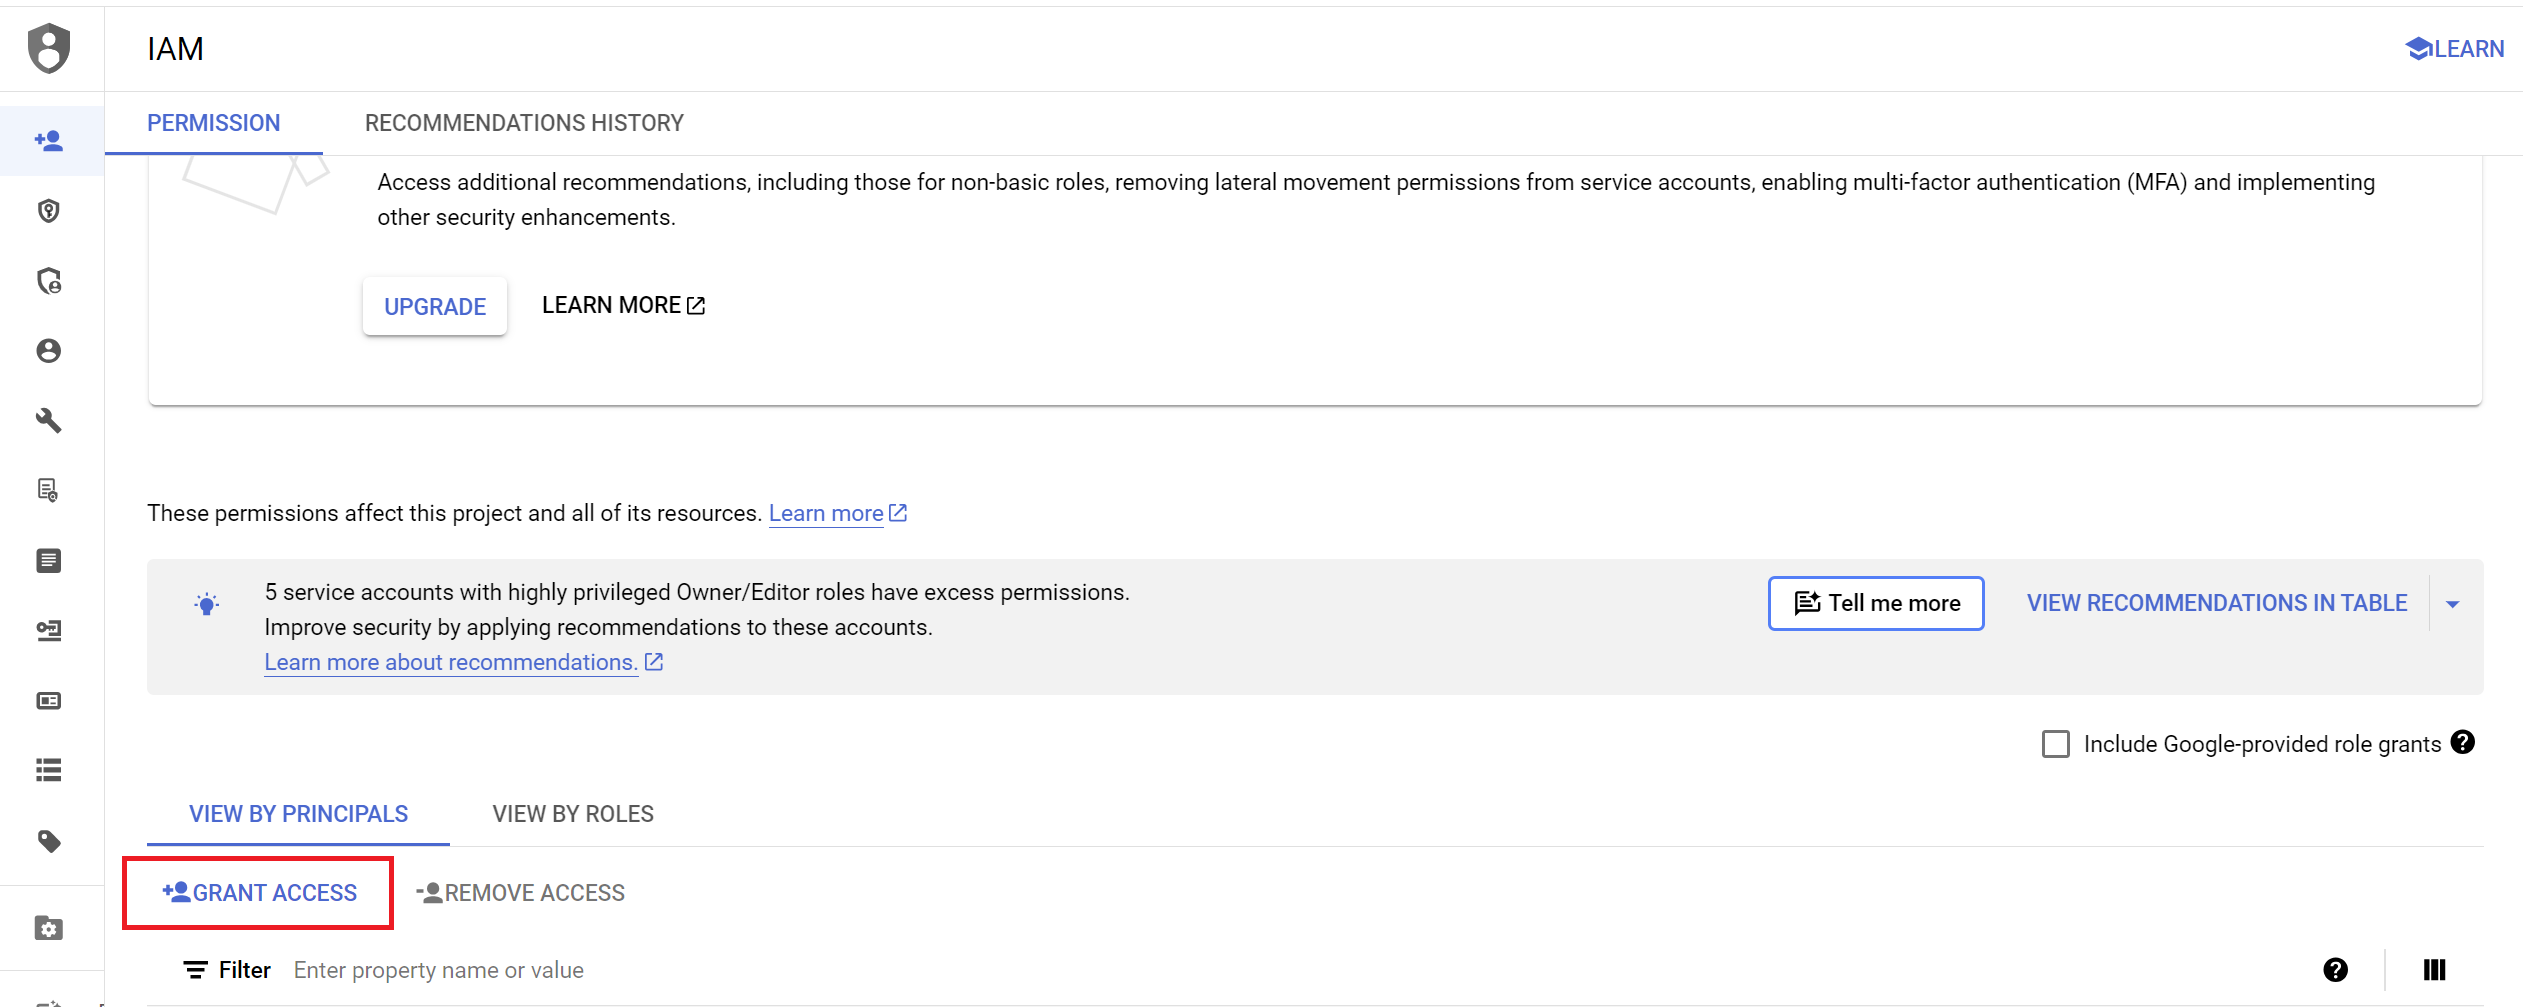
- Paste your service account email from the previous step into the
New principalsfield.

-
Assign the following roles to the service account to grant it the necessary permissions:
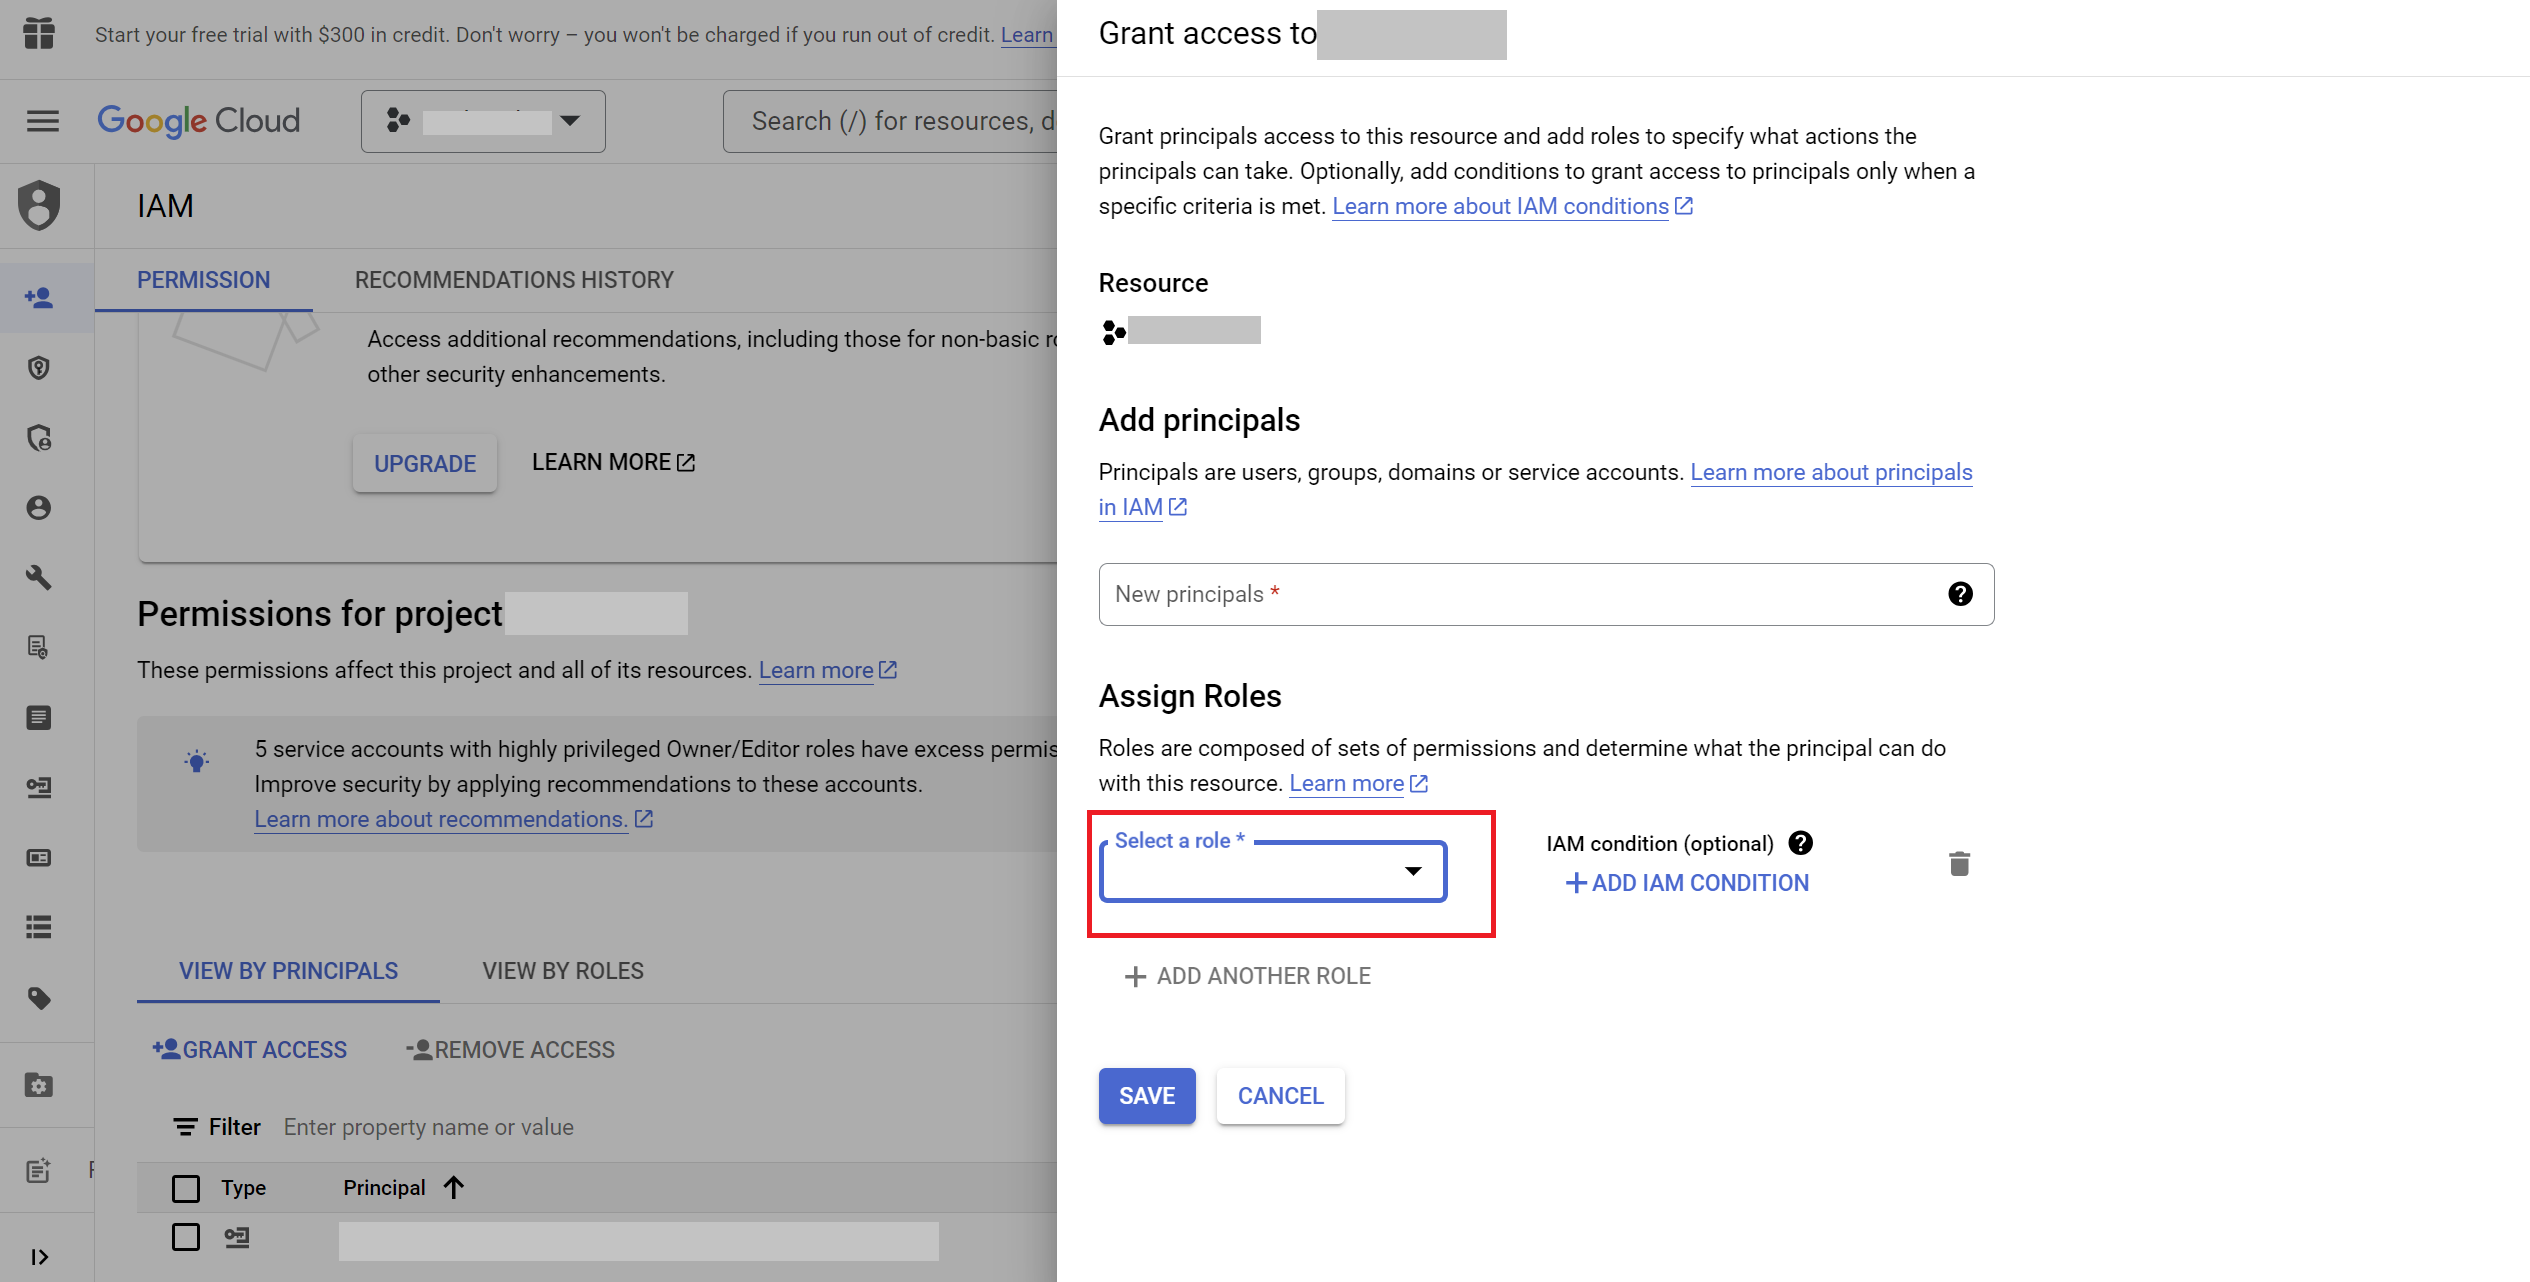
-
Logging Admin:
- Resource:
google_logging_project_sink - Role:
roles/logging.admin
- Resource:
- Config Writer:
- Resource:
google_logging_project_sink - Role:
roles/config.writer - After adding all the roles, click
DONE.
- Resource:
Note: You can set the owner role to grant all of the permissions mentioned above to the service account in one step. However, be aware that this will also grant full access to the service account.
Step 3: Create and Download the Service Account Key
- Generate a New Key:
- In the
Service Accountspage, find the service account you created. - Click the
⋮(three vertical dots) at the end of the service account row, then clickManage keys.
- In the
- Add Key:
- Click
ADD KEY>Create new key.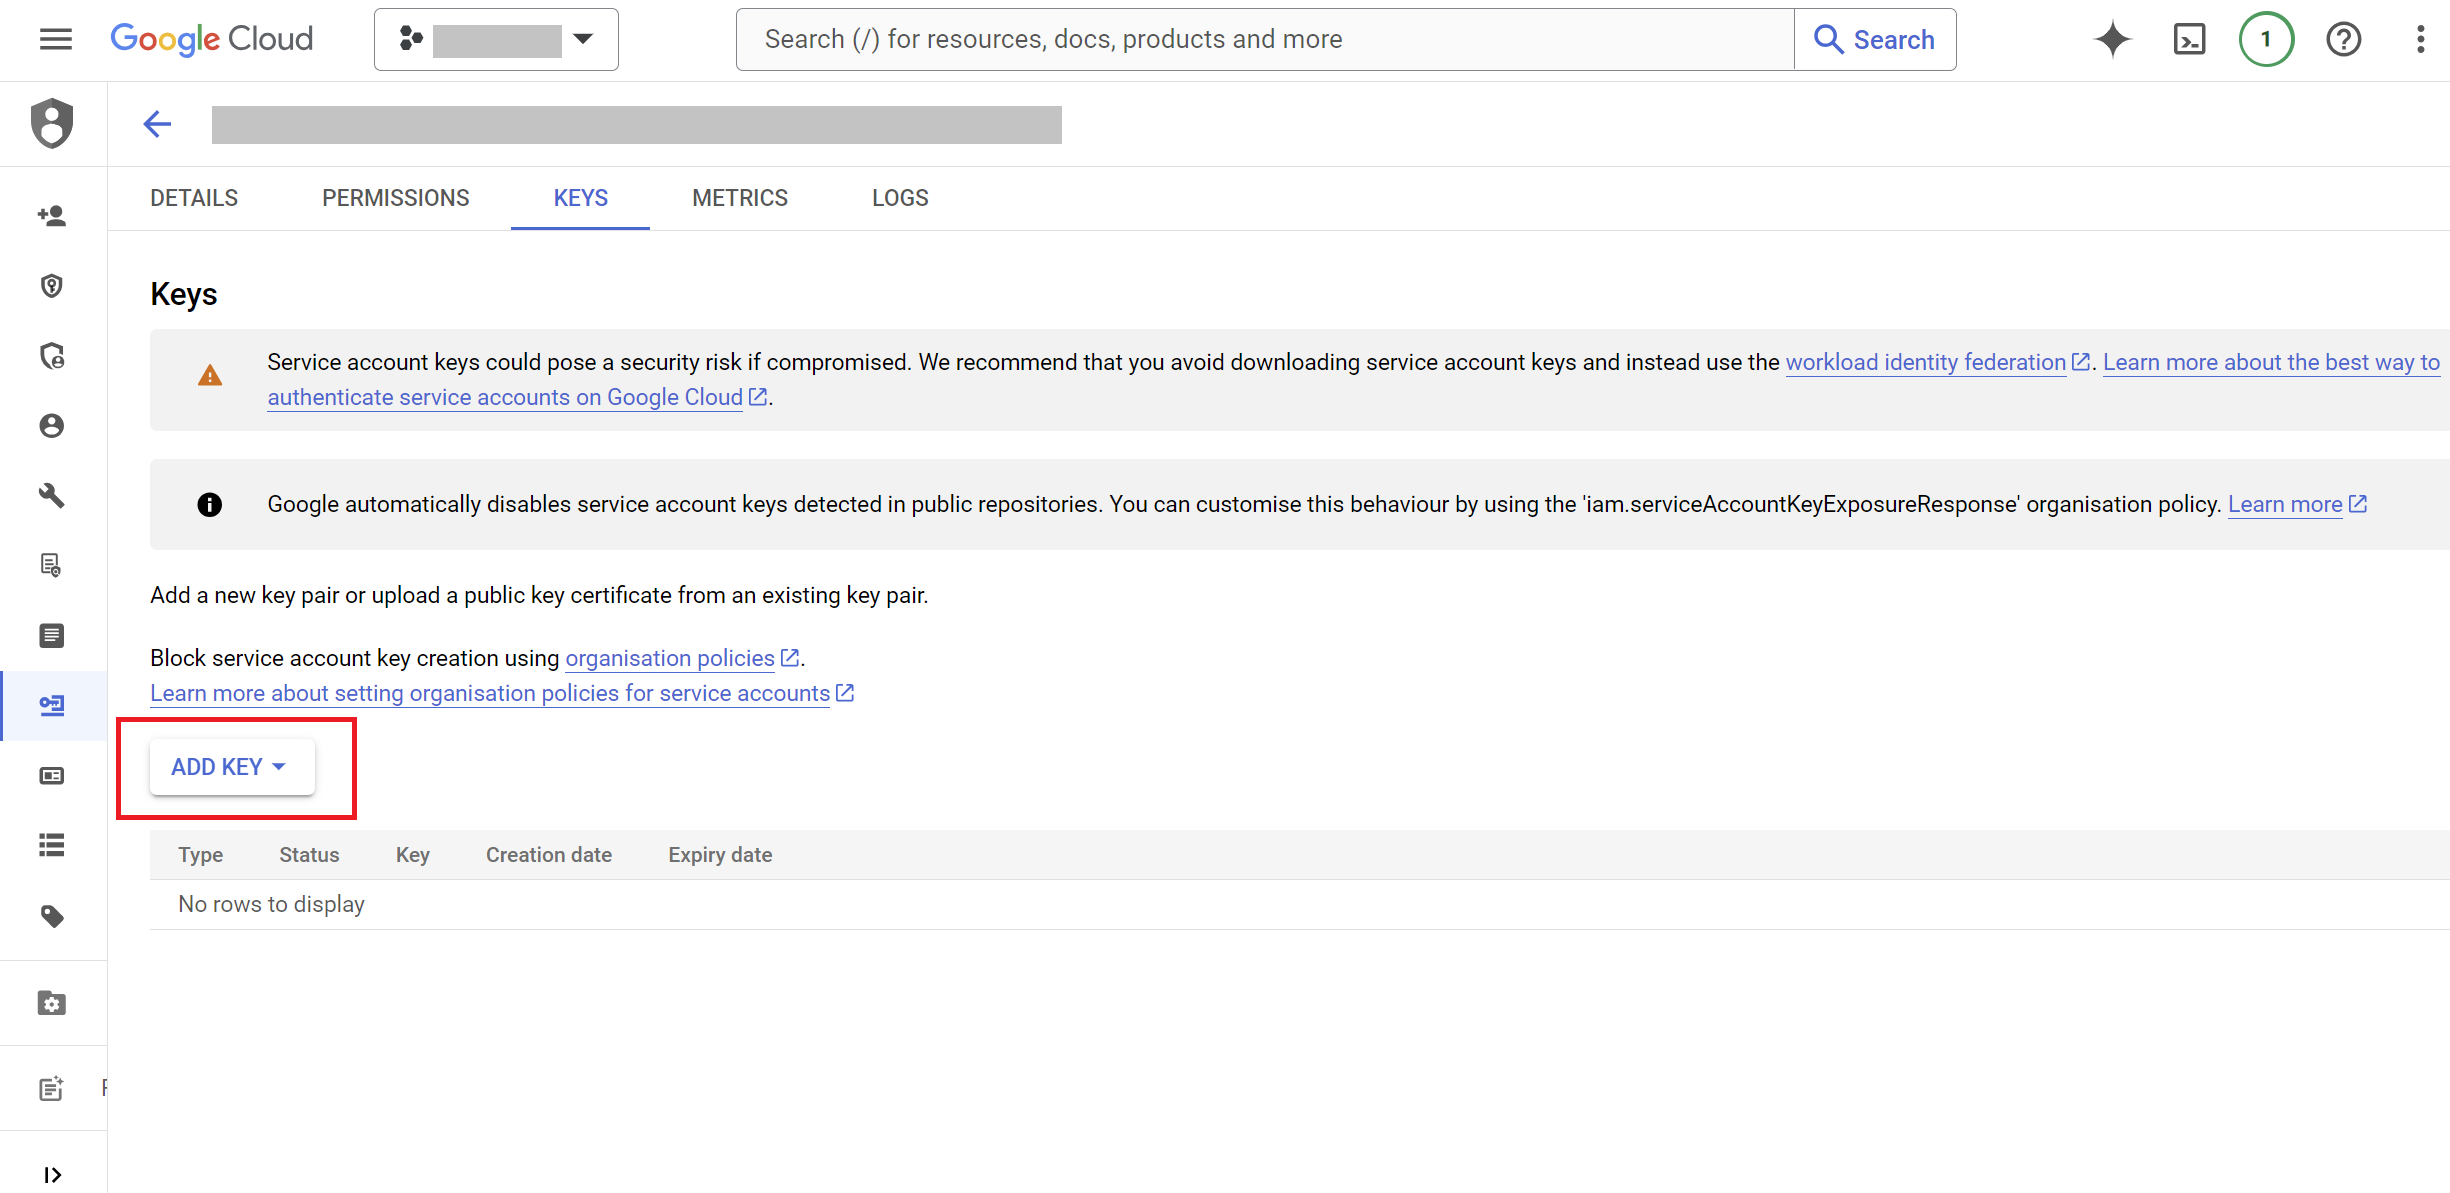
- Click
- Select Key Type:
- Choose the
JSONkey type and clickCREATE.
- Choose the
- Download Key:
- The key will automatically download to your computer. Keep this file secure, as it contains the credentials required to access the service account.
Security Measures and Implementation Safeguards
Our implementation process is built around a strong security framework that safeguards user data and blocks unauthorized access. Here's how we maintain top-level security throughout the process:
- One-Time Use of Service Account Key:
- We keep your service account key secure by using it only once. The service account key, necessary for implementation, is never stored in our databases. This means that after the initial implementation, the key is discarded. Should you need to update your setup, you will be required to upload the key again. This approach eliminates any potential vulnerabilities associated with key storage.
- Strict Separation of Front-End and Back-End Processing:
- To minimize risk, the service account key file is never handled on the front-end. Instead, when you upload the key, it is sent as a binary file via secure HTTPS requests directly to our servers. By processing the key exclusively on the back-end, we prevent any exposure of sensitive information in the front-end environment, adding an extra layer of protection against potential security breaches.
- No Credentials Stored:
- In the event of a security breach, your credentials remain safe. Since we do not store the service account key or any sensitive credentials in our system, even a successful hack would yield no access to your Google Cloud resources. This ensures that your data and accounts remain secure, regardless of external threats.
- Limited Scope of Resource Creation:
- Our implementation is highly targeted and precise. We only create the resources explicitly required for the project within your Google Cloud environment, and nothing more. This controlled and minimalistic approach ensures that there are no unnecessary permissions or resources that could be exploited, further tightening security.
See the list of resources that will be created in your GCP project
- Our implementation is highly targeted and precise. We only create the resources explicitly required for the project within your Google Cloud environment, and nothing more. This controlled and minimalistic approach ensures that there are no unnecessary permissions or resources that could be exploited, further tightening security.
By following these strict security practices, we secure your implementation, reducing risk and protecting your Google Cloud environment.