Cloud Run Monitoring
Feature description
This feature helps you monitor your Google Tag Manager (GTM) tagging servers on Google Cloud Platform (GCP) using the Cloud Run service. It ensures that your servers stay healthy, secure, and running smoothly. It automatically sets up monitoring rules in your GCP project, such as checking memory and CPU usage, verifying SSL certificates, and making sure your servers are always up and running. This allows you to keep an eye on your tagging servers and make sure they are working properly.
The main goal of this feature is to keep your tagging servers reliable so your data collection is uninterrupted. This way, you can focus on analyzing and improving your marketing campaigns without worrying abut technical problems. If anything goes wrong, you’ll be notified right away through your preferred method, whether by email or Slack. This helps you quickly fix any issues that is detected to make sure your GTM server continues to provide the data you need.
How it works
To get started with this monitoring feature, you'll first need to provide us with a service account key from your GCP project. This key should have the necessary permissions to create and manage resources within your project. The instructions of how to create the service account key and the necessary permissions are explained in further steps.
The setup involves configuring a comprehensive set of alert policies to monitor the performance and health of your Cloud Run services. These policies include tracking CPU and memory usage to ensure your services are operating efficiently, performing uptime checks to verify continuous service availability, and monitoring SSL certificate expiration to maintain security. Additionally, a Pub/Sub topic is configured along with a corresponding subscription that receives messages from the notification channels defined in the alert policies. These messages are then forwarded to a Cloud Function within our GCP project, enabling efficient handling and routing of notifications. This setup ensures that any issues are promptly detected and addressed, maintaining the reliability and security of your services.
Additionally, we will set up a service account specifically for monitoring with the necessary IAM roles to manage and access these resources.
Once everything is in place, the monitoring system will actively keep an eye on your Cloud Run services. If any issues arise, you will receive notifications through your preferred channels, such as email or Slack, so you can quickly address any problems and ensure your tagging infrastructure remains reliable.
Resources Created in your GCP project
- Notification Channel
- A notification channel linked to the alert policies that pushes messages to a pub/sub topic in your project.
- Pub/Sub Topic and Subscription
- A Pub/Sub topic that receives the alert messages from the notification channel used in the alert policies.
- A Pub/Sub subscription with push configuration for Cloud Functions.
- Alert Policies
- CPU Alert Policy: Monitors CPU utilization of Cloud Run services.
- Memory Alert Policy: Monitors memory utilization of Cloud Run services.
- Uptime Check Alert Policy: Ensures Cloud Run services are up and running.
- SSL Certificate Expiration Alert Policy: Monitors SSL certificate expiration.
- Service Account
- A service account named
cloud-run-monitoring@{project_id}.iam.gserviceaccount.comwithPub/Sub Publisherrole.
- A service account named
How to Enable Cloud Run Monitoring
To enable the feature you need to take the steps below:
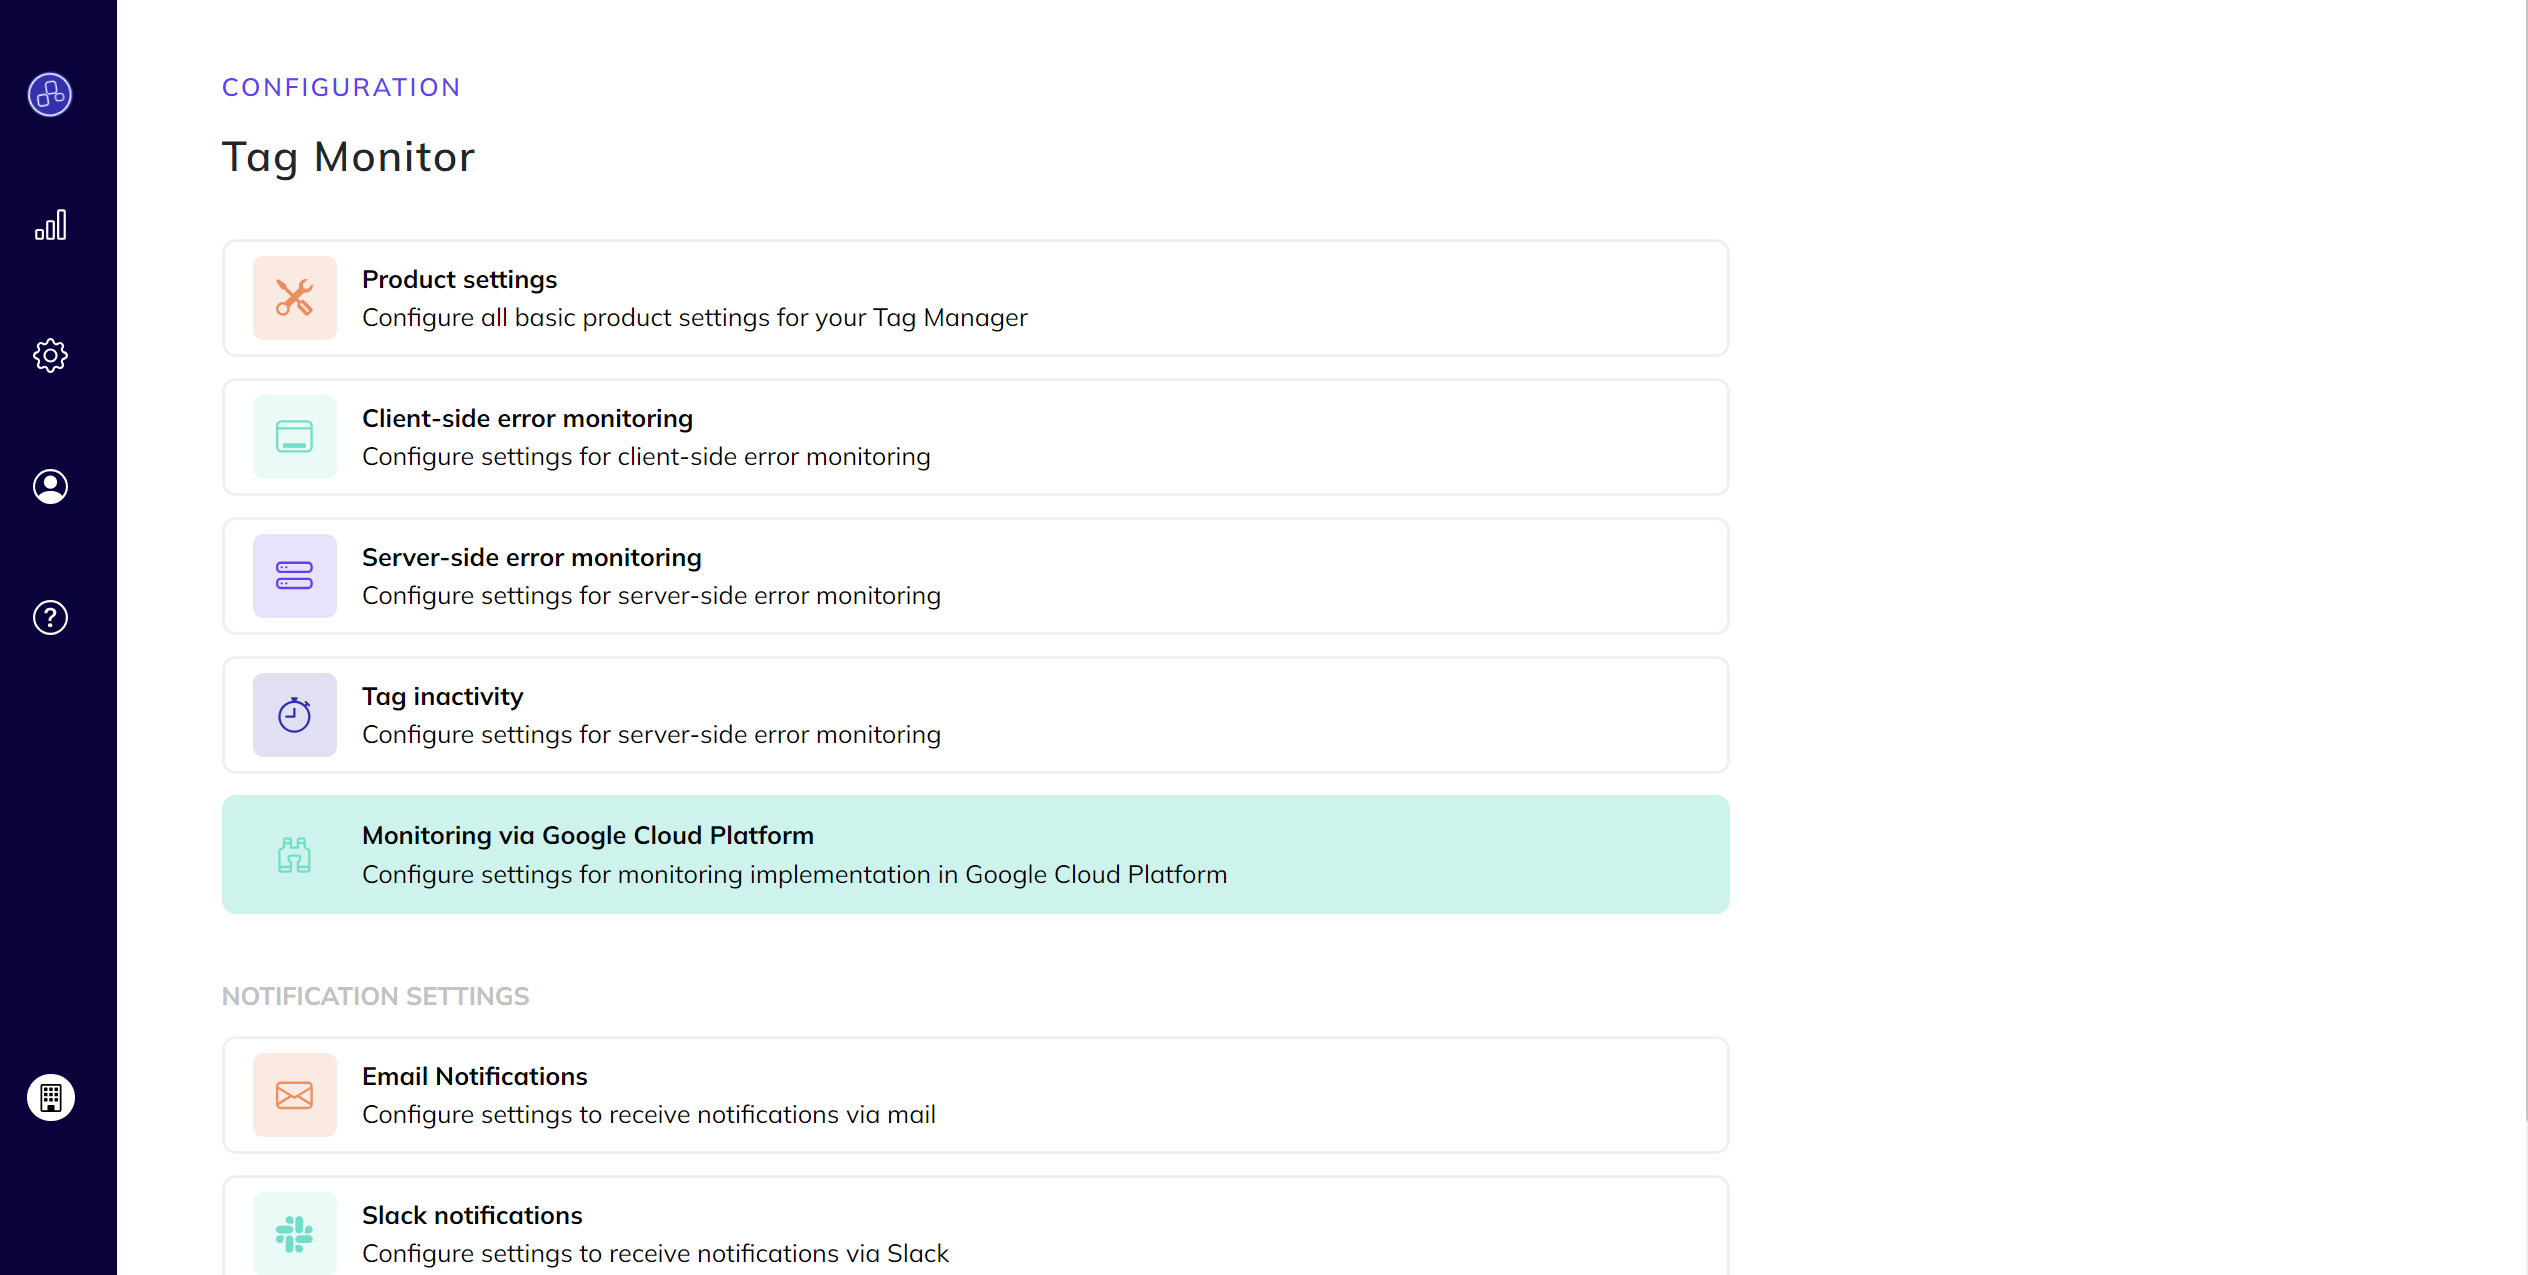
- Navigate to the Configuration Page:
- Go to the Tag Monitor Configuration Page on our portal.
- Access the Monitoring Tab:
- Click on the
Monitoring via Google Cloud Platformtab.
- Click on the
- Enable Cloud Run Monitoring:
- Turn on the toggle for Cloud Run monitoring.
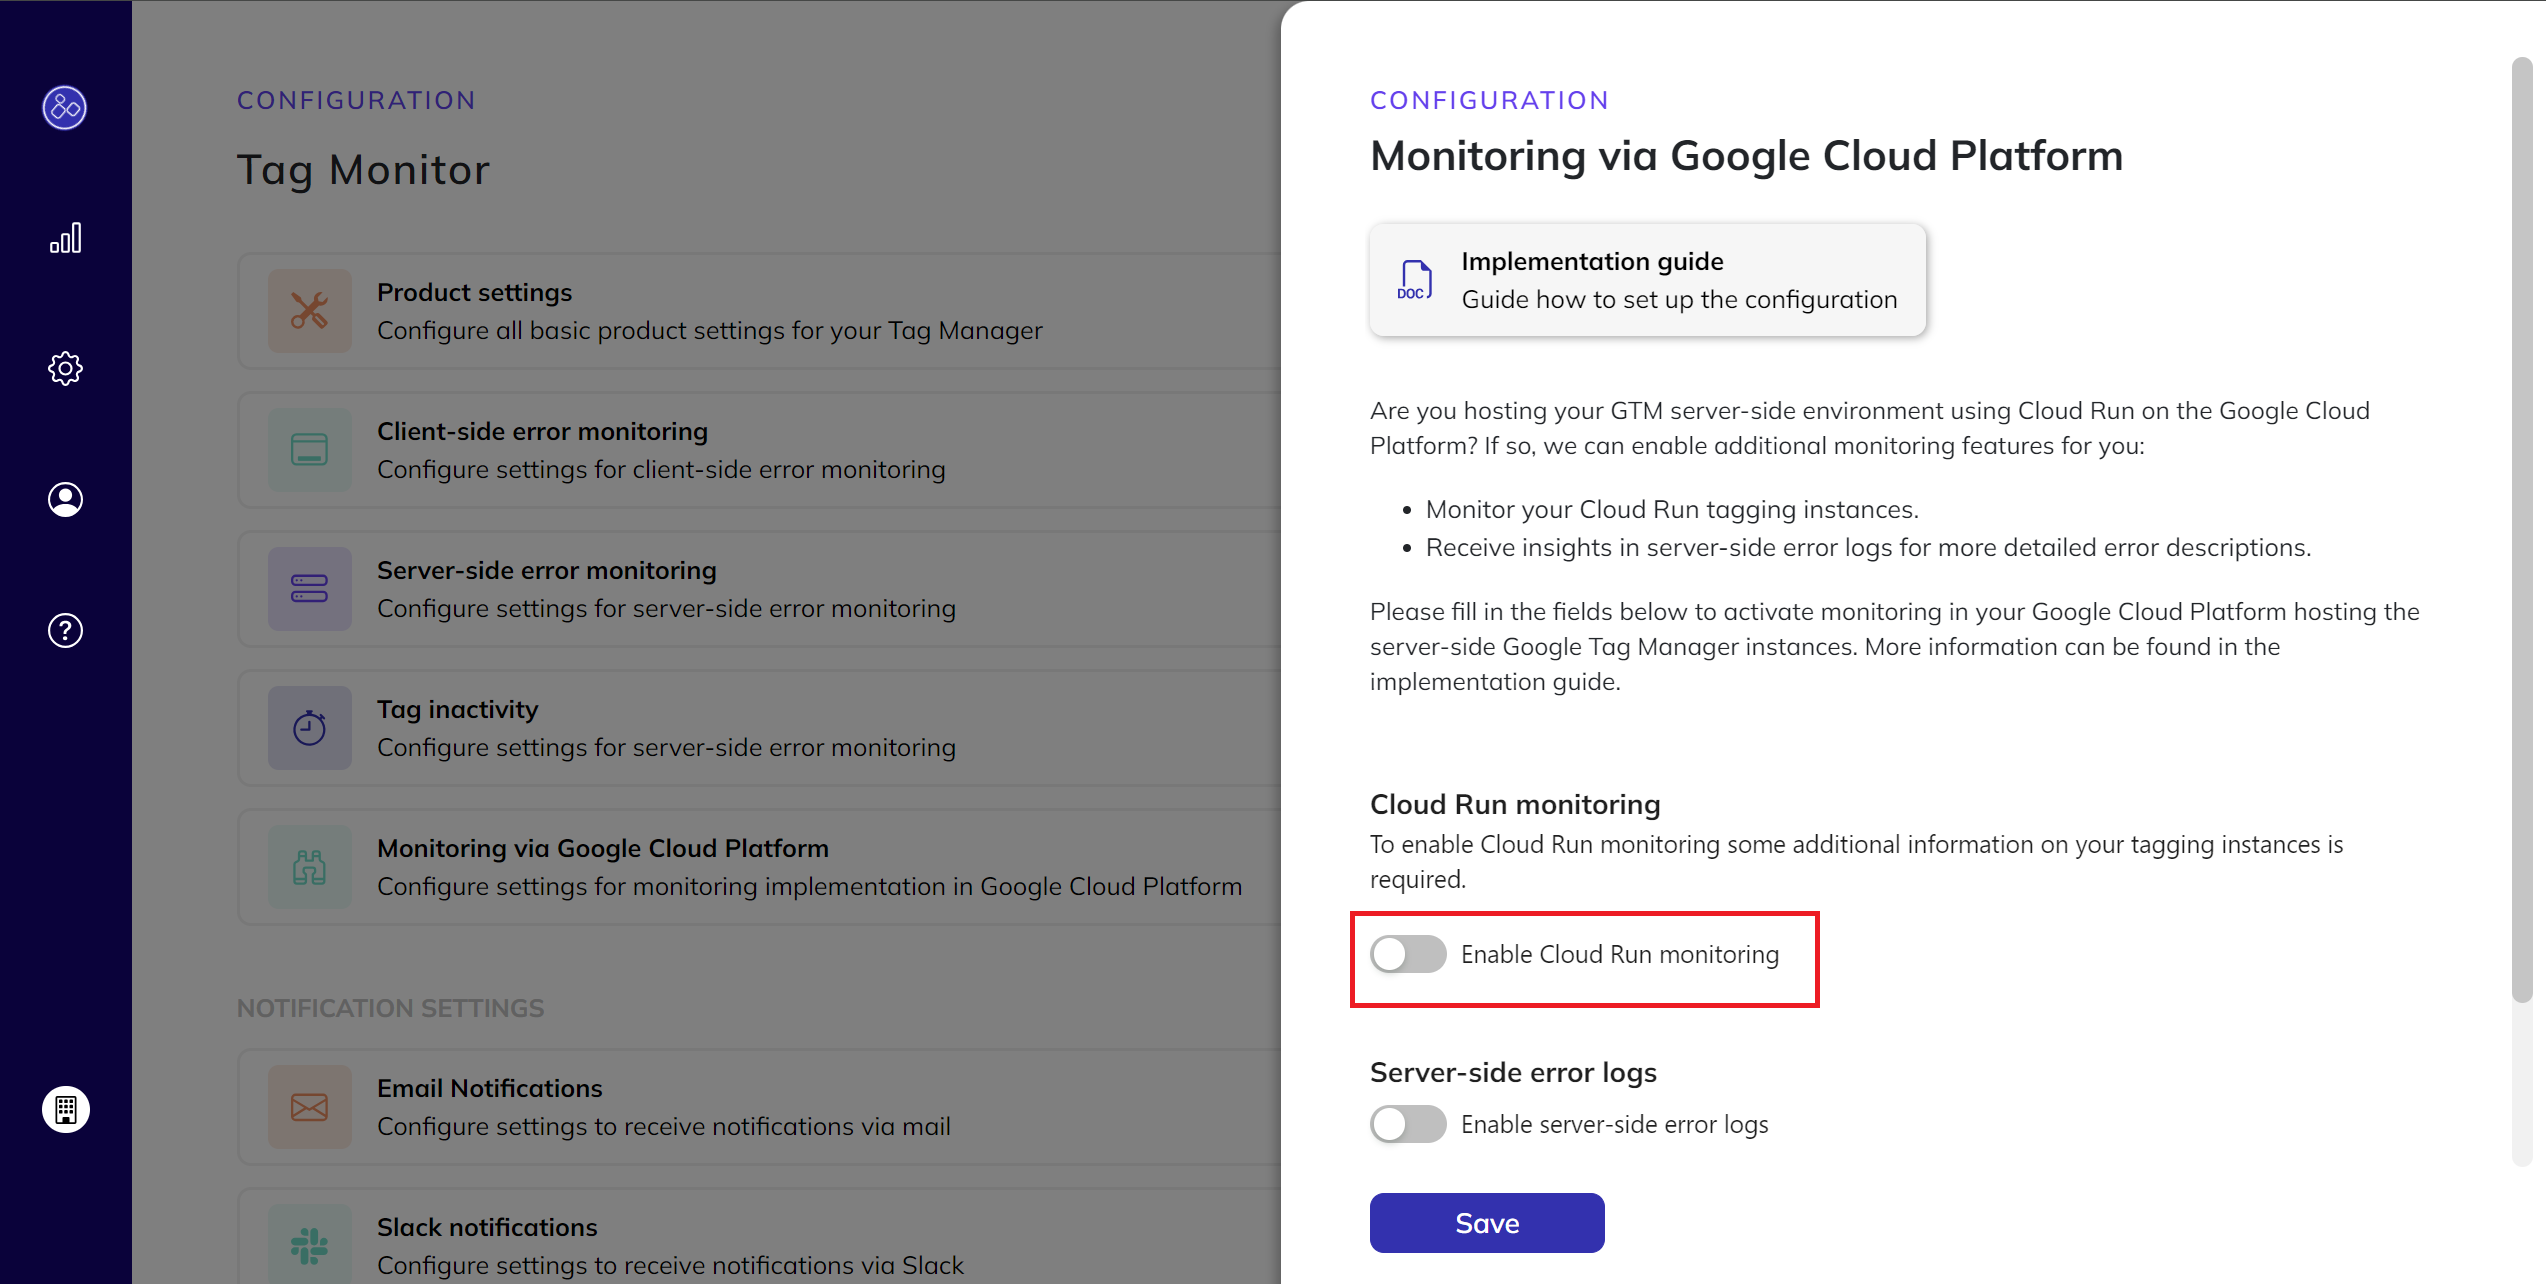
- Turn on the toggle for Cloud Run monitoring.
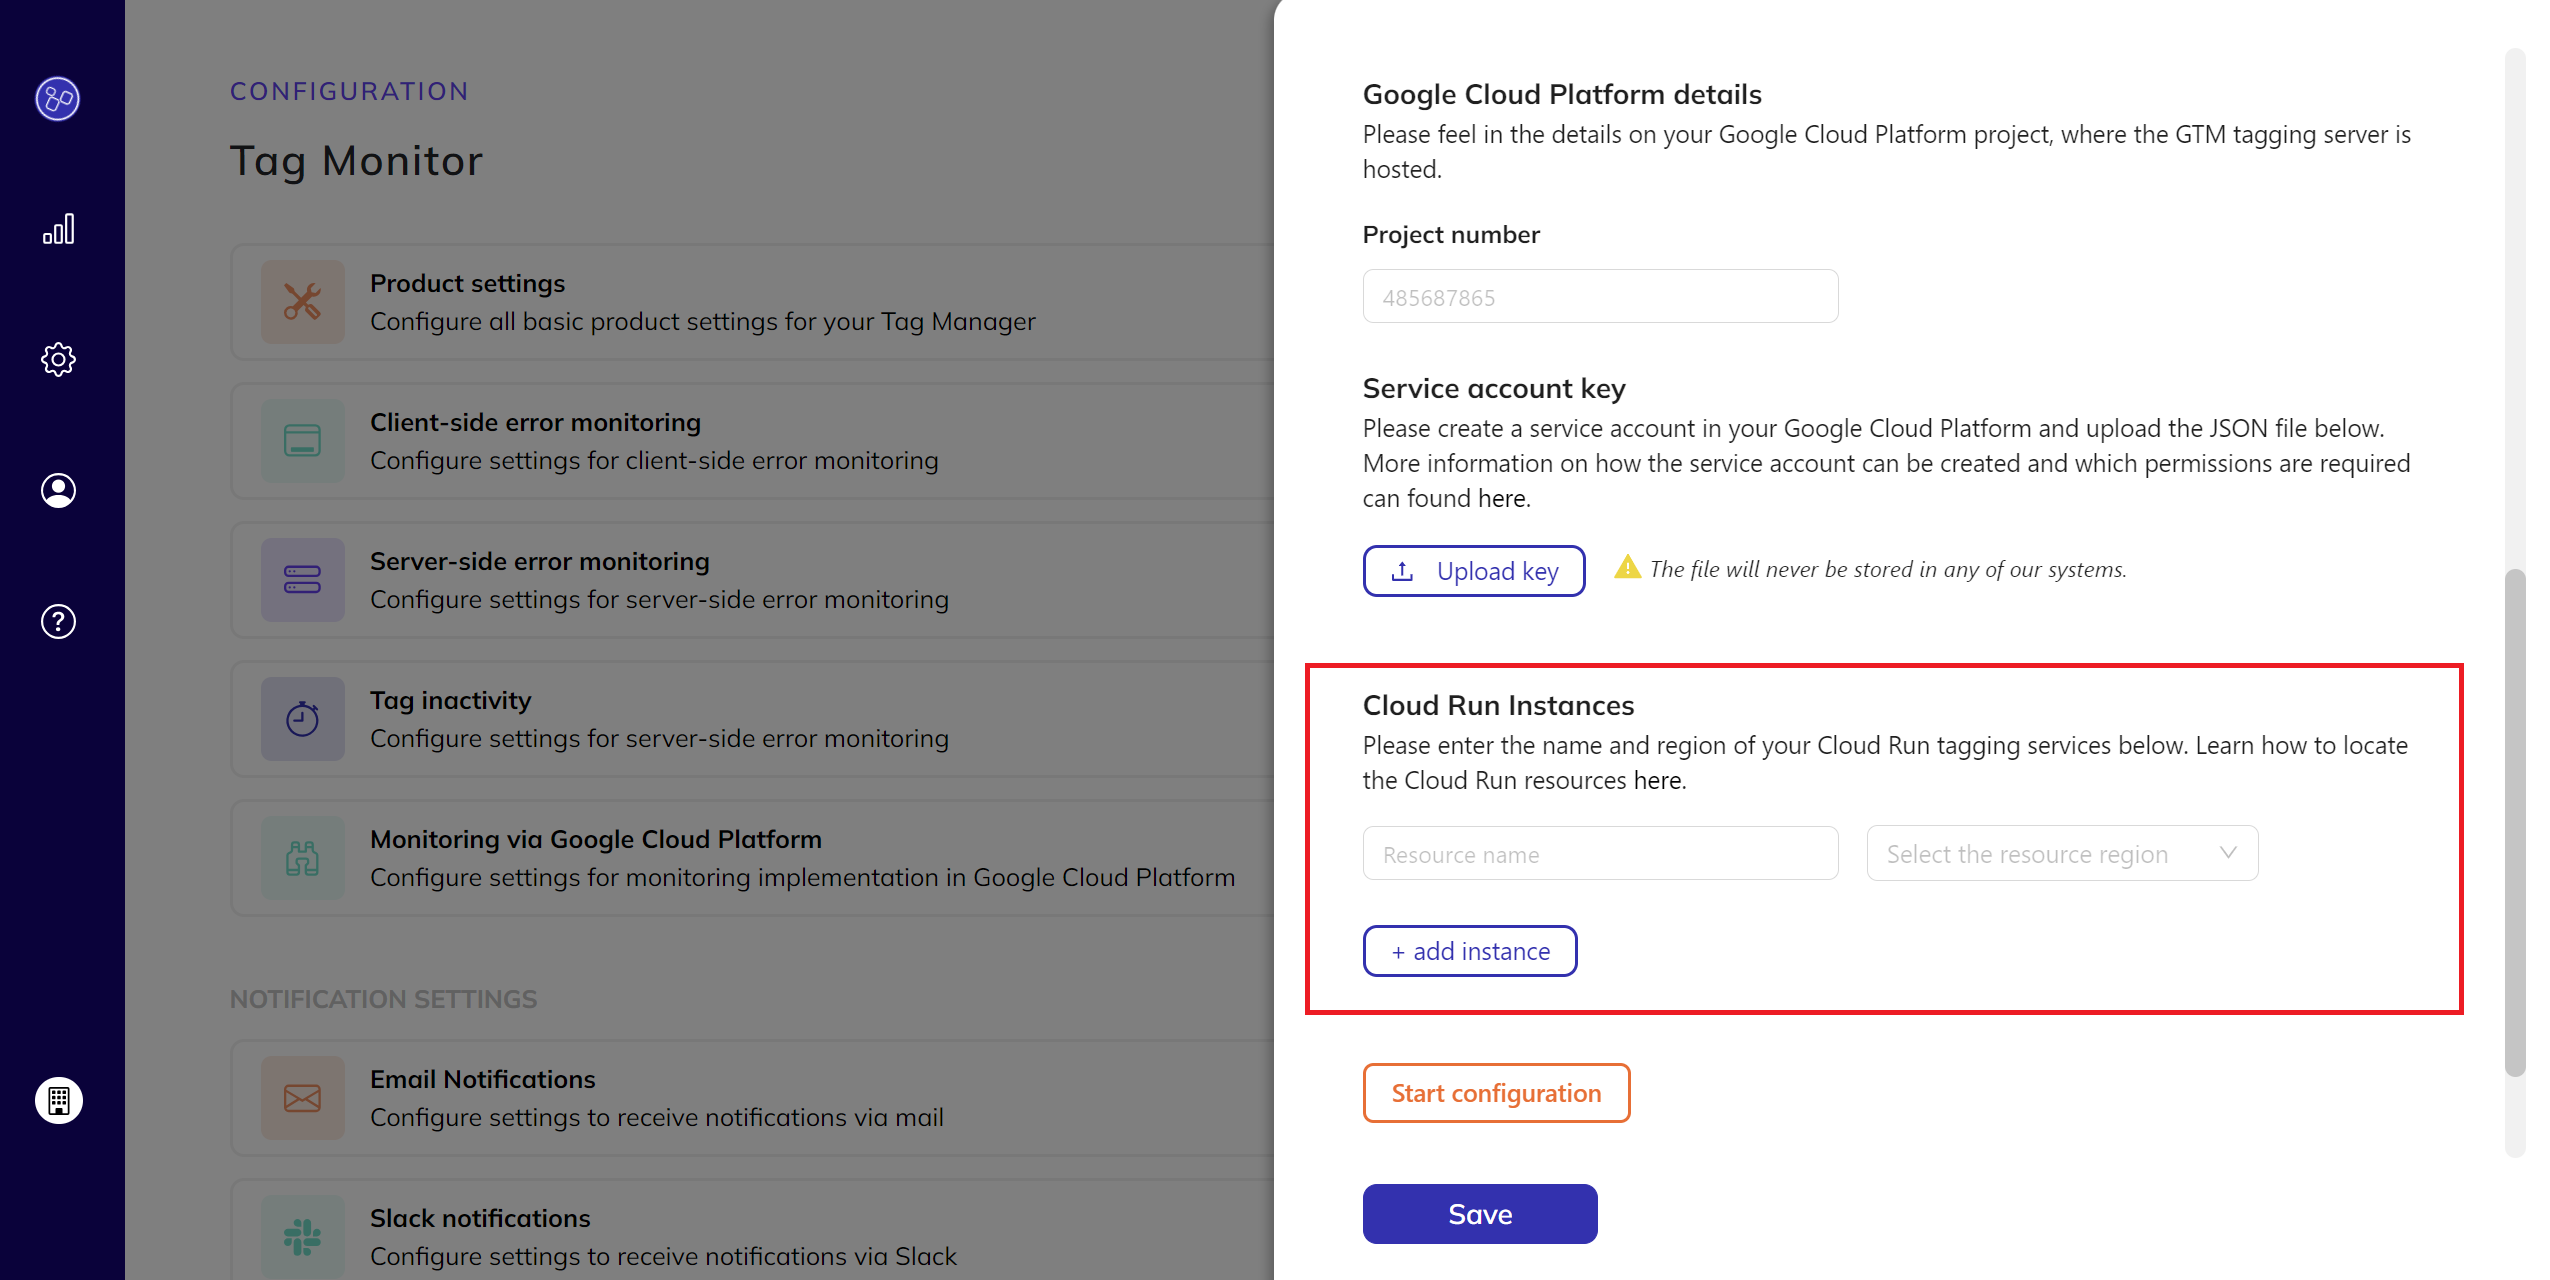
- Enter Project Information:
- In the project number field, enter your GCP project number.
Where to find your project number?
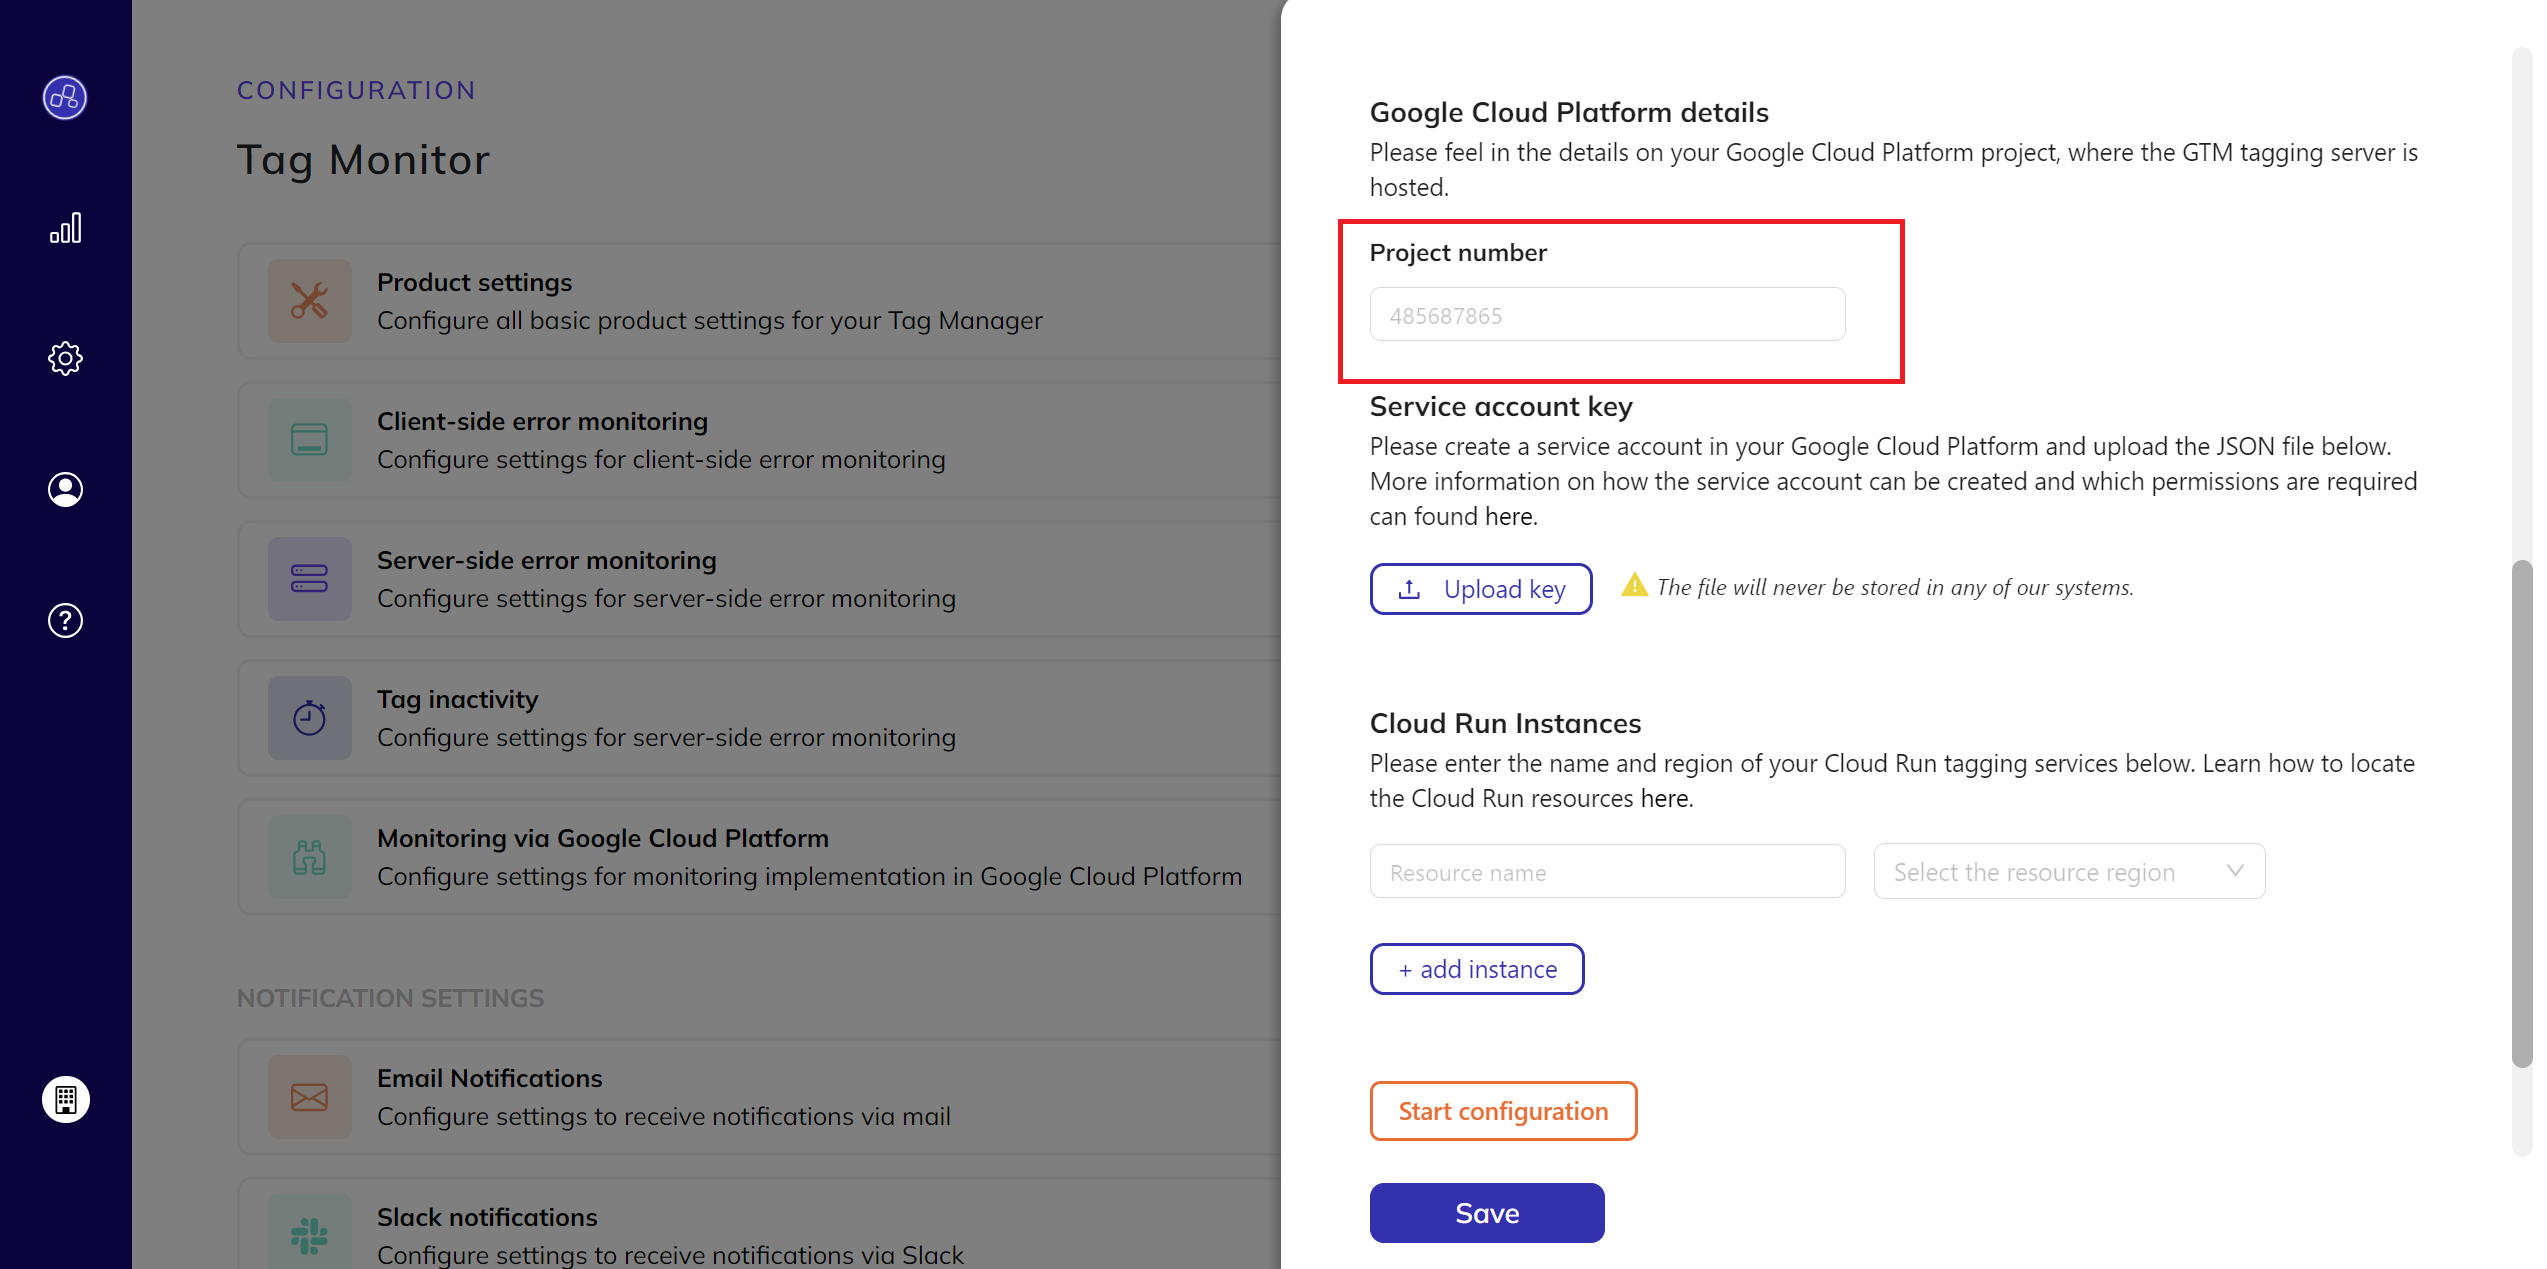
- In the project number field, enter your GCP project number.
- Upload Service Account Key:
- Upload your service account key.
How to create the service account key? - Note: This service account key will not be stored in any of our systems for privacy and security purposes. Find more about
the security Measures and Implementation safeguards here.
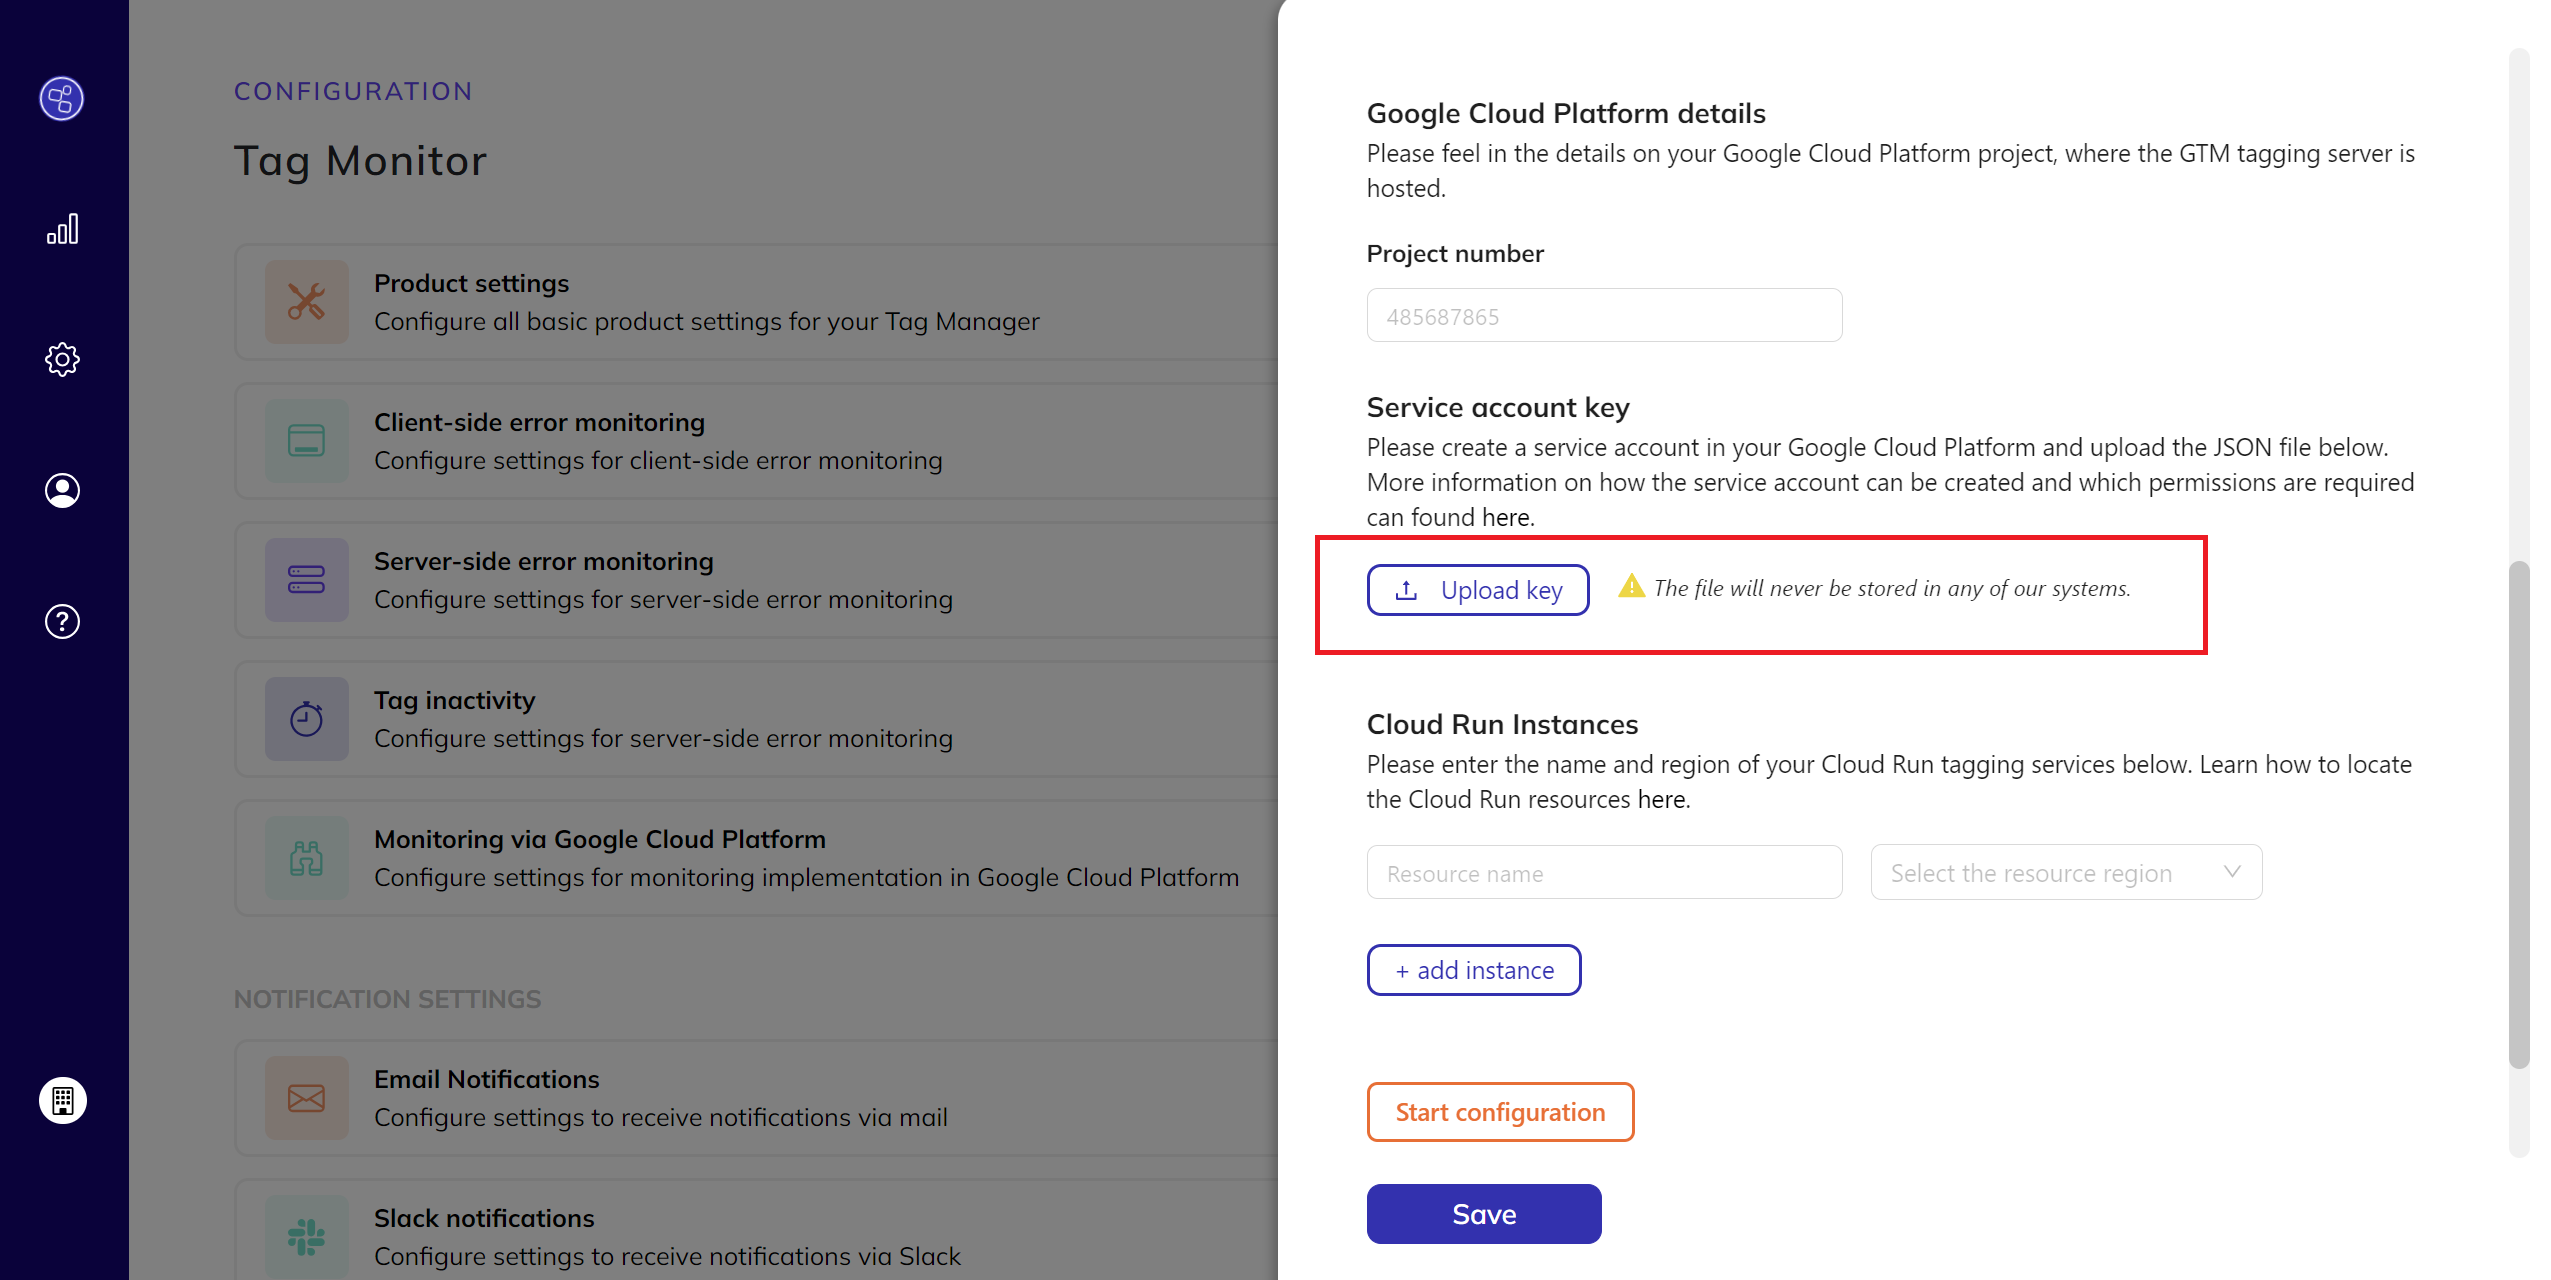
- Upload your service account key.
- Provide Cloud Run Details:
- Enter the name and the region of your Cloud Run resources for your tagging service.
How to find the Cloud Run Details
- Enter the name and the region of your Cloud Run resources for your tagging service.
-
Start Configuration:
- Click on
Start Configurationto initiate the process.
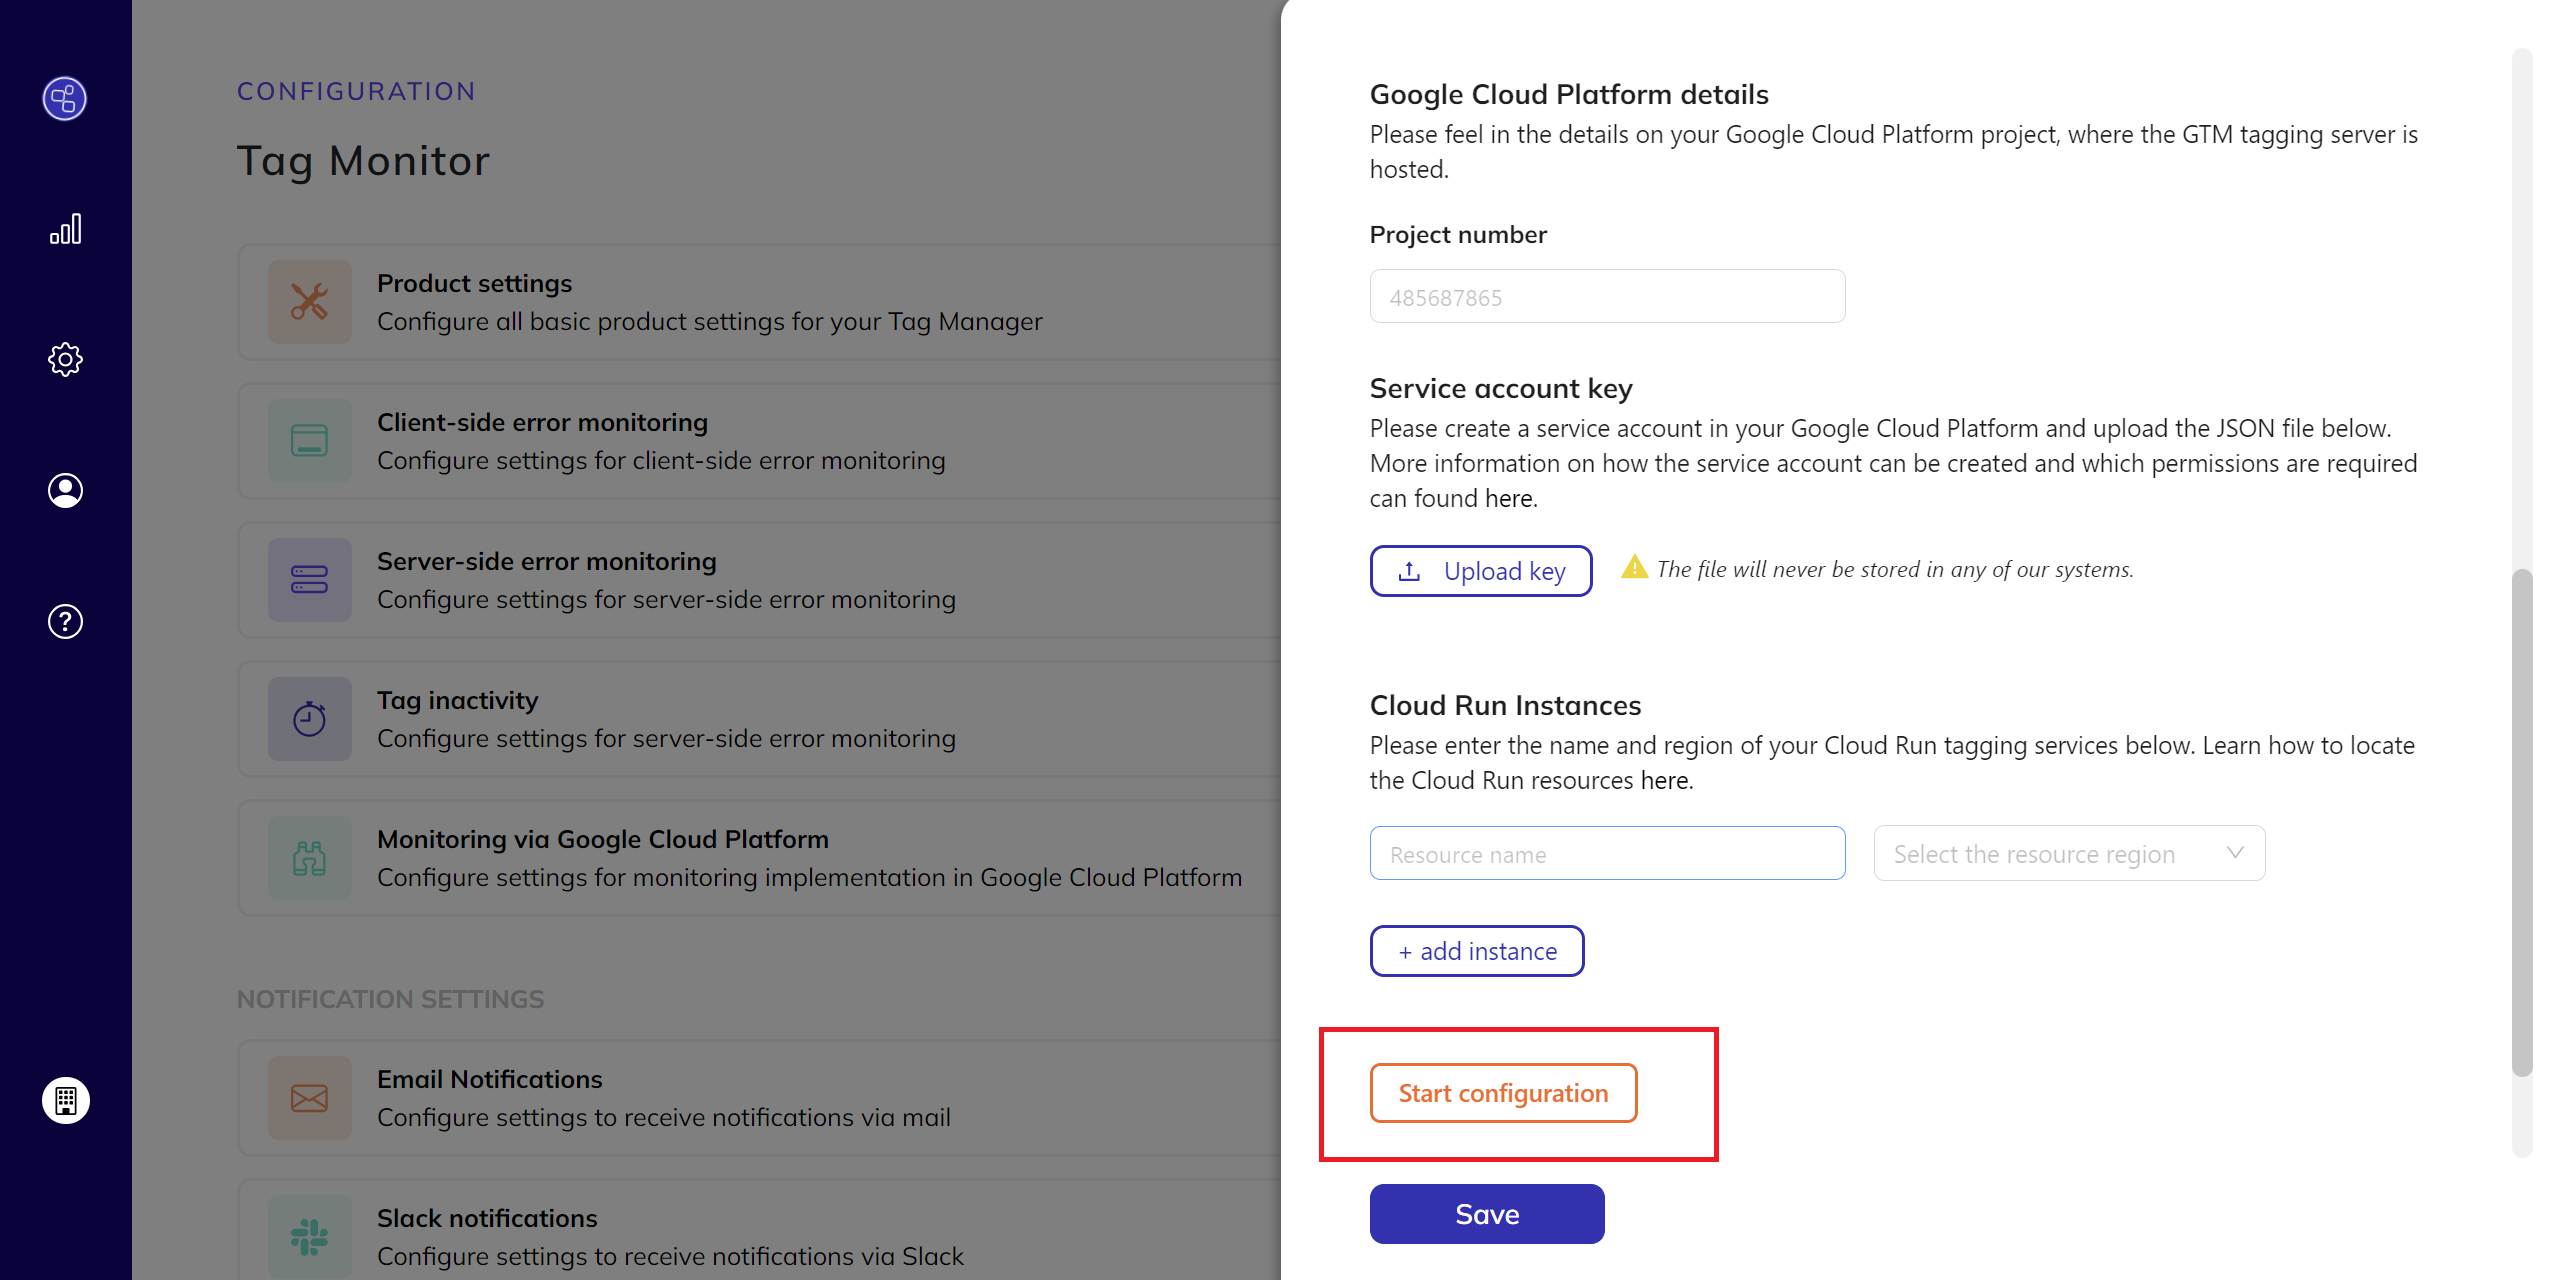
- Click on
-
Confirm the implementation:
- Once the following message appears on your screen, you can confirm that the implementation was successful.
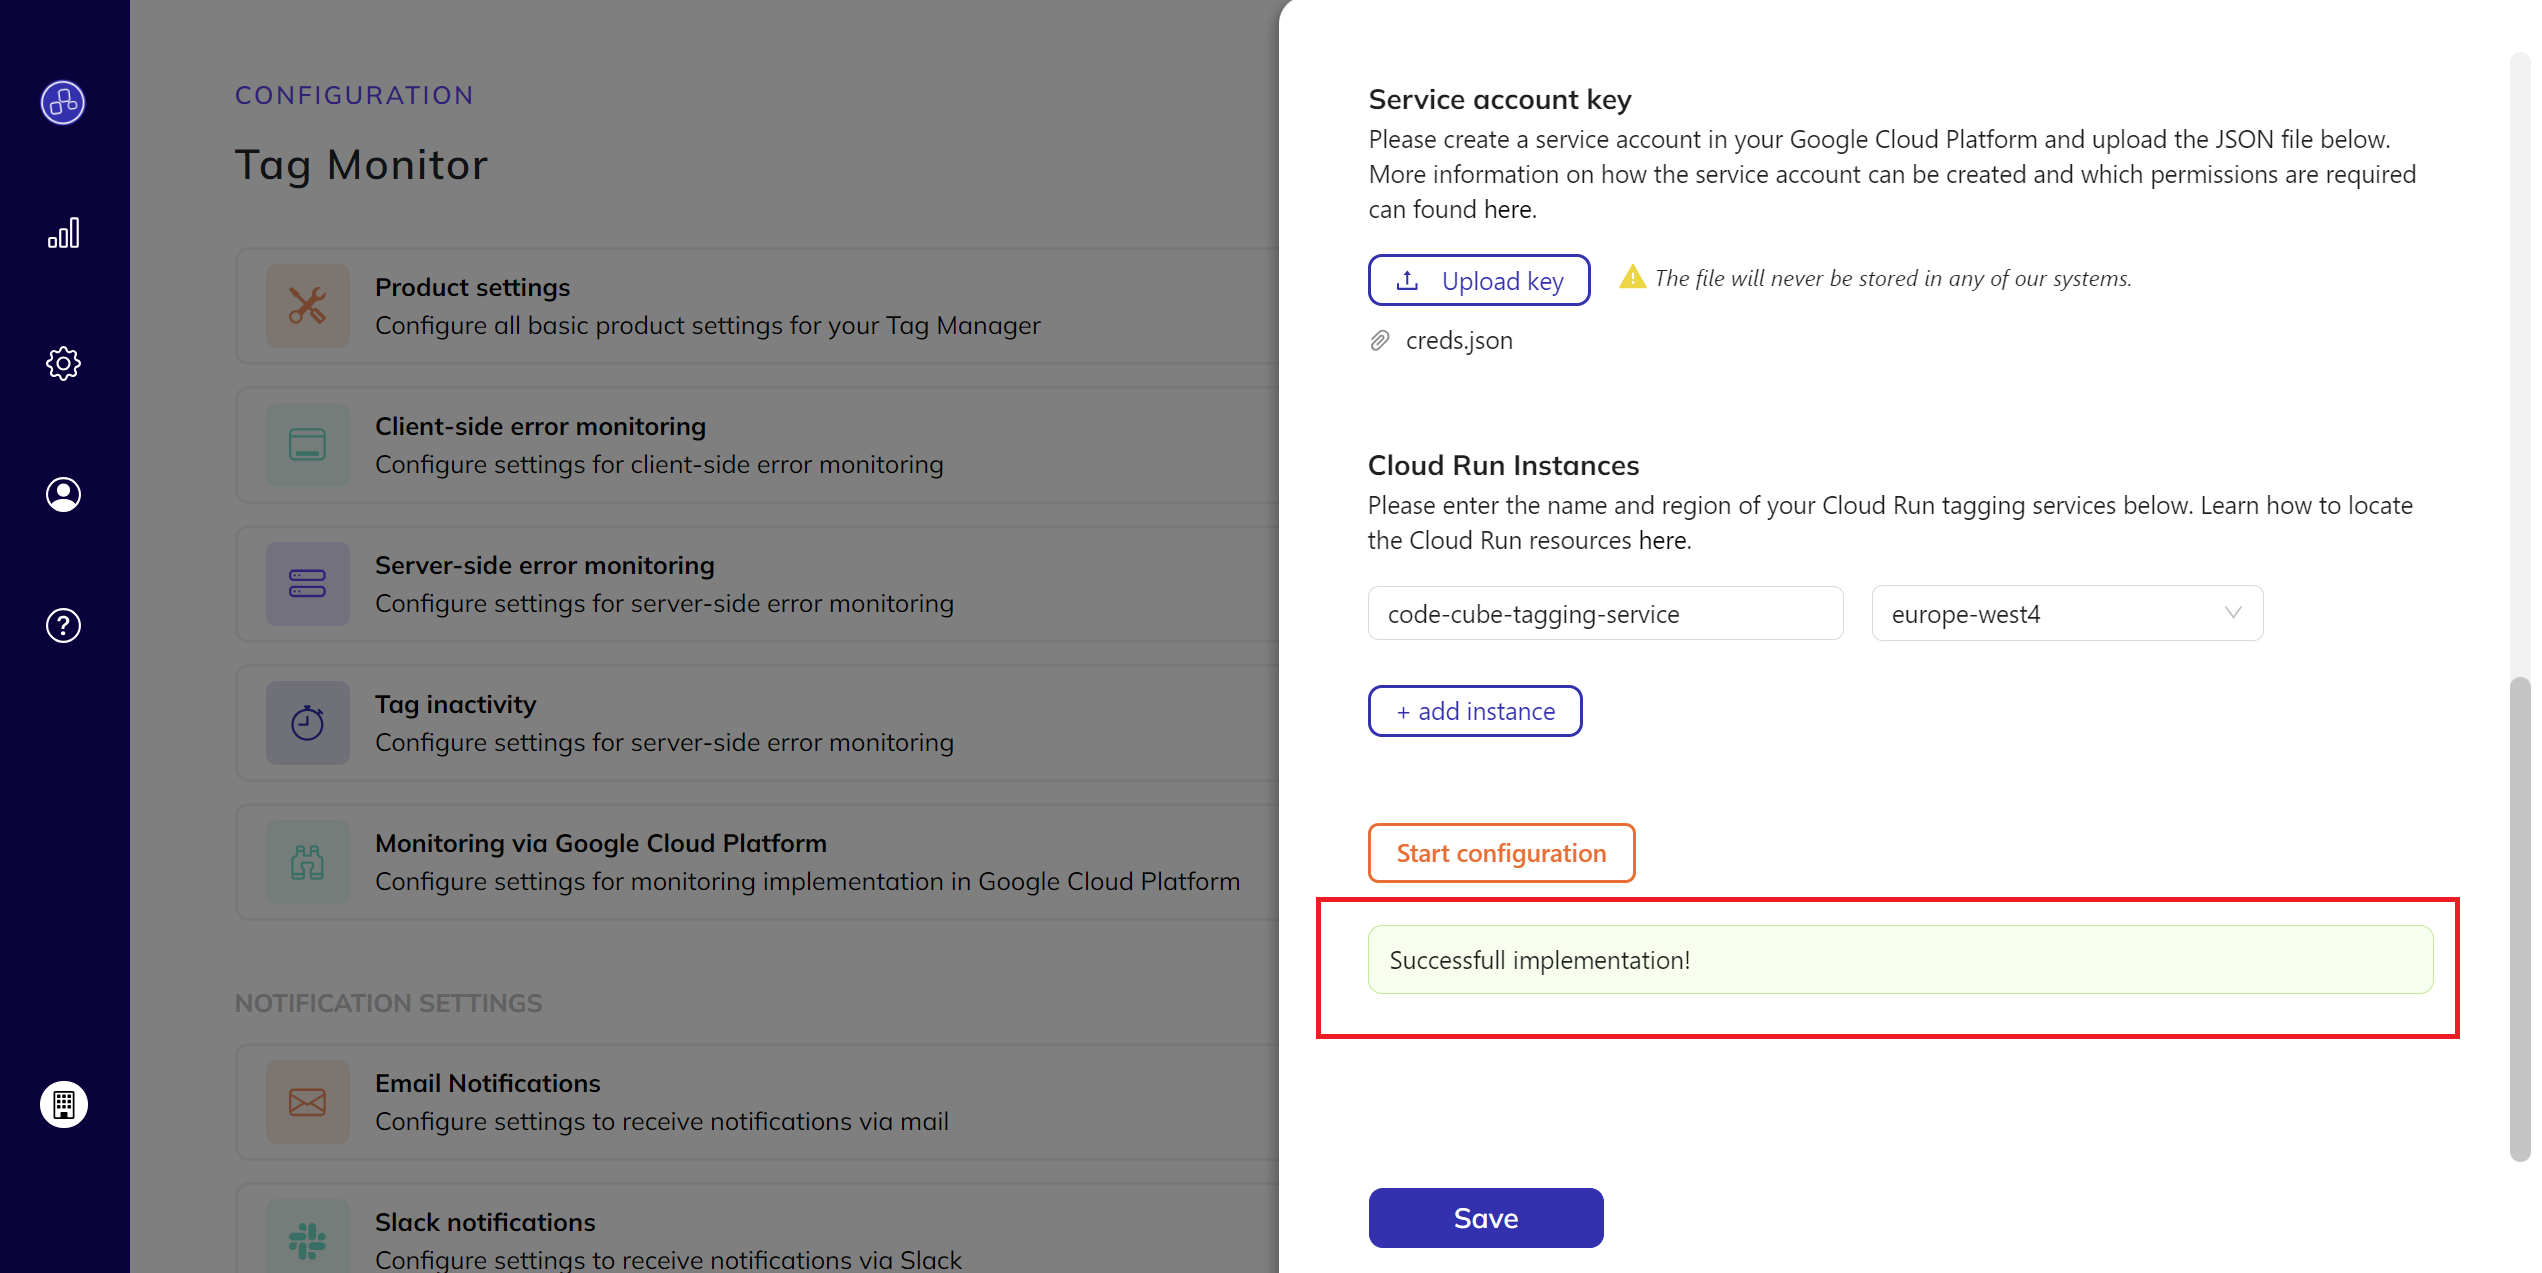
- Once the following message appears on your screen, you can confirm that the implementation was successful.
- Enable the notifications
Set up your preferred notification methods (e.g., email or Slack) to receive alerts when an event occurs.
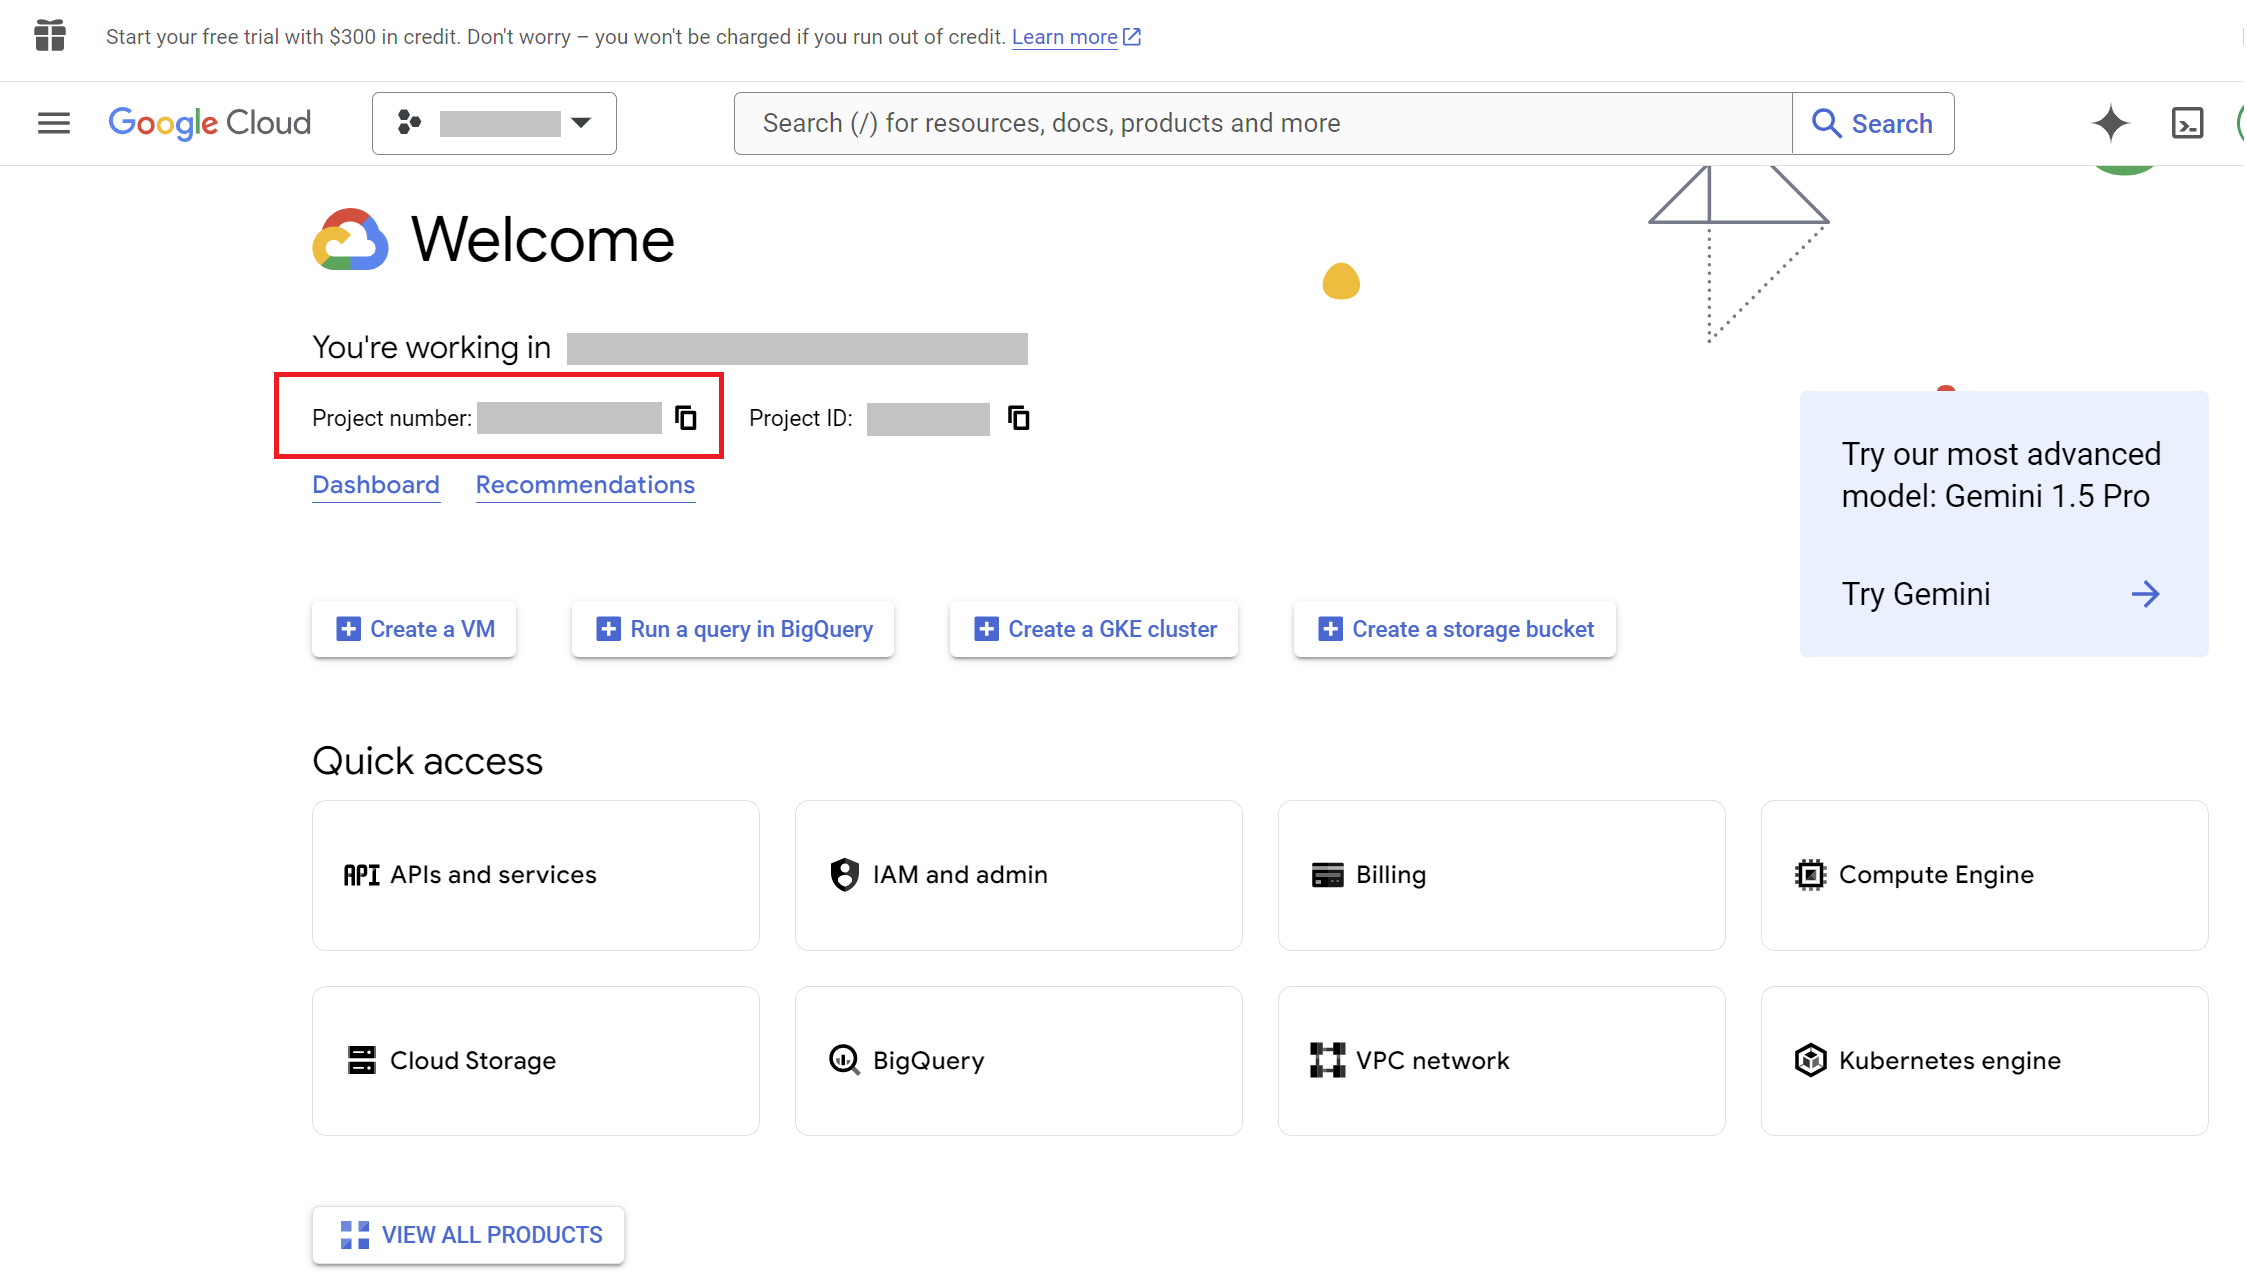
How to Find Your GCP Project Number
- Log in to the Google Cloud Console:
- Visit Google Cloud Console.
- Sign in with your Google account if you're not already logged in.
-
Select Your Project:
- In the top navigation bar, click on the project drop-down menu (typically displaying the name of your currently selected project).
- If you have multiple projects, select the one you want from the list.
-
Locate the Project Number:
- After selecting your project, the Project Info panel will appear on the dashboard.
- Your Project number will be displayed in this panel, usually right below the project name.
Creating a Service Account and Generating a Key
To enable the automation of monitoring and management processes, you need to create a Google Cloud Service Account with specific permissions. Follow these steps to create the service account, assign the necessary roles, and generate a service account key for upload to our portal.
Step 1: Create a Service Account
- Navigate to the Google Cloud Console
- Open the Google Cloud Console.
- Select Your Project:
- Ensure you have the correct project selected from the project selector dropdown at the top of the page.
- Go to the Service Accounts Page
- Navigate to
IAM & Admin>Service Accounts.
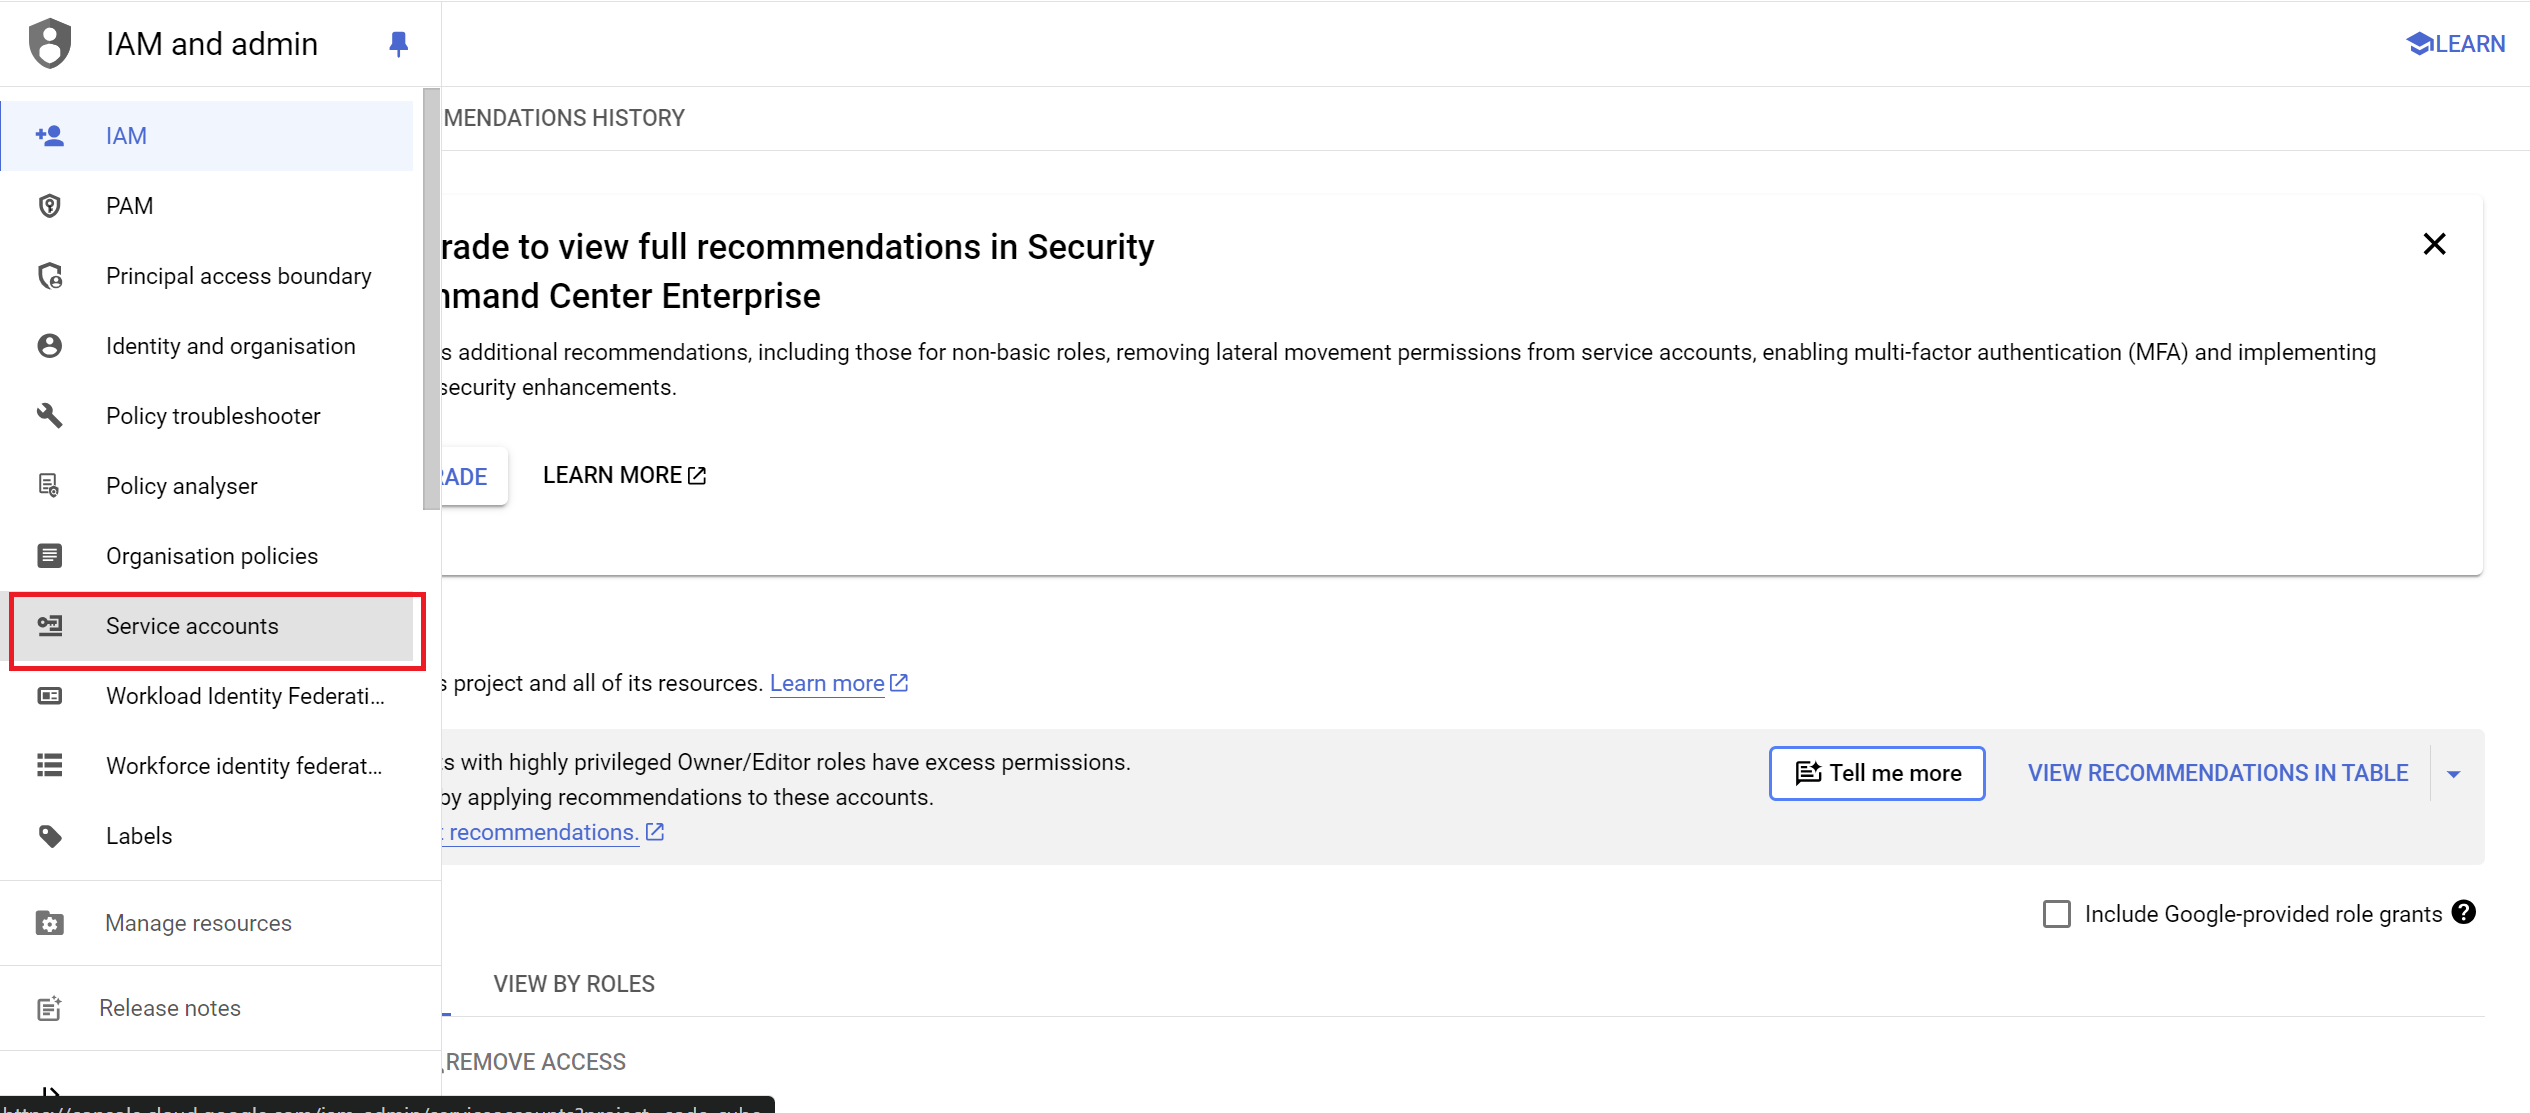
- Navigate to
- Create a New Service Account
- Click the
+ CREATE SERVICE ACCOUNTbutton.
- Enter a name, ID, and description for the service account.
- Click
CREATE AND CONTINUE. - Copy the service account email into your clipboard for the next step.
- Click the
Step 2: Assign Roles to the Service Account
- Navigate to
IAM & Admin>IAM.
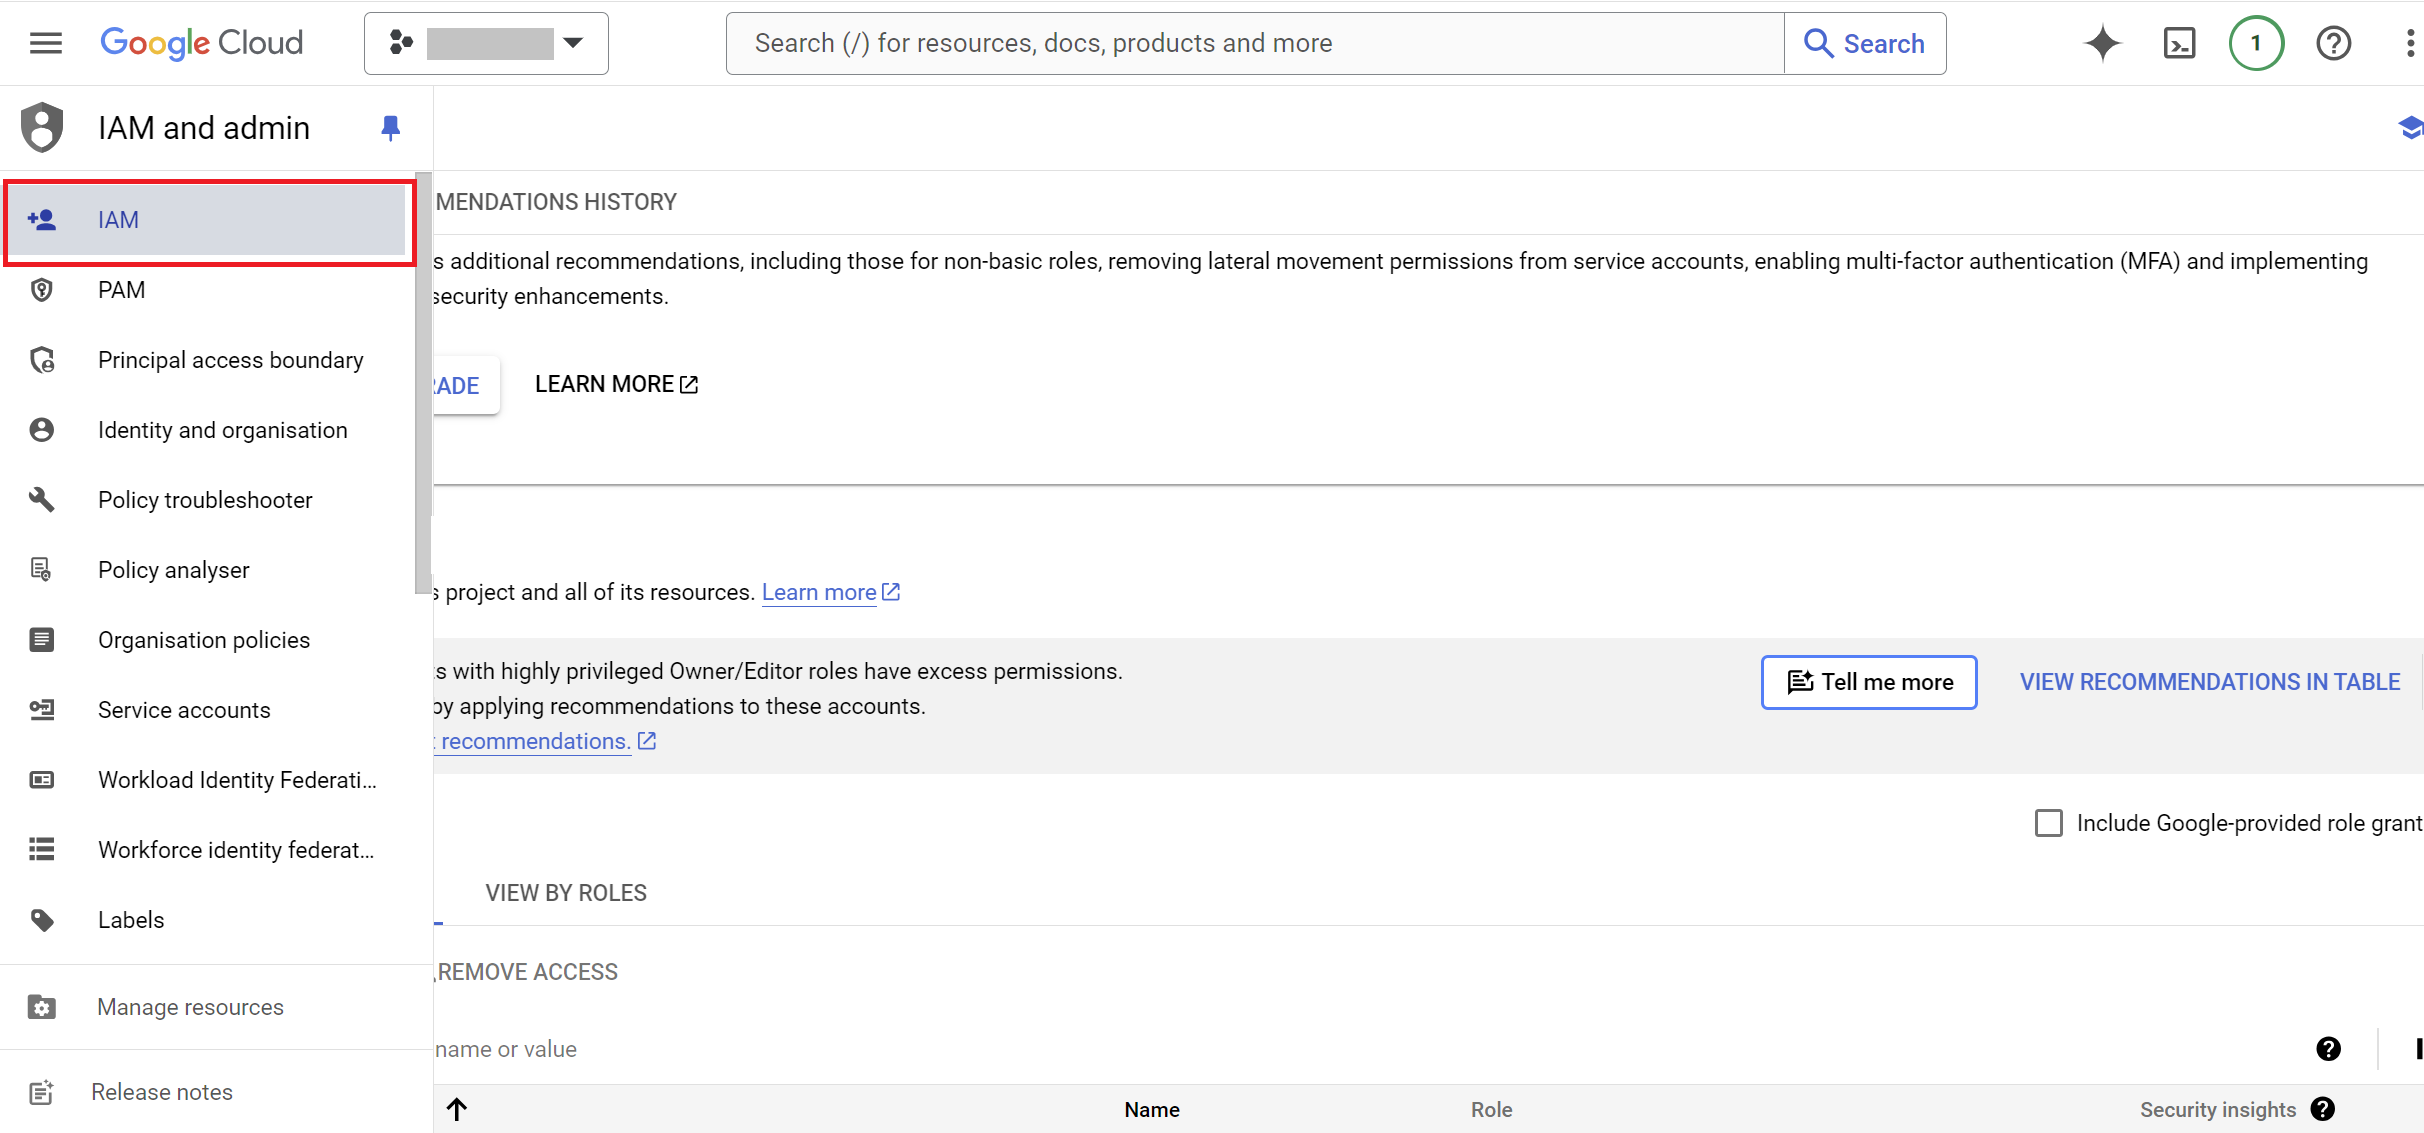
- Click on
GRANT ACCESSbutton.
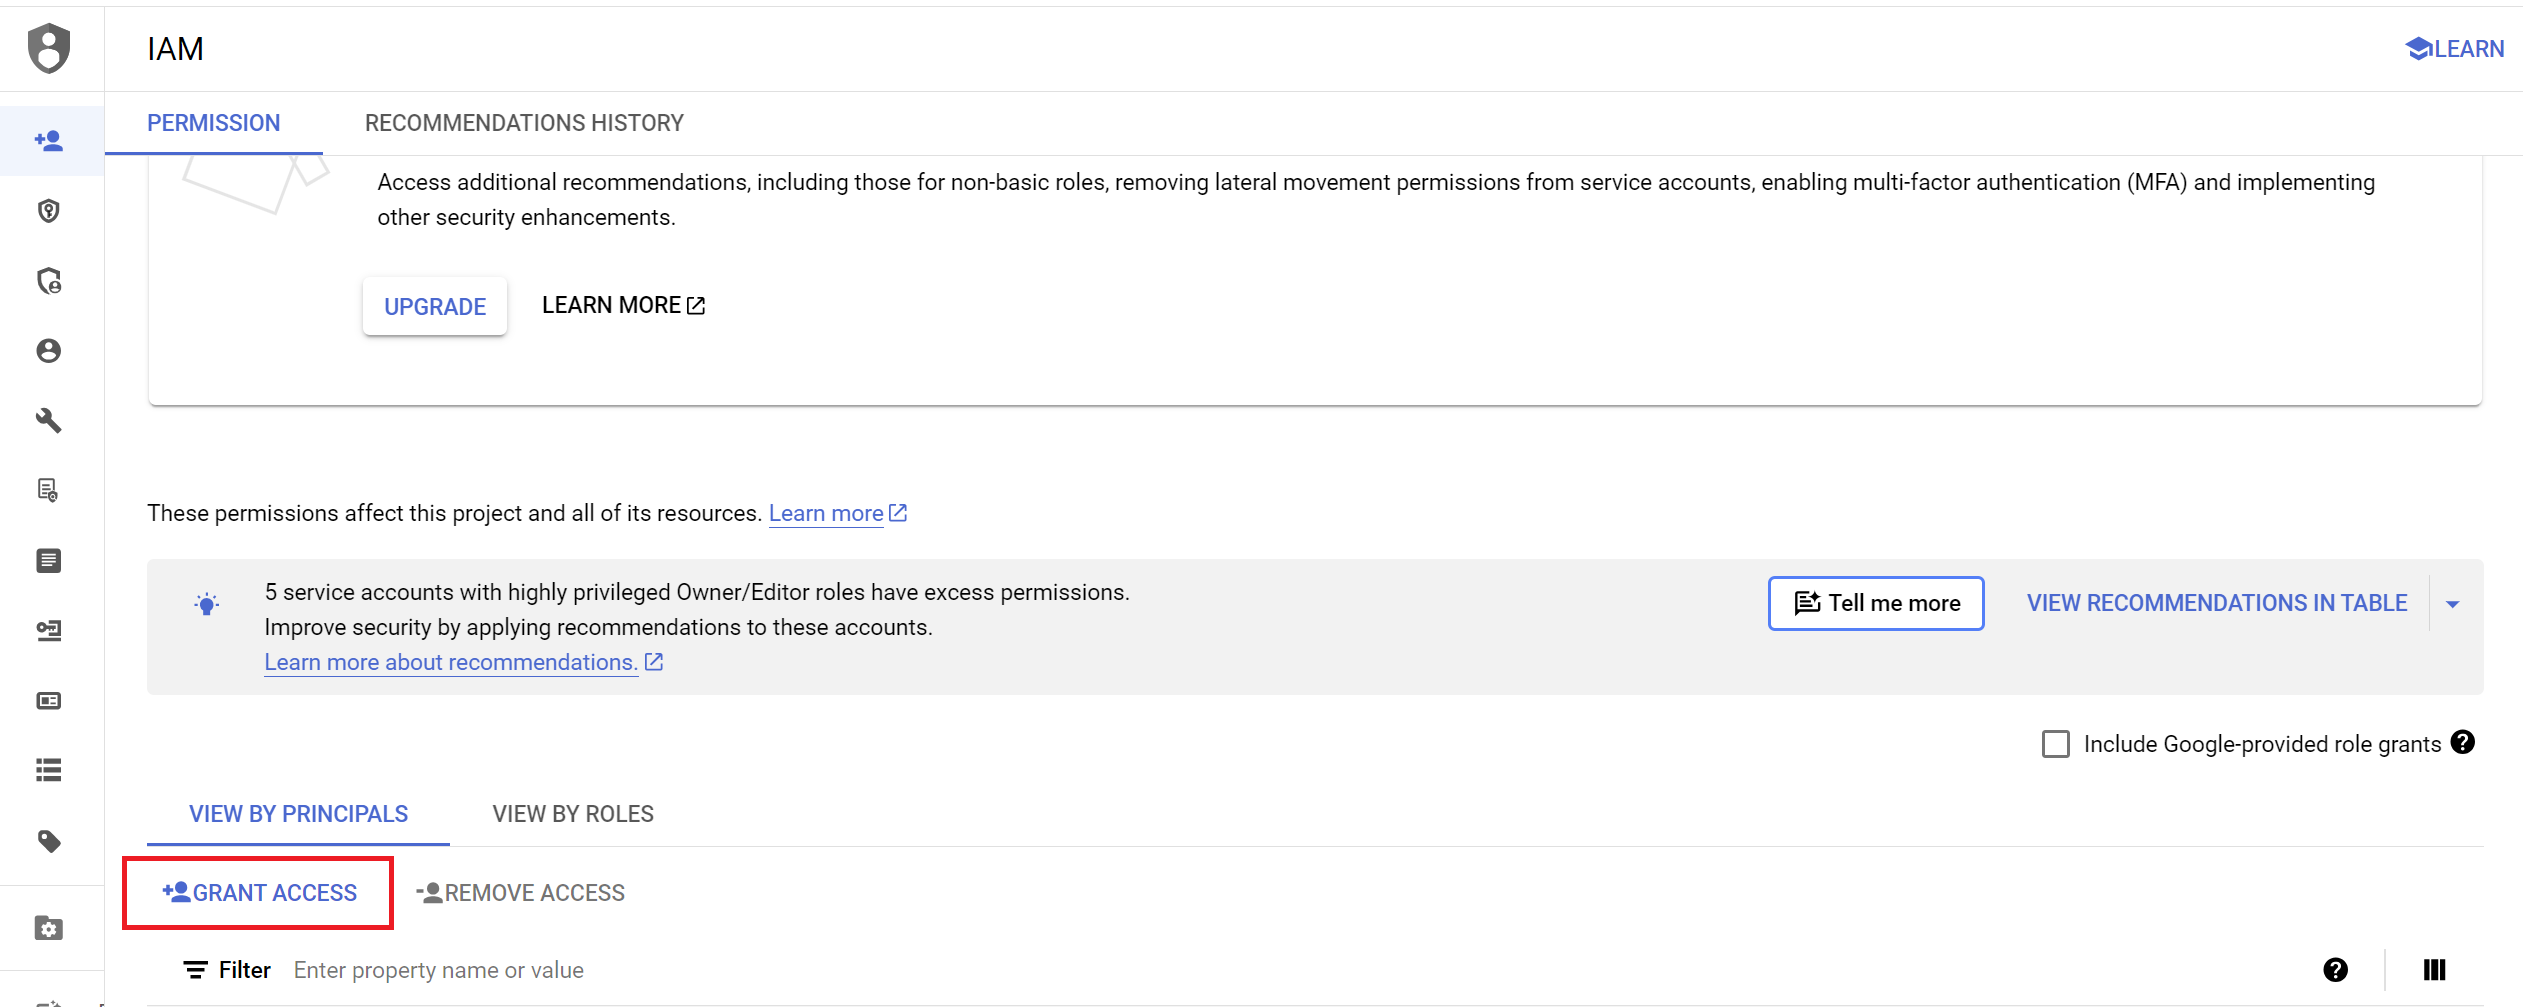
- Paste your service account email from the previous step into the
New principalsfield.

- Assign the following roles to the service account to grant it the necessary permissions:
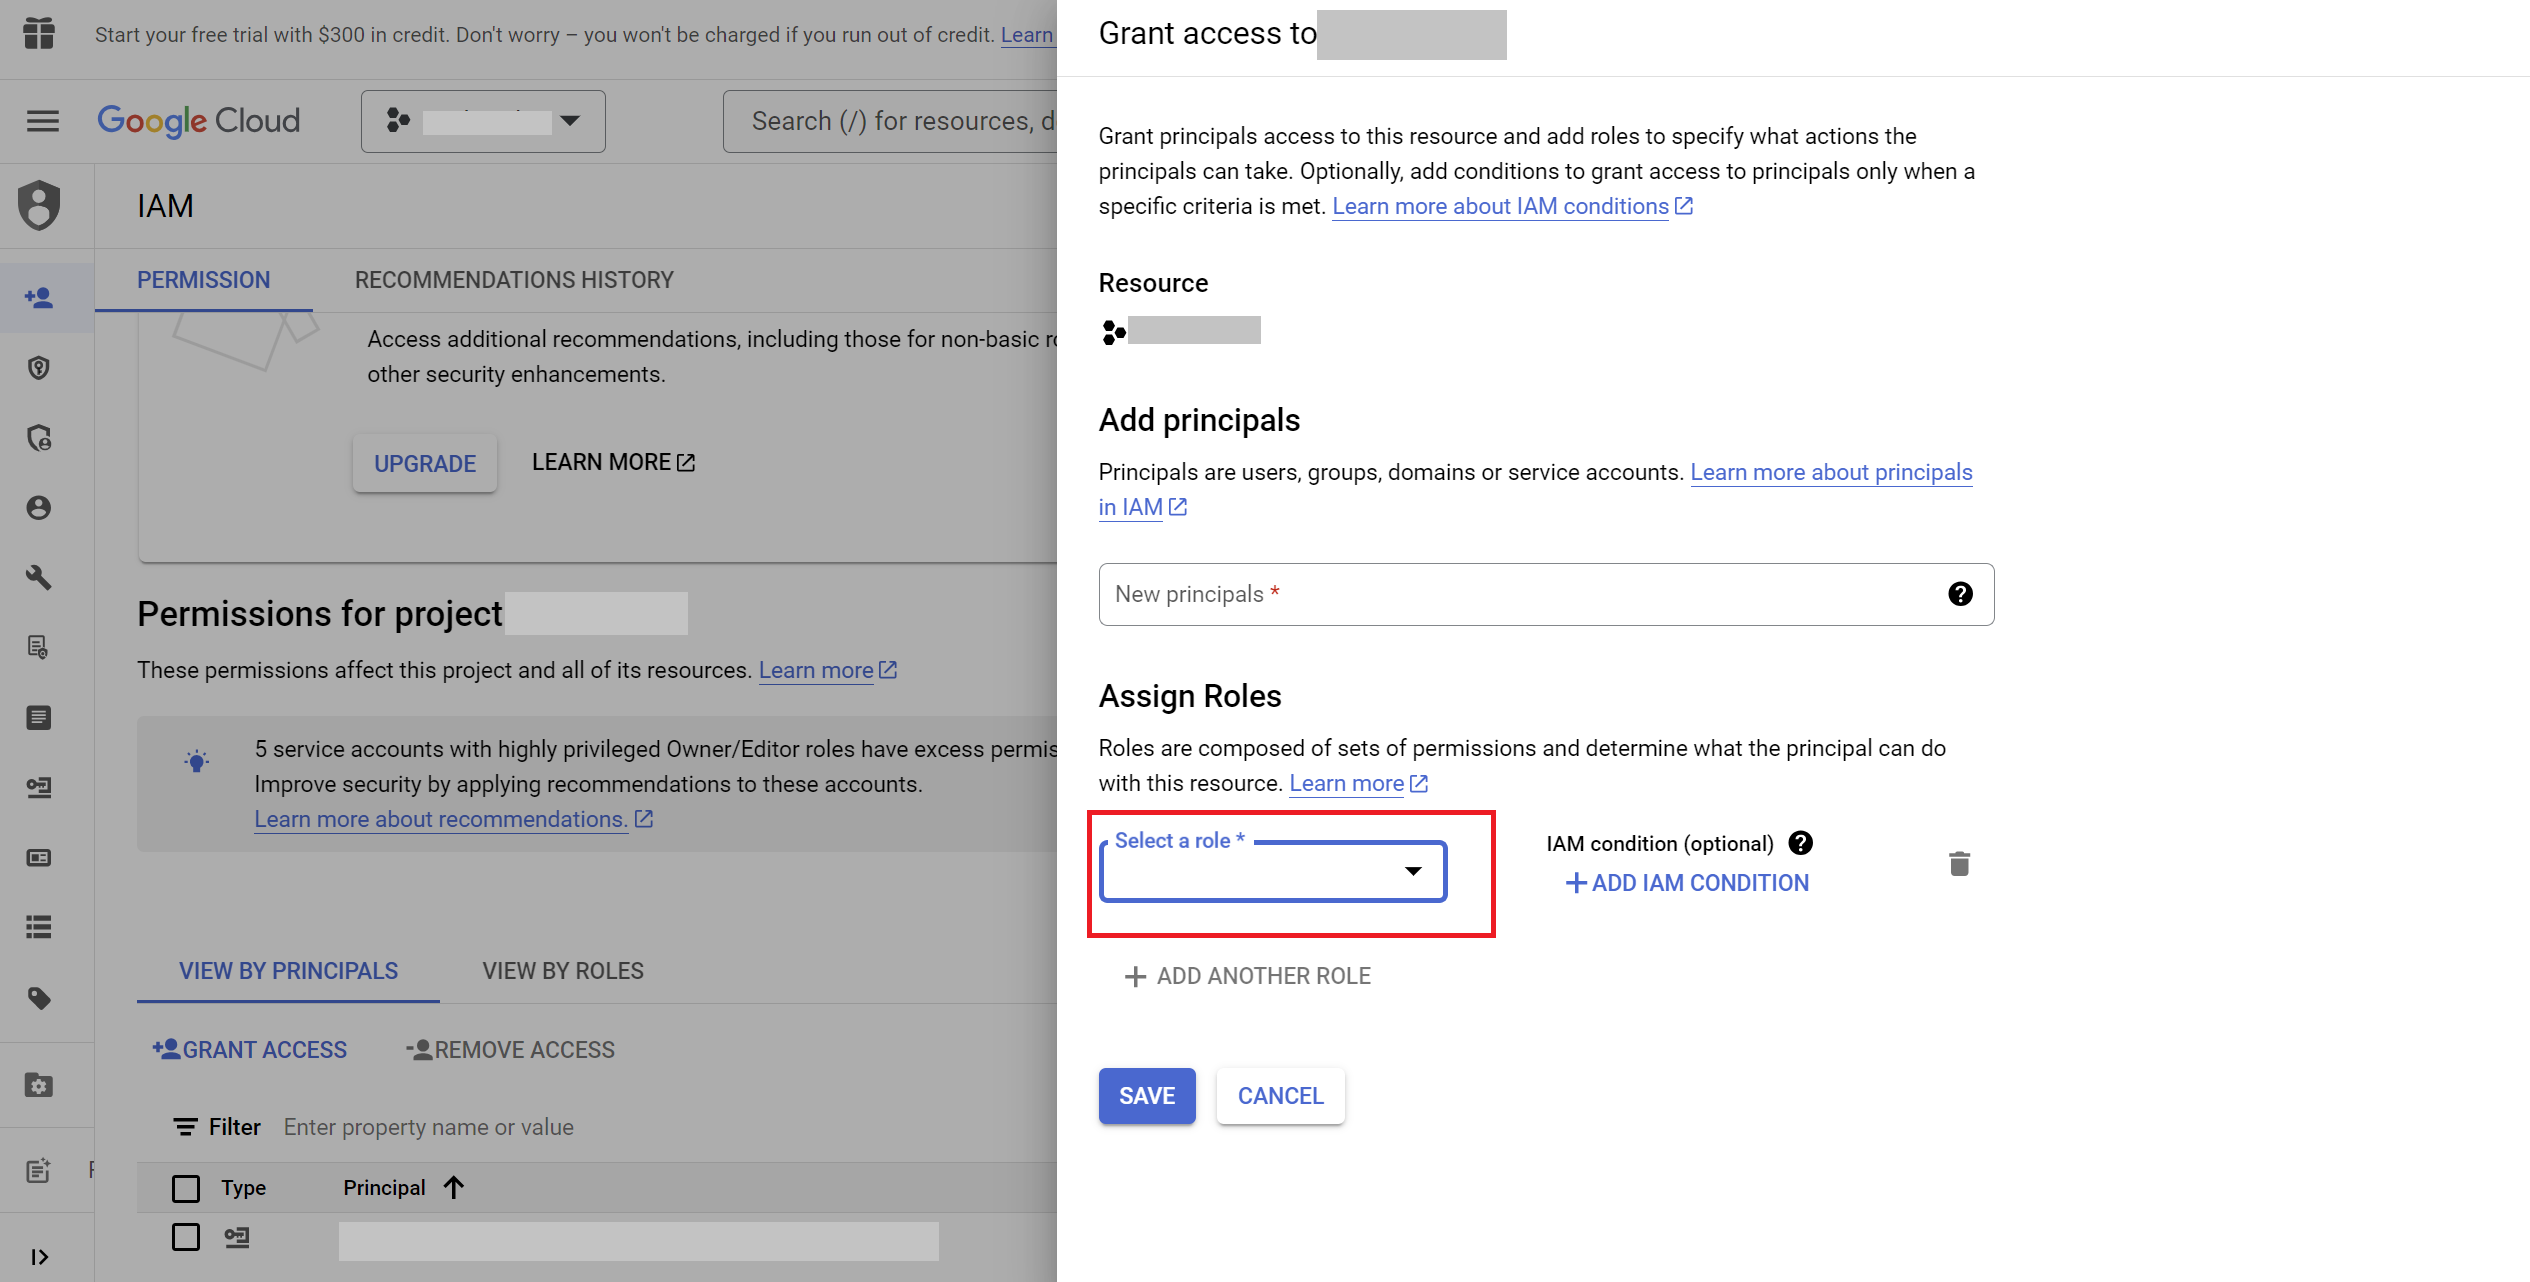
- Pub/Sub Admin:
- Resource:
google_pubsub_topic - Role:
roles/pubsub.admin
- Resource:
- Monitoring Notification Channel Admin:
- Resource:
google_monitoring_notification_channel - Role:
roles/monitoring.notificationChannelAdmin
- Resource:
- Monitoring Alert Policy Admin:
- Resource:
google_monitoring_alert_policy - Role:
roles/monitoring.alertPolicyAdmin
- Resource:
- Service Account Admin:
- Resources:
google_pubsub_topic_iam_member,google_project_iam_binding - Role:
roles/iam.serviceAccountAdmin
- Resources:
- Pub/Sub Admin:
- Resource:
google_pubsub_subscription - Role:
roles/pubsub.admin
- Resource:
- Monitoring Uptime Check Admin:
- Resource:
google_monitoring_uptime_check_config - Role:
roles/monitoring.uptimeCheckAdmin
- Resource:
- Logging Admin:
- Resource:
google_logging_project_sink - Role:
roles/logging.admin
- Resource:
- Config Writer:
- Resource:
google_logging_project_sink - Role:
roles/config.writer - After adding all the roles, click
DONE.
- Resource:
Note: You can set the owner role to grant all of the permissions mentioned above to the service account in one step. However, be aware that this will also grant full access to the service account.
Step 3: Create and Download the Service Account Key
- Generate a New Key:
- In the
Service Accountspage, find the service account you created. - Click the
⋮(three vertical dots) at the end of the service account row, then clickManage keys.
- In the
- Add Key:
- Click
ADD KEY>Create new key.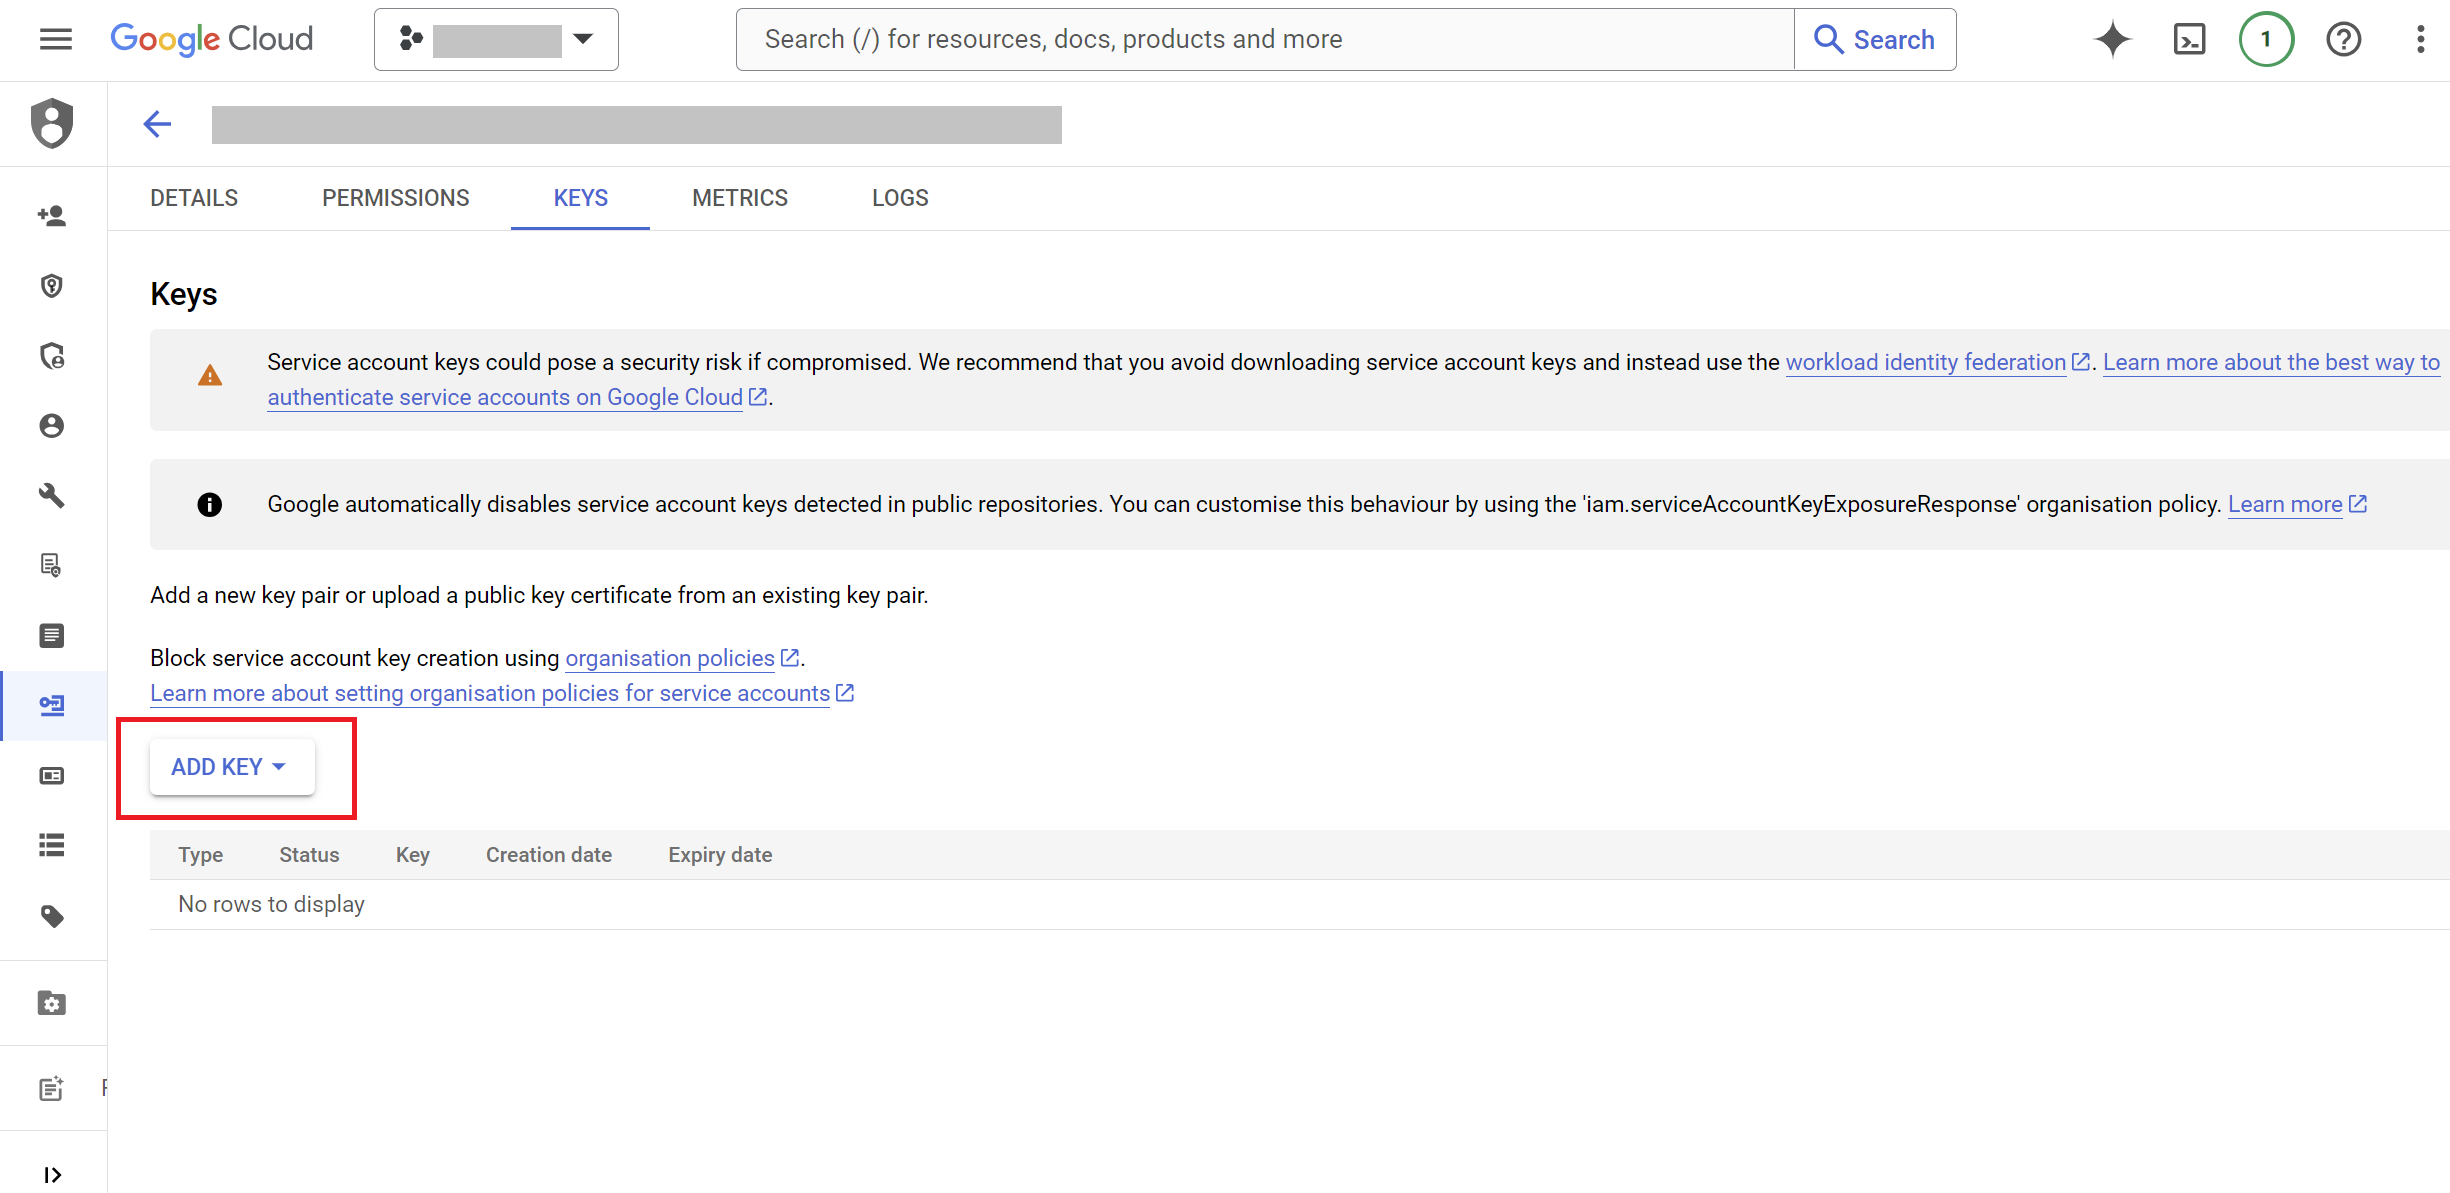
- Click
- Select Key Type:
- Choose the
JSONkey type and clickCREATE.
- Choose the
- Download Key:
- The key will automatically download to your computer. Keep this file secure, as it contains the credentials required to access the service account.
Identifying Cloud Run Services and Their Regions
To manage and monitor your Cloud Run services, you need to know the name and region of each service used for your tagging service. Follow these steps to locate your Cloud Run services and identify their corresponding names and regions.
Step 1: Navigate to the Cloud Run Console
- Open the Google Cloud Console:
- Go to the Google Cloud Console.
- Select Your Project:
- Ensure you have the correct project selected from the project selector dropdown at the top of the page.
- Access Cloud Run:
- From the navigation menu, go to
Cloud Rununder theServerlesssection.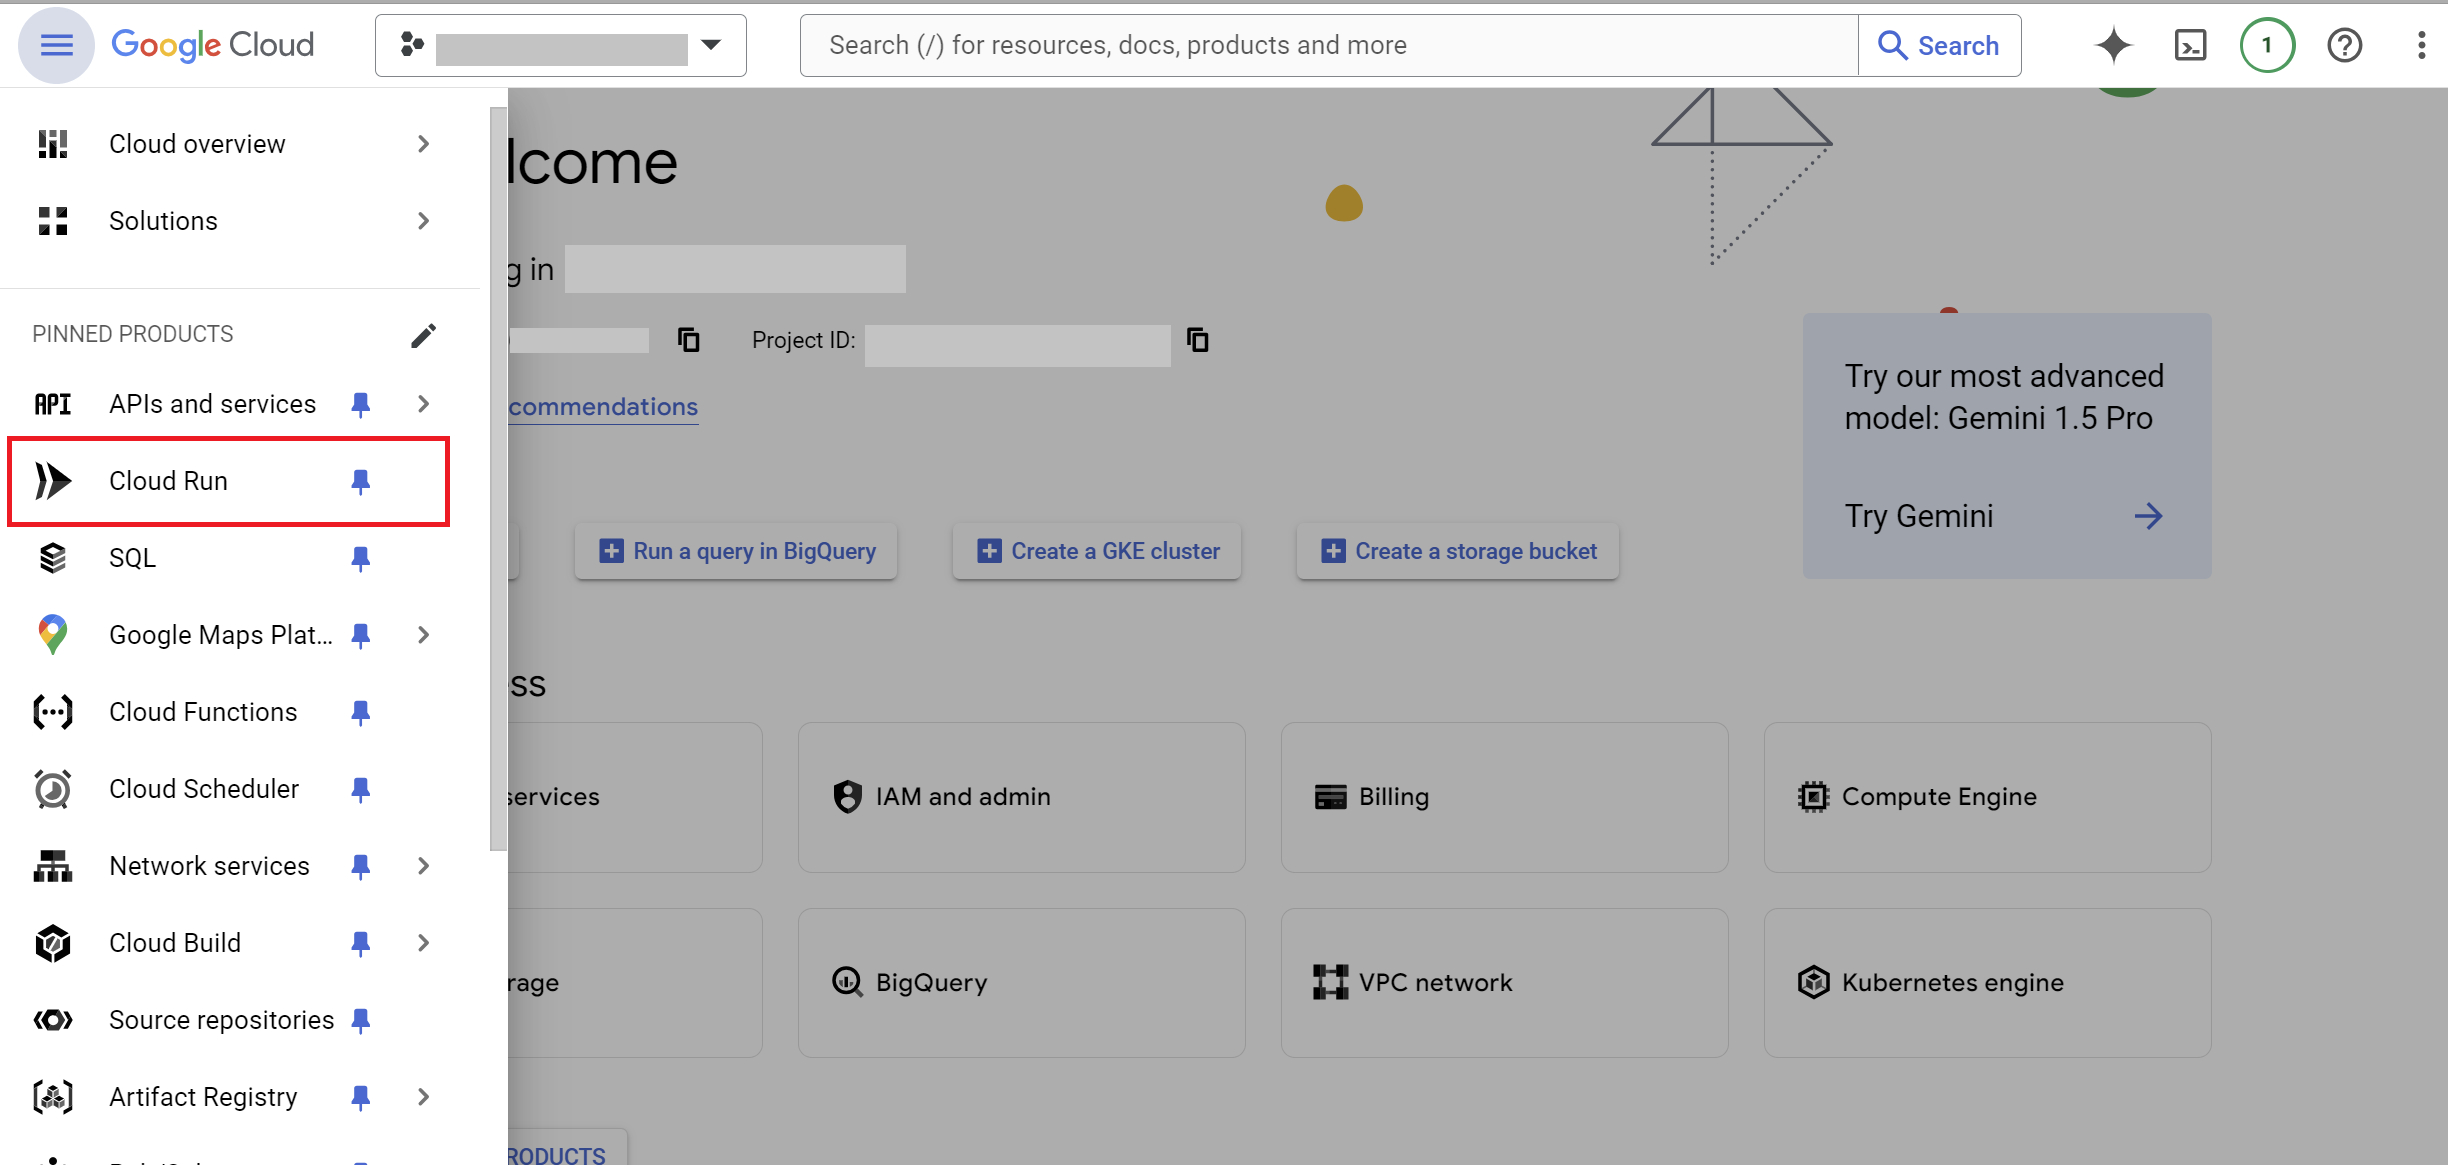
- From the navigation menu, go to
Step 2: View Cloud Run Services
- List of Services:
- On the Cloud Run page, you will see a list of all Cloud Run services deployed in your project.
- Service Details:
- Each row in the list represents a Cloud Run service. The primary details displayed include:
- Service Name: The name of the Cloud Run service.
- Region: The region where the service is deployed.
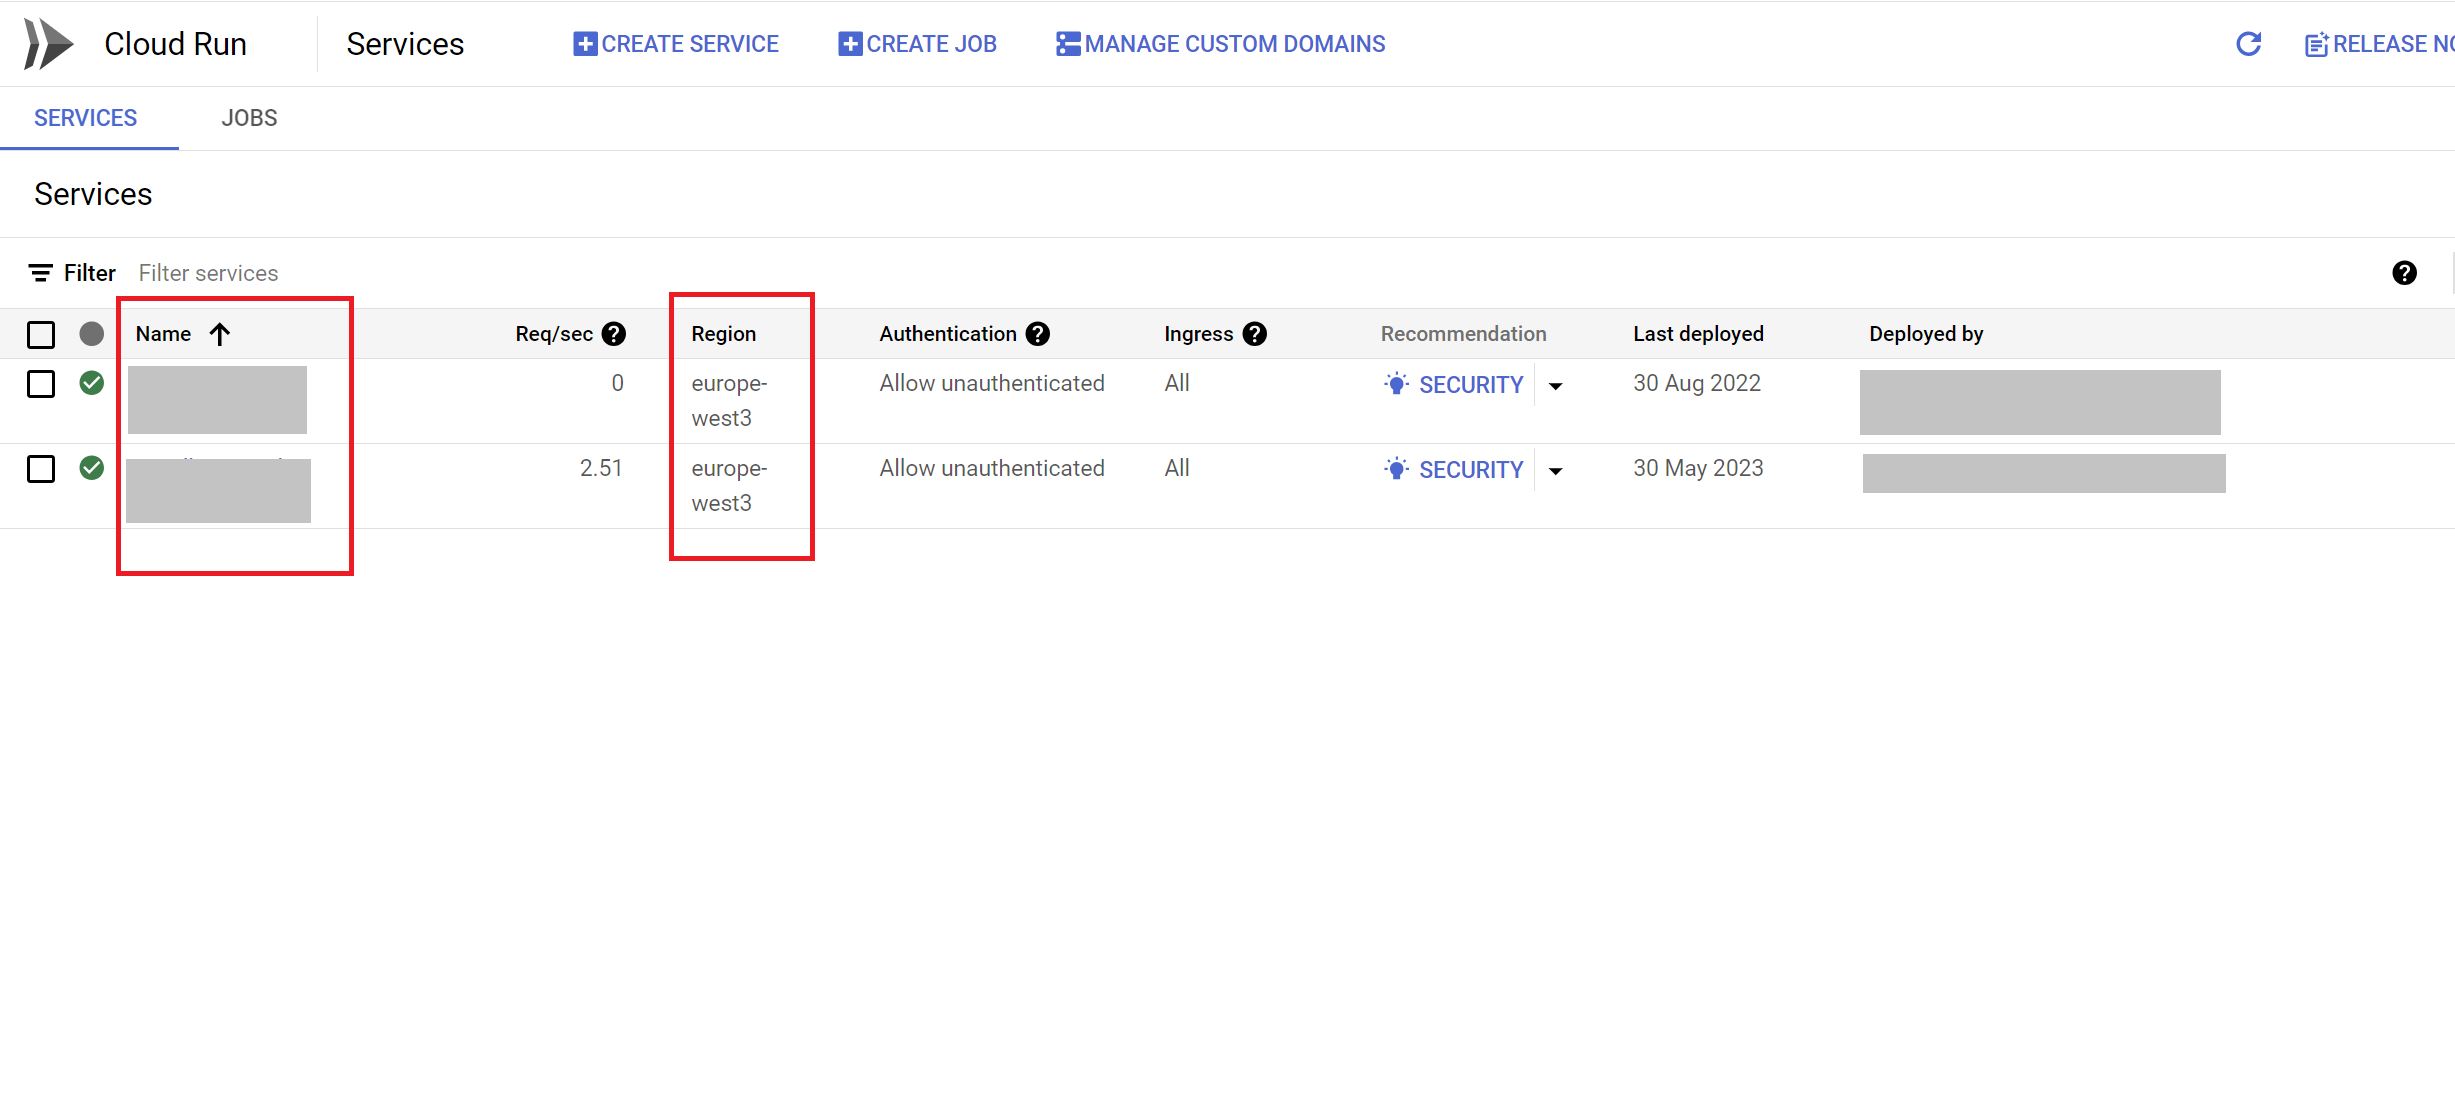
- Each row in the list represents a Cloud Run service. The primary details displayed include:
Step 3: Identify Service Name and Region
- Service Name:
- The service name is displayed in the
Servicecolumn. This is the identifier you use to manage and reference the service within your project.
- The service name is displayed in the
- Region:
- The region is displayed in the
Regioncolumn. This indicates the geographical location where the service is deployed, which is crucial for understanding latency and data residency.
- The region is displayed in the
By following these steps, you will be able to easily locate all Cloud Run services within your project and identify their names and regions needed for the implementation.
Security Measures and Implementation Safeguards
Our implementation process is built around a strong security framework that safeguards user data and blocks unauthorized access. Here's how we maintain top-level security throughout the process:
- One-Time Use of Service Account Key:
- We keep your service account key secure by using it only once. The service account key, necessary for implementation, is never stored in our databases. This means that after the initial implementation, the key is discarded. Should you need to update your setup, you will be required to upload the key again. This approach eliminates any potential vulnerabilities associated with key storage.
- Strict Separation of Front-End and Back-End Processing:
- To minimize risk, the service account key file is never handled on the front-end. Instead, when you upload the key, it is sent as a binary file via secure HTTPS requests directly to our servers. By processing the key exclusively on the back-end, we prevent any exposure of sensitive information in the front-end environment, adding an extra layer of protection against potential security breaches.
- No Credentials Stored:
- In the event of a security breach, your credentials remain safe. Since we do not store the service account key or any sensitive credentials in our system, even a successful hack would yield no access to your Google Cloud resources. This ensures that your data and accounts remain secure, regardless of external threats.
- Limited Scope of Resource Creation:
- Our implementation is highly targeted and precise. We only create the resources explicitly required for the project within your Google Cloud environment, and nothing more. This controlled and minimalistic approach ensures that there are no unnecessary permissions or resources that could be exploited, further tightening security.
See the list of resources that will be created in your GCP project
- Our implementation is highly targeted and precise. We only create the resources explicitly required for the project within your Google Cloud environment, and nothing more. This controlled and minimalistic approach ensures that there are no unnecessary permissions or resources that could be exploited, further tightening security.
By following these strict security practices, we secure your implementation, reducing risk and protecting your Google Cloud environment.
Next Steps
Enable Notification Methods
Set up your preferred notification methods (e.g., email or Slack) to receive alerts when an event occurs.
You can enable the notifications from Tag Monitor Configuration Page on
our portal.